Daily Juice: Guava Blush

0
image
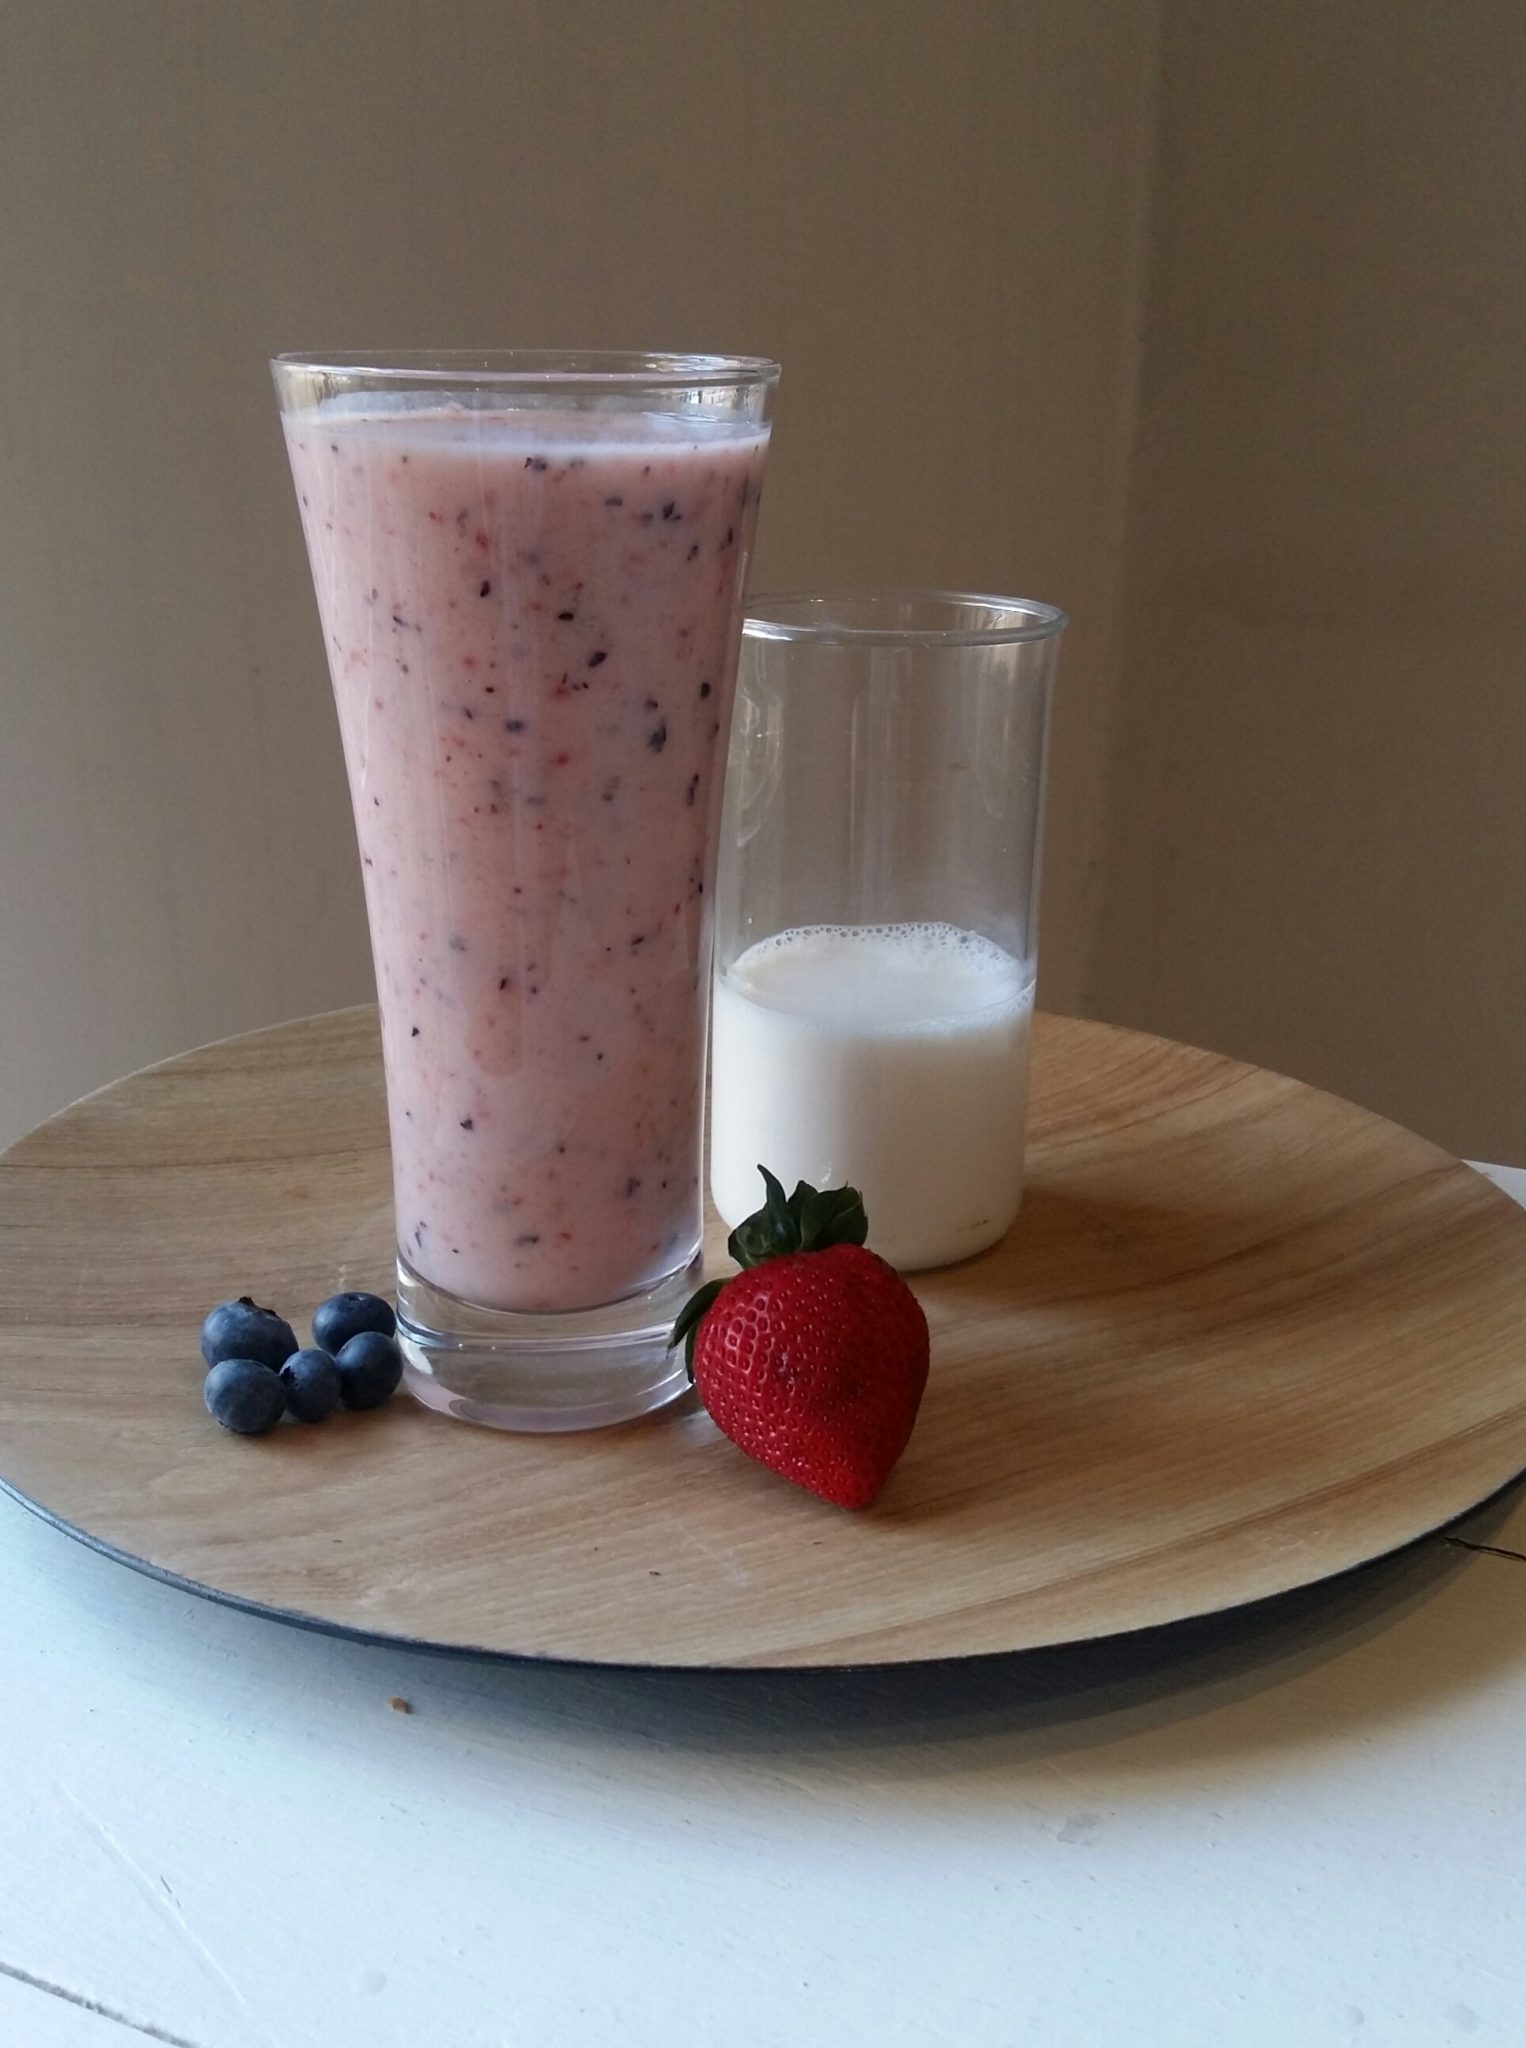
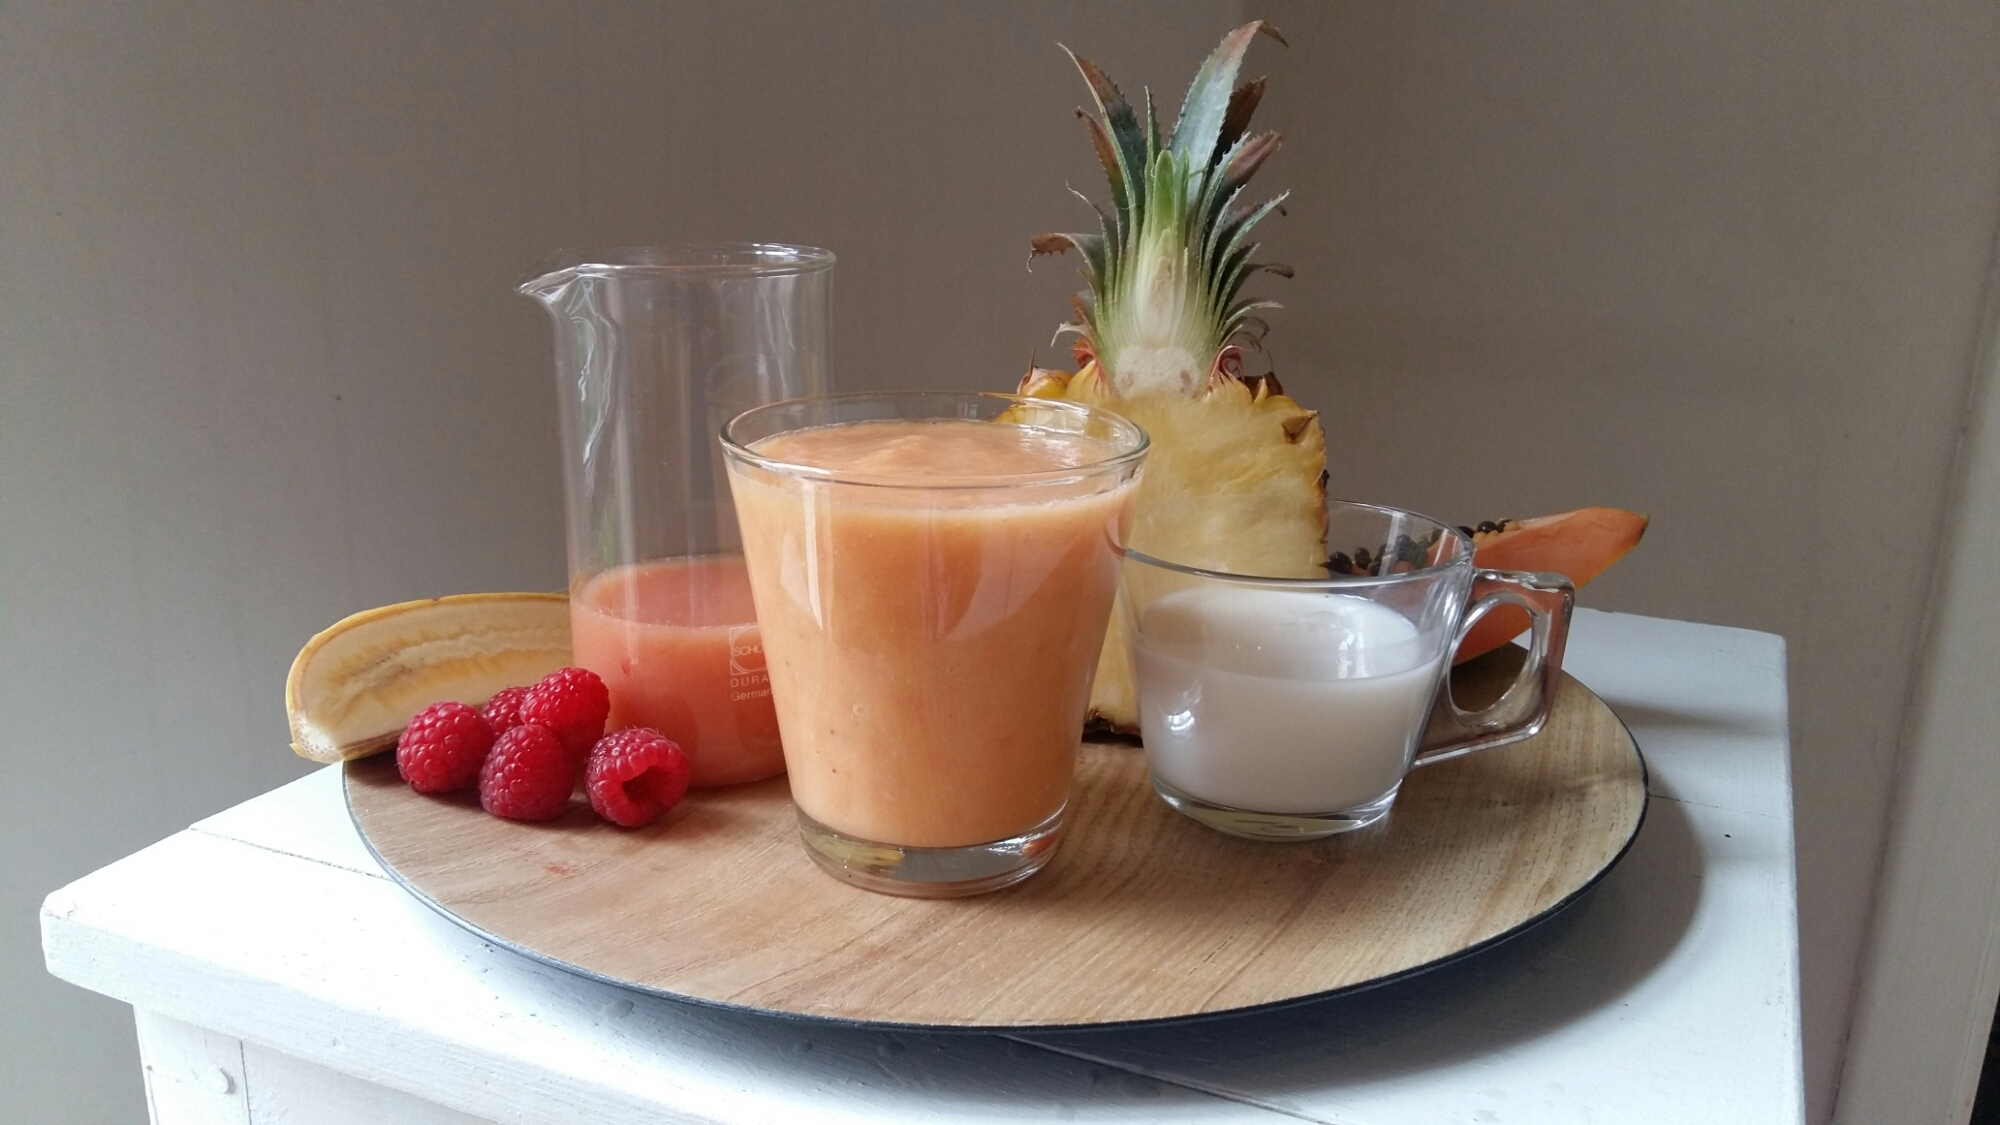
Guava Blush: pineapple, papaya, raspberry, banana, almond milk and guava juice smoothie

People of a certain age in South Africa will remember the thrill of lurid pink guava juice, first sold during the 70’s in squashable plastic bottles. We’ve come a long way since! The best guava juice available today is as close to nature as they come – no colourants, additives or preservatives added. It’s very subtle and lightly fragrant and blends easily with other fruit in cocktails without becoming overpowering.

Sir Fruit sells the most delectable, pure and smooth guava juice with a very pretty rosy pink blush of colour. No grittiness, not over-sweet, no artificial colourants, just…essence of guava.

It also makes the most amazing addition to juice combos and smoothies, so despite my general misgivings about eating the fruit itself, this post is devoted to extolling the loveliness of guavas in juiced form. (If you can’t find Sir Fruit guava juice, substitute with any other juice you like. No-one is going to die. It’s only juice.)

Guavas are believed to have originated in Mexico, although no-one is really certain. They are native to Mexico, Central America and northern South America and grow abundantly well in tropical and sub-tropical areas.

Guavas have a great many health-giving properties and are considered a good food choice for diabetics since it’s very high in fibre and relatively low in sugar. Guavas also aid in lowering blood pressure and cholestrol, and are very beneficial in treating tummy upsets, dysentry, gastroentiritis, constipation and stomach ulcers. Freshly extracted, raw guava juice applied topically is said to aid wound healing and repair. With an incredibly high anti-oxidant content, a vitamin C level 5 x that of oranges, sufficient vitamin A to improve eyesight and enough copper to help balance the thyroid gland, it’s clear that guavas should be one of our primary choices when it comes to juicing.

Since guavas are not prone to disease, they’re also one of the least sprayed crops, which make them ideal fruit for children or anyone keen on organic living.

Pineapple juice cools the blood and clears the skin. As a really good anti-inflammatory in general, it’s very beneficial to the digestive system; a useful aid for premenstrual difficulties like painful periods, and also improves the complexion. Use liberally in cases of fever, inflammation and upset digestion.

Guava Blush

Serves 1

Ingredients:

generous handful of raspberries (use strawberries if you like)

about 2 cupfuls of chopped papaya

1 banana

2 thick slices of pineapple

1/2 cup (125 ml) almond milk

1/2 cup (125 ml) Sir Fruit guava juice

Method:

  1. Blend the fruit until very smooth. Pour in the almond milk and guava juice, stir and enjoy!

Daily Juice – Healthy Home-made Drinks to Soothe, Nourish and Delight

0

Juices and smoothies are an easy and delicious way to get a whole lot of nourishment into your body real fast. While the juice and smoothie business has become a thriving industry worldwide, it is actually easier, cheaper and better to make your own at home. Just use the freshest and best ingredients you can find!

You don’t need fancy equipment, either. A stick blender, liquidiser or basic centrifugal juicer will do perfectly fine in most cases. (Depending of course what you’re making: smoothies, or raw juices, or a blend of the two.) Centrifugal juicers remove most of the fibrous pulp from fruits and vegetables, resulting in a thinner and smoother drink than the currently popular cold press juicers. Cold press juices are all the rage at the moment, and really expensive to buy at trendy juice bars, but it’s not the be all and end all of juicing. I would love to be able to afford a cold press juicer, but for the time being, my trusty Breville serves me very well.

What we’re aiming for is liquid food. Easily digested, palatable, nourishing and affordable!

When it comes to appliances, my advice would be to buy the best, sturdiest machines you can afford. The fewer moving parts and shiny bling-bling, the better. My appliances of choice are Kitchen Aid and Breville. Neither are what you’d call cheap, but trust me, they’ll last much longer than a cost-saving device will.

Much is made of the health-giving properties of juices, other than the fact that they are just so sheer damn delicious. Pretty much any fruit, herb and vegetable with a reasonable water content can be juiced or liquidised – and that includes avocados, whizzed to a smooth puree in a blender or fruit processor and stirred into extracted juice blends. I have even on occasion added potato peels, prized for the high potassium content – just make sure your potatoes are organic. And if the healthy aspect of juicing all sounds a little too holier than thou for you, just add a shot of vodka, white rum or whatever spirit you like to even things out!

I don’t have a liquidiser, but my Kitchen Aid food processor comes in handy when my daughter wants smoothies. I’ve found the best method is to puree the fruit first and then stir in whatever blend of liquids, milks, ice cream, juices etc afterwards. Sir Fruit do an incredible range of juices that are just so much fun to experiment with, so I can certainly recommend them!

Experiment to your heart’s content. There is a juice combination for everyone. Some like it sweet and creamy, some like it salty and peppy, some like it a little tart. My standard, go-to daily juice mix consists of beetroot, celery, Granny Smith apples, carrots and parsley with half a peeled lemon and sometimes a little nugget of fresh gingerroot. Or else, a pure, straight-up Granny Smith juice, with half a lemon, a smidgen of turmeric powder and a glug of extra virgin olive oil stirred in at the end. Turmeric in juices are terribly trendy at the moment, but I’ve been adding it to my juice cocktails for more than 20 years! Turmeric has great cooling, anti-inflammatory properties and is a real tummy settler.

My mom  introduced us to raw juices at a very early age, and my inherited dog-eared copy of John B Lust’s Raw Juice Therapy is still my juice bible. I still haven’t found any other book to equal it. You can order it online from Amazon: John B. Lust Raw Juice Therapy or scout your local bookshops for interesting and informative books – there are many!

Over the next few weeks, I’ll be sharing some juicing tips, websites, books, nutrition tips and juice recipes with you, and I would love to hear from readers who are considering juicing or who are already juicing. Tell me what you love about it!

We’re kicking off with a simple, palatable and drop-dead easy berry-almond milk smoothie. I made this for my daughter for breakfast yesterday, and she loved it.

Berry Almond Smoothie

Serves 1

a handful each of strawberries, raspberries and blueberries

1 banana

1 cup (250 ml) almond milk (use any other nut milk or even dairy if you want)

3/4 cup (180 ml) probiotic yoghurt (again, use any yoghurt you like)

1/2 cup (125 ml) orange juice

Method:

  1. Blend the berries and banana until smooth. Add the milk, yoghurt and orange juice and blend until thoroughly mixed
Berry-almond smoothie

How to Make Luscious Lemony Sour Cream Cheesecake

2
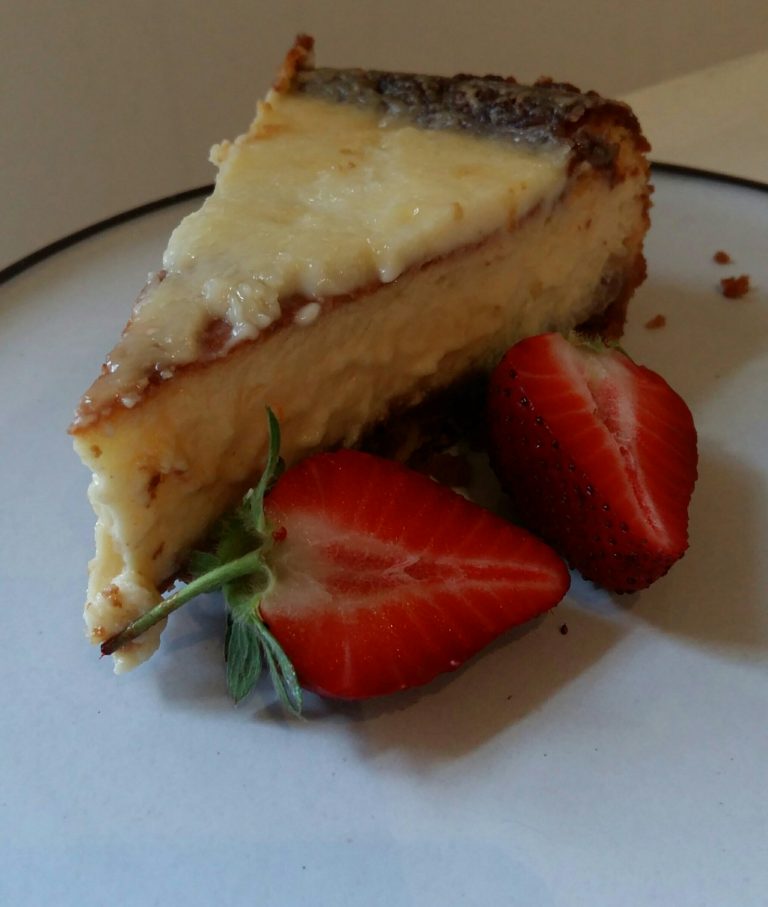
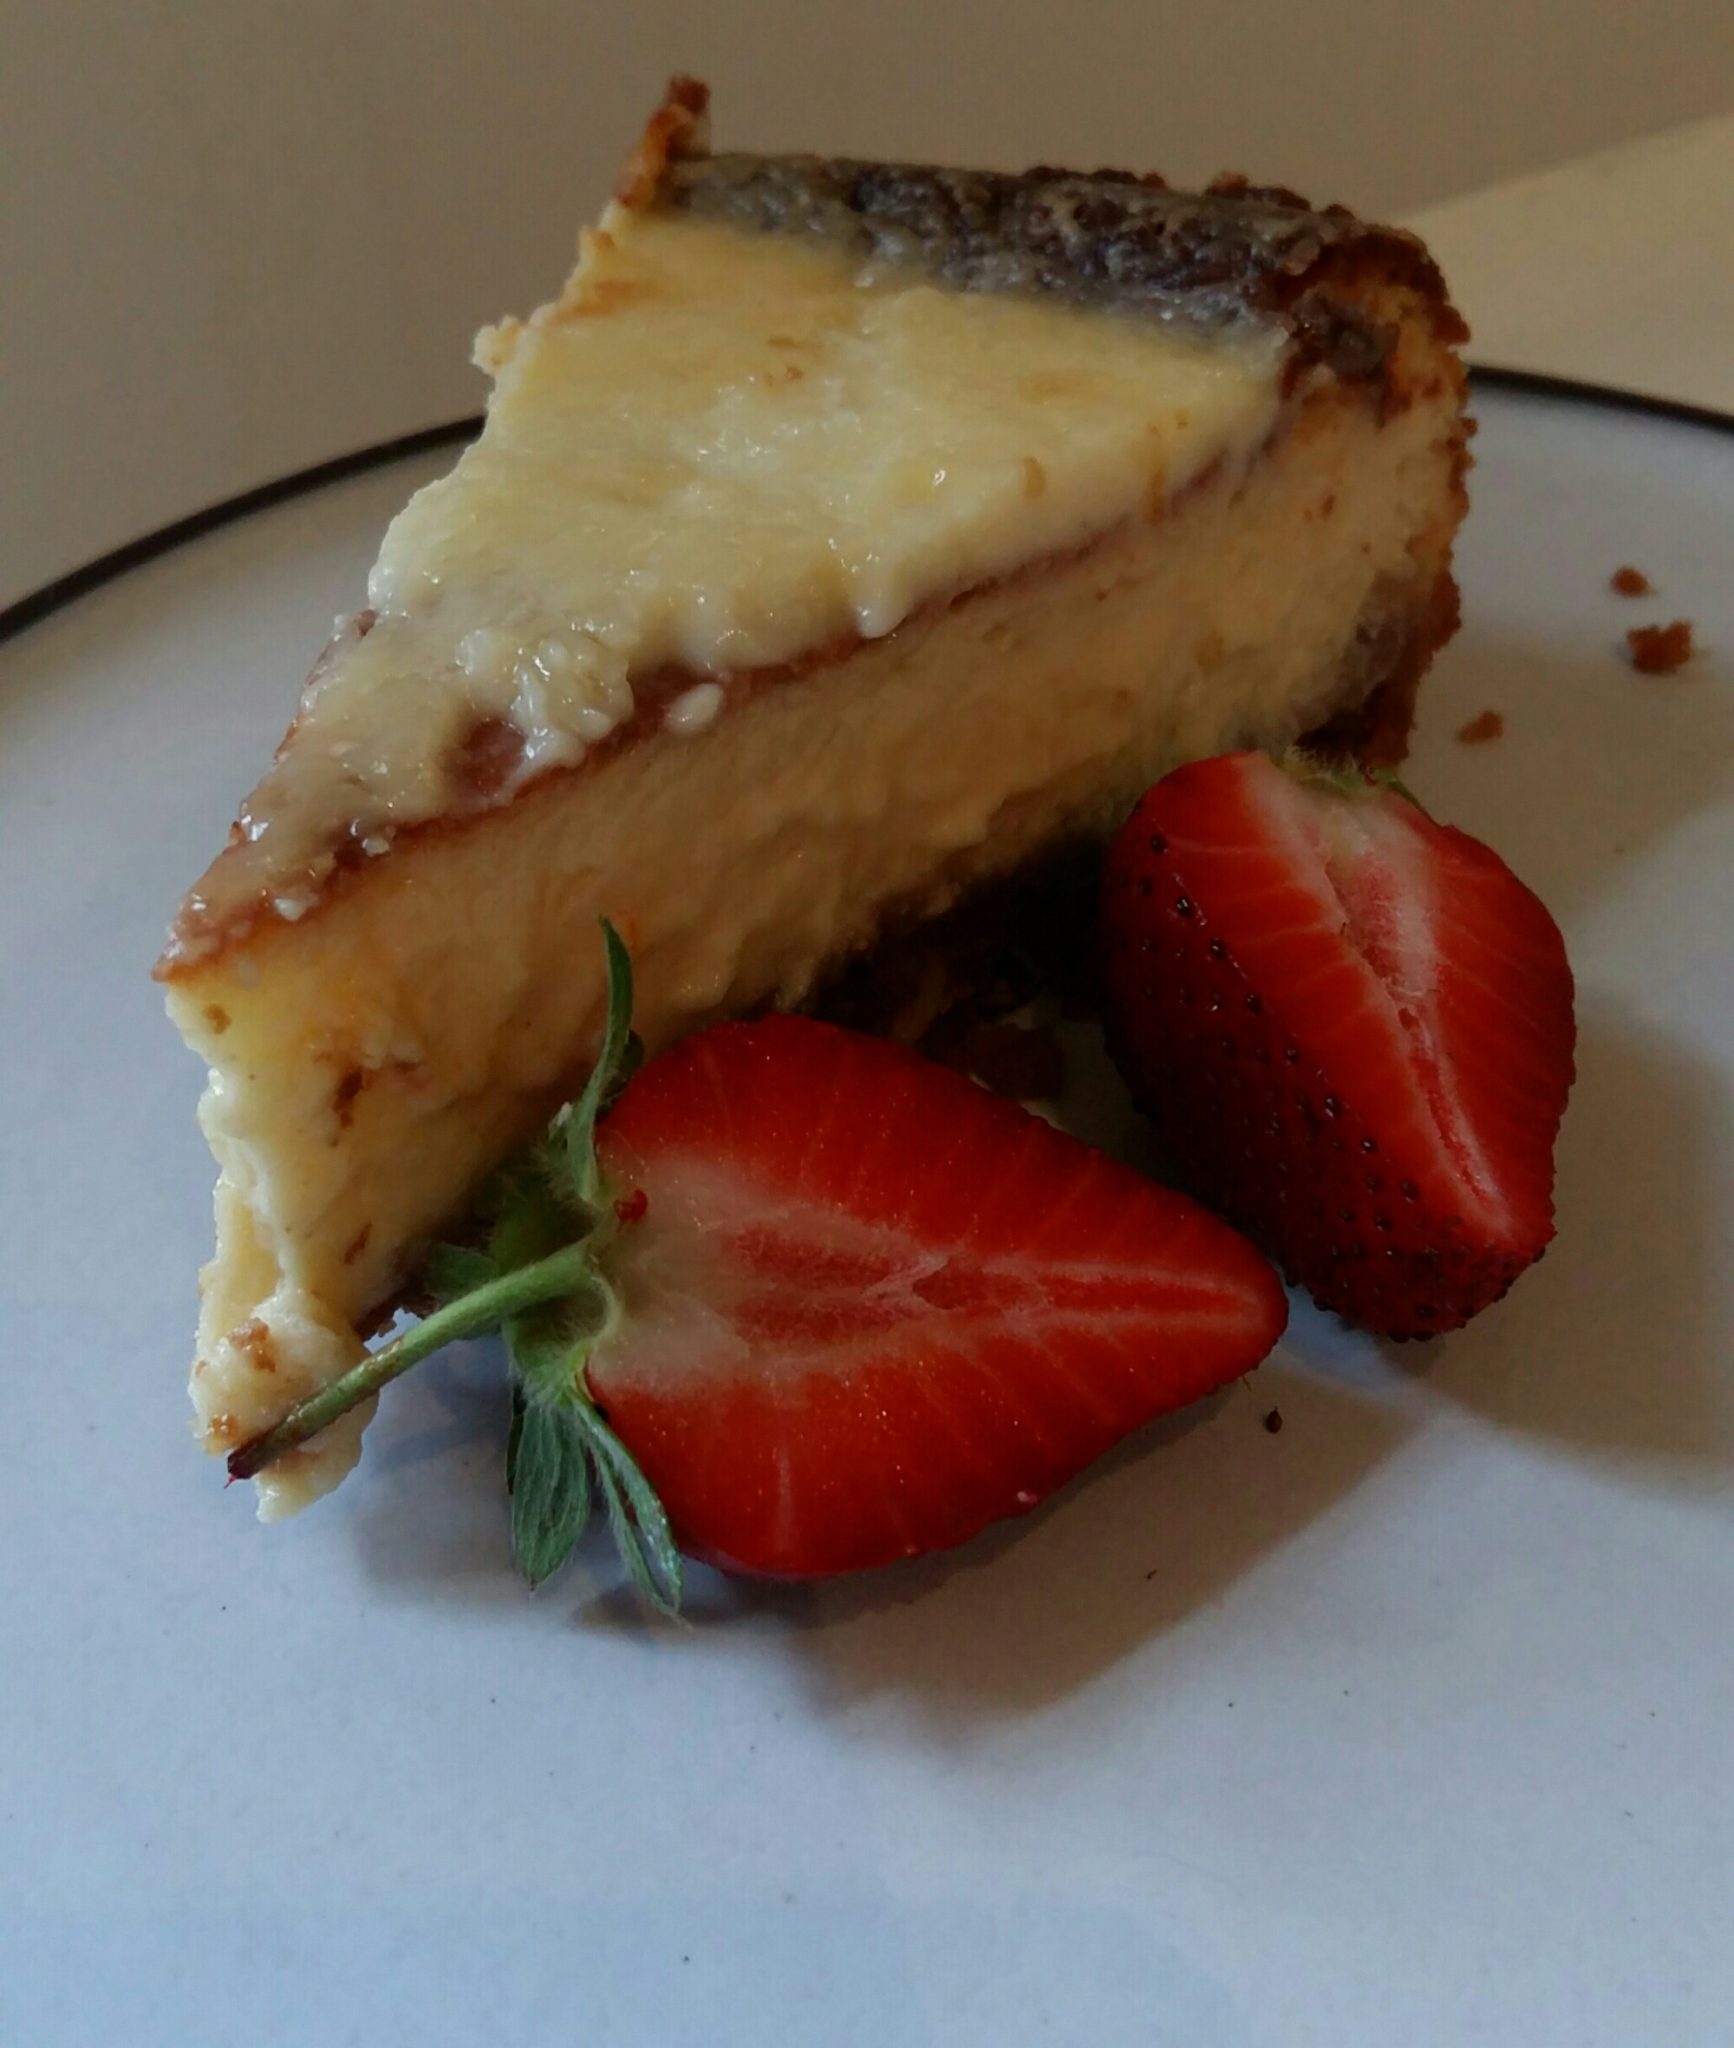
Luscious lemony sour cream cheesecake

The addition of lemon and orange zest, sour cream and lemon juice turn this classic New York cheesecake recipe into something altogether lighter and less cloying than the standard. You can also use lime zest and juice instead of lemon.

I’ve tweaked the crust by adding small amounts of cinnamon and ground nutmeg, plus 1/3 cup of coarsely chopped nuts. The sour cream topping gets poured over at the end, and the cake is then baked for a final 20 minutes.

The original recipe stated 1 cup of castor sugar for the filling but I really found that too sweet to my taste, so you can use either 1 cup (250 ml) or 3/4 cup (180 ml).

Make it the day before you plan to serve it, as it really turns out best after a good, long chill in the refrigerator.

Adapted from a recipe in Australian Women’s Weekly ‘Cheesecakes’ recipe book, published by ACP Books.

New York sour cream cheesecake with orange and lemon zest

LUSCIOUS LEMONY SOUR CREAM CHEESECAKE

Serves 12

Crust: 

250g Tennis biscuits

1/2 t (2.5 ml) cinnamon

1/4 t (1 ml) ground nutmeg

1/3 cup coarsely chopped mixed nuts or plain hazelnuts

125 ml butter, melted

Filling:

750 g low fat cream cheese

2 t (10 ml) finely grated orange zest

2 t (10 ml) finely grated lemon zest

1 cup (220 g) castor sugar (I only used 3/4 cup)

3 large eggs

3/4 cup (180 ml) sour cream

1/4 cup (60 ml) lemon juice

Sour Cream Topping:

1 cup (250 ml) sour cream

2 T (30 ml) castor sugar

2 t (10 ml) lemon juice

Method:

  1. Preheat the oven to 180 C/160 C if a fan-driven oven. Make the crust by processing the Tennis biscuits with the spices until fine. Stir in the melted butter and nuts until very well blended. Press into the bottom of a 24cm springform cake tin that you previously lined with baking parchment. Place the tin in the fridge for 30 minutes while you prepare the filling.
  2. Make the filling by beating the cream cheese, citrus zest, sugar and eggs until smooth. Mix the sour cream and juice and beat into the cream cheese.
  3. Pour filling onto the crust and place cake tin on a baking tray. Put in the middle of the oven and bake for 1 hour 15 minutes until just set. Remove from oven without turning off the heat, and let stand for 15 minutes.
  4. Make the sour cream topping by whisking together the sour cream, sugar and lemon juice. Pour over the cheesecake and return to the oven for another 20 minutes. When the baking time is expired, turn the oven off and leave the cake inside to cool down with the door slightly ajar.
  5. Let cheesecake chill overnight before serving.
Lemony sour cream cheesecake

Moroccan Merguez Sausage Bake with Potato, Tomato and Sweet Peppers

2

This is the ideal recipe if you have crowd to feed and want to be in and out of the kitchen as quickly as possible. Minimum effort, maximum flavour. Perfect weekend food!

While not a Moroccan recipe as such, I generally use spicy Moroccan merguez sausages for this easy tray bake. The sausages release their spicy, savoury juices while cooking, subtly flavouring the layers of vegetables underneath. The aromas that fill the kitchen will have everyone poking their heads around the door, sniffing appreciatively!

Feel free to use any sausages that you fancy, and turn the seasonings up or down to your own liking. Some days I add more spices, some days I add more fresh herbs. Tucking in some chicken portions and adding a can of chickpeas is also a mighty fine idea! It’s equally good served hot or cold, and a dollop of tzatziki and some warm toasted pitas alongside are all you need.

The merguez sausages are made by Salvin Hirschfield, who trades as Son of a Butcher at Cape Town’s Oranjezicht City Farm Market on Saturdays. He offers a wide variety of tasty home-made sausages, such as Greek lamb and feta, Italian salsiccia with fennel, wild boar, proper English pork bangers, venison, boerewors, chorizo and especially for Christmas, a new ‘turducken’ style with turkey, duck and chicken. He also sells top quality free-range beef and lamb, pork, duck and chicken and a selection of venison in season. Best of all, he delivers! Order directly from him by email salvin@meatzone.co.za or contact him on 083 4436411 and 021 674 1841. Orders over R750 are delivered free to the city bowl, Atlantic Seaboard and Durbanville, otherwise a fee of R50 is added.

The tomatoes release a fair amount of liquid as they cook, but if you’re nervous that the potatoes might scorch while baking, by all means add 1/2 a cup of stock, beer, wine or gravy. Remember to season each layer well.

Serves 6-8 amply

Ingredients:

8 merguez sausages

6-8 large potatoes, peeled and sliced

1 large sweet red pepper, chopped

handful each of fresh coriander & Italian parsley, roughly chopped

2-3 garlic cloves, thinly sliced

5 bay leaves

500g cherry plum tomatoes, halved

2 wheels feta cheese, roughly crumbled

2 medium red onions, sliced into rings

Optional: 1/2 cup stock, wine, beer or gravy

olive oil, dried mint, smoked paprika and cumin to taste

Salt and pepper

Extra virgin olive oil

Tzatziki and toasted pitta bread, to serve

Method:

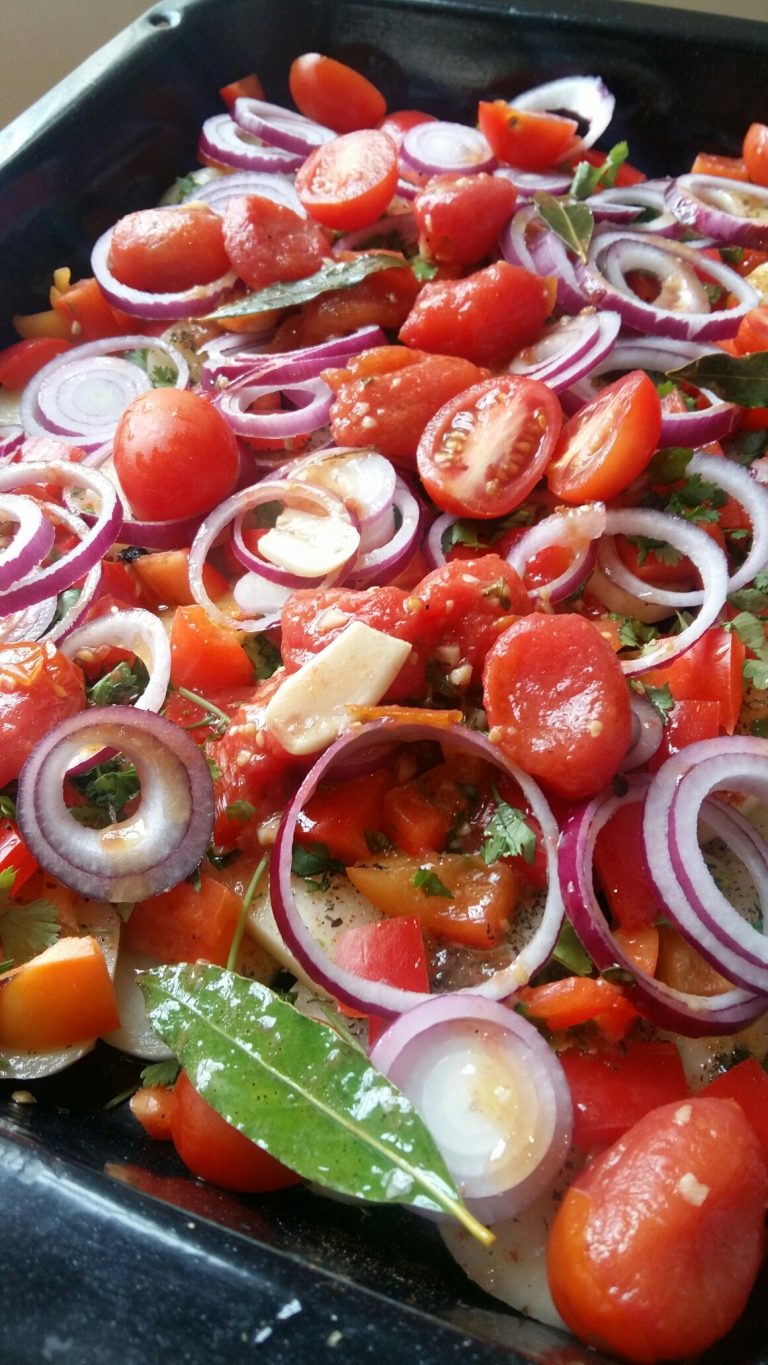
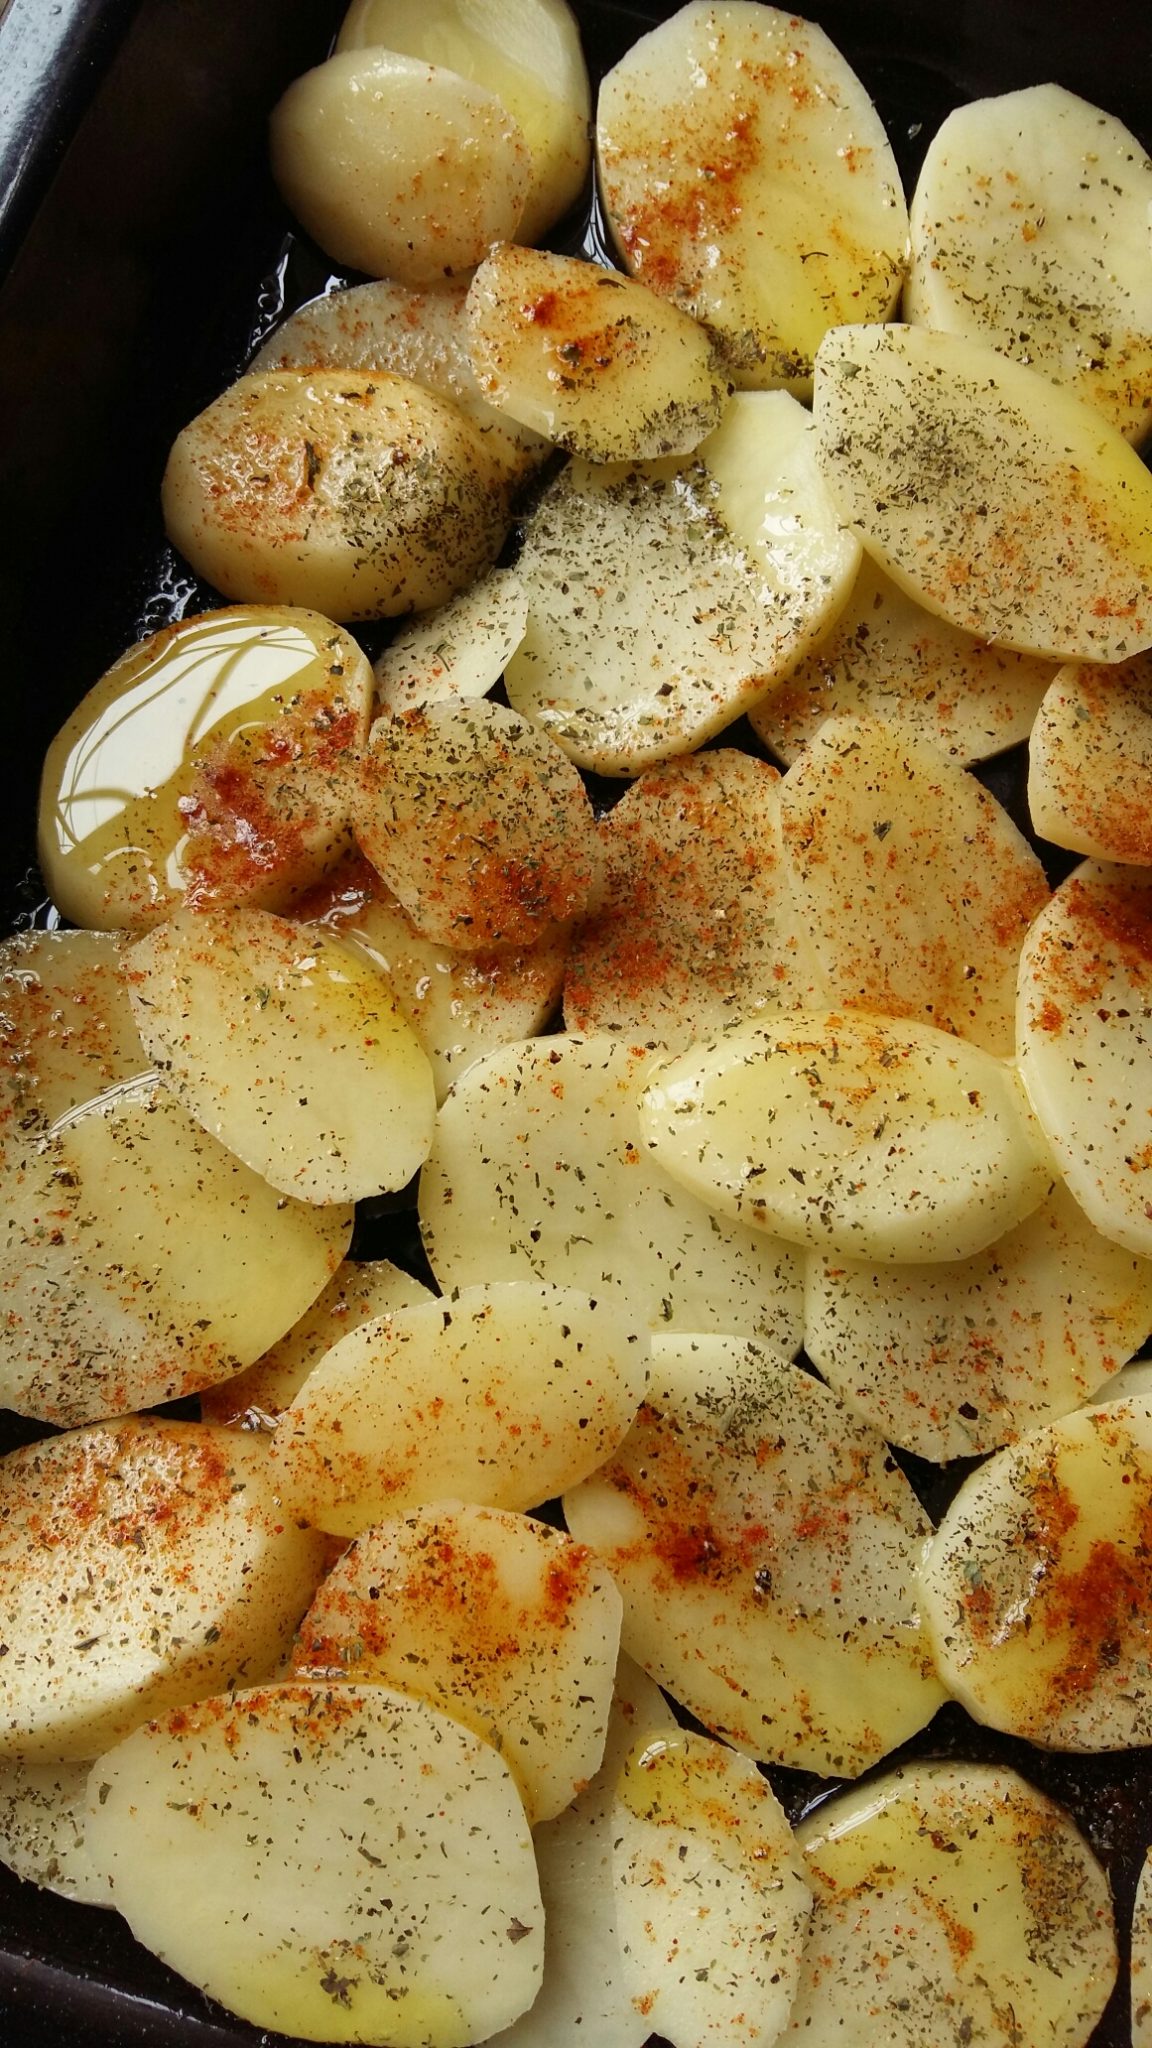
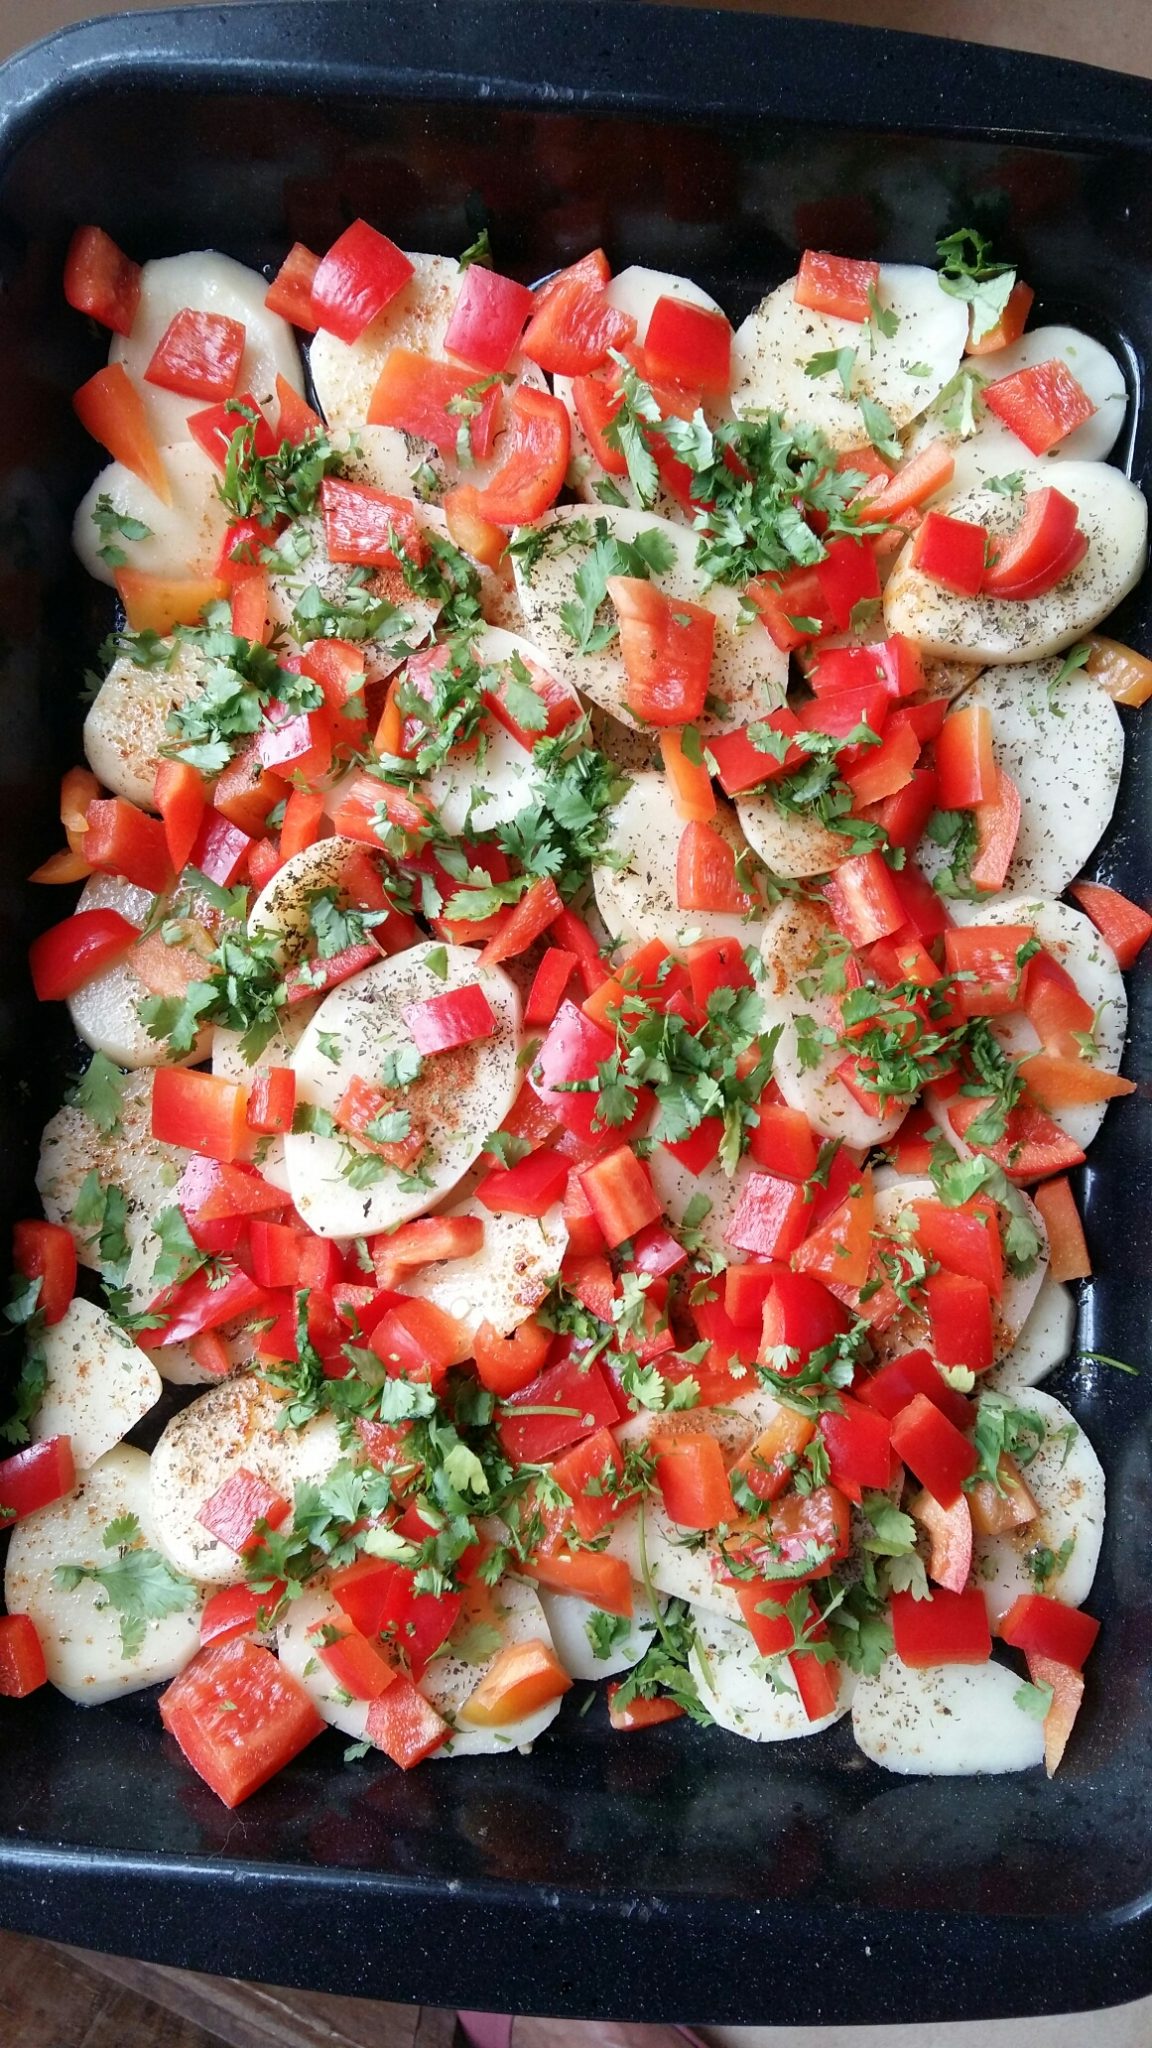
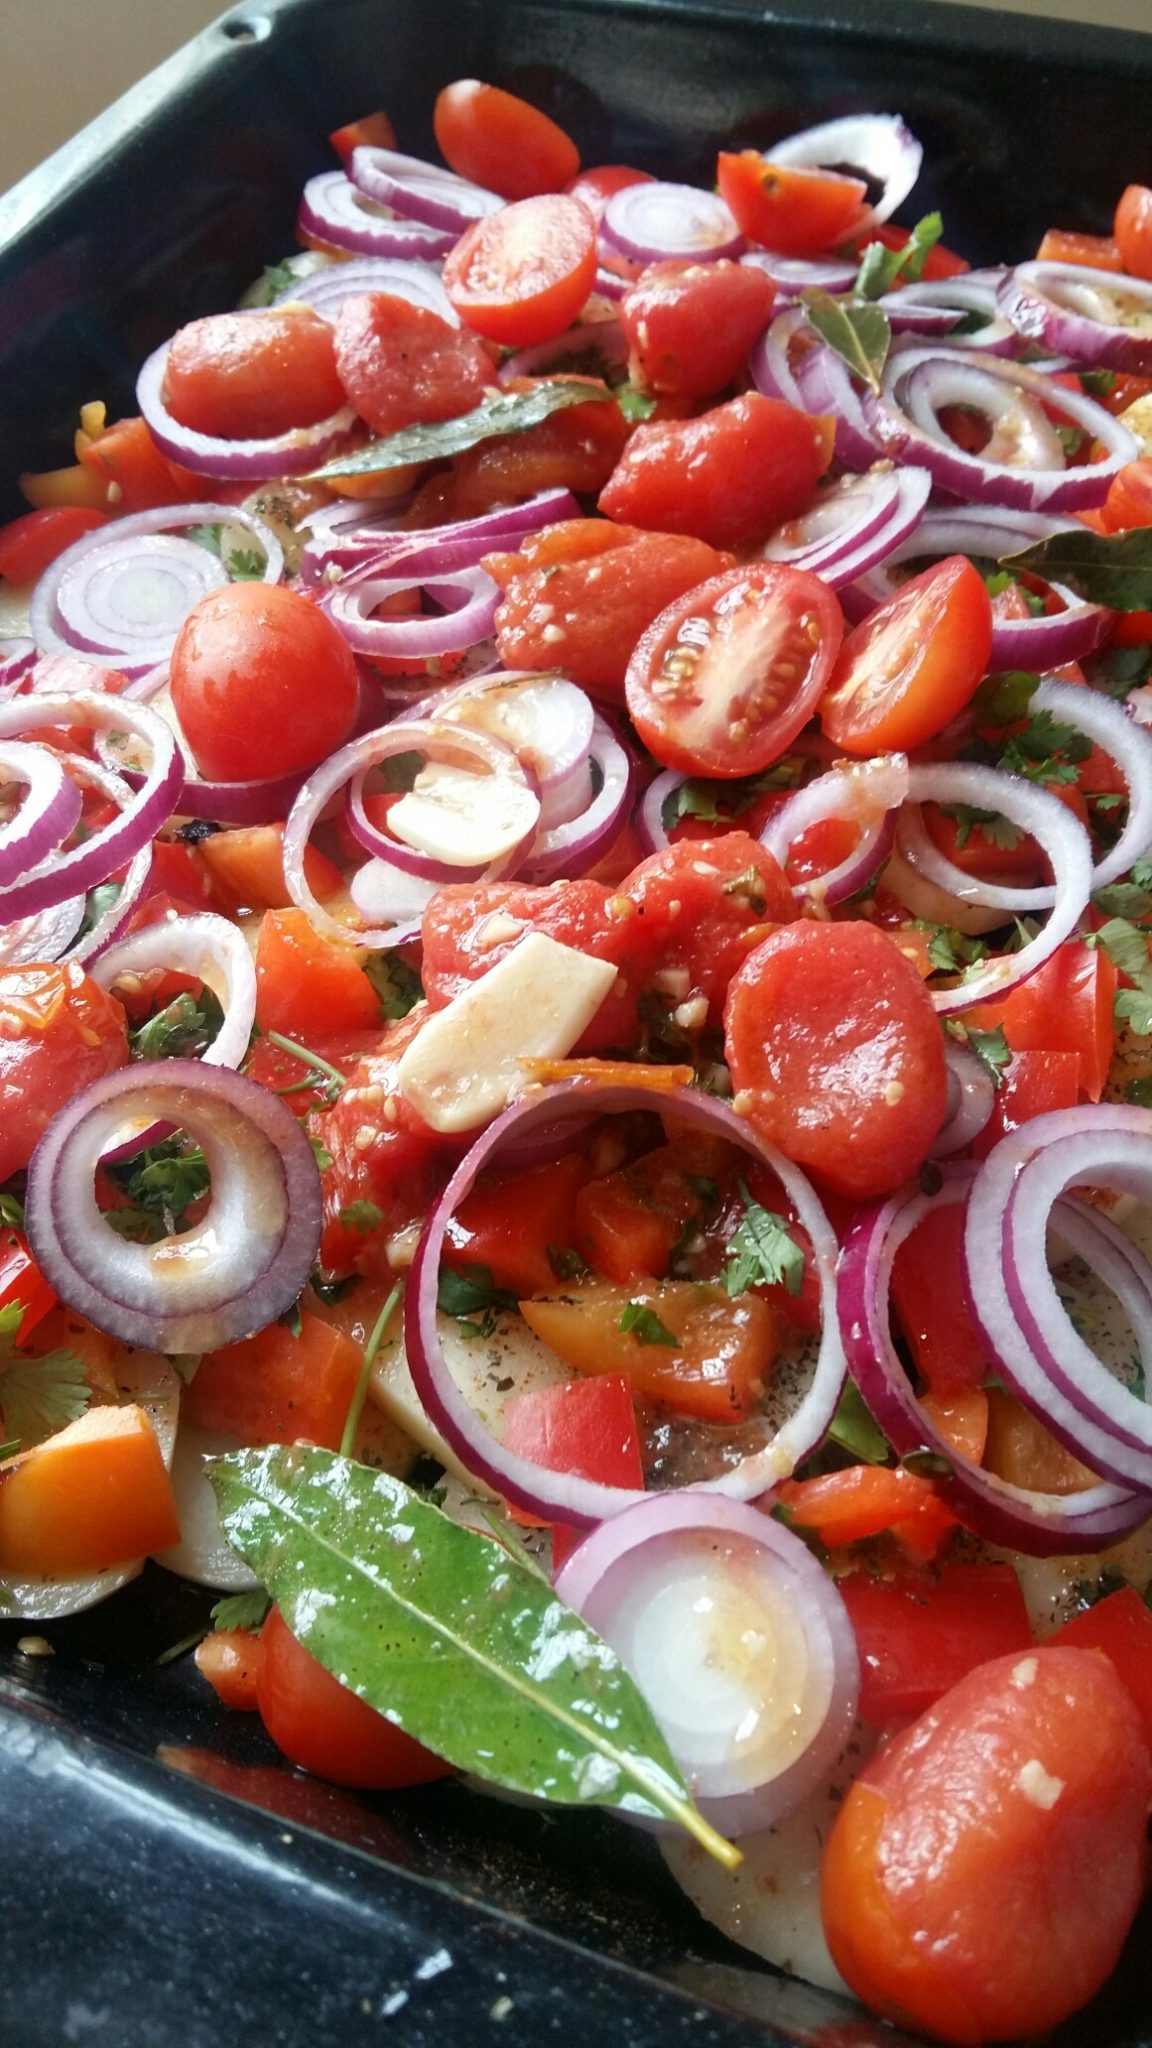
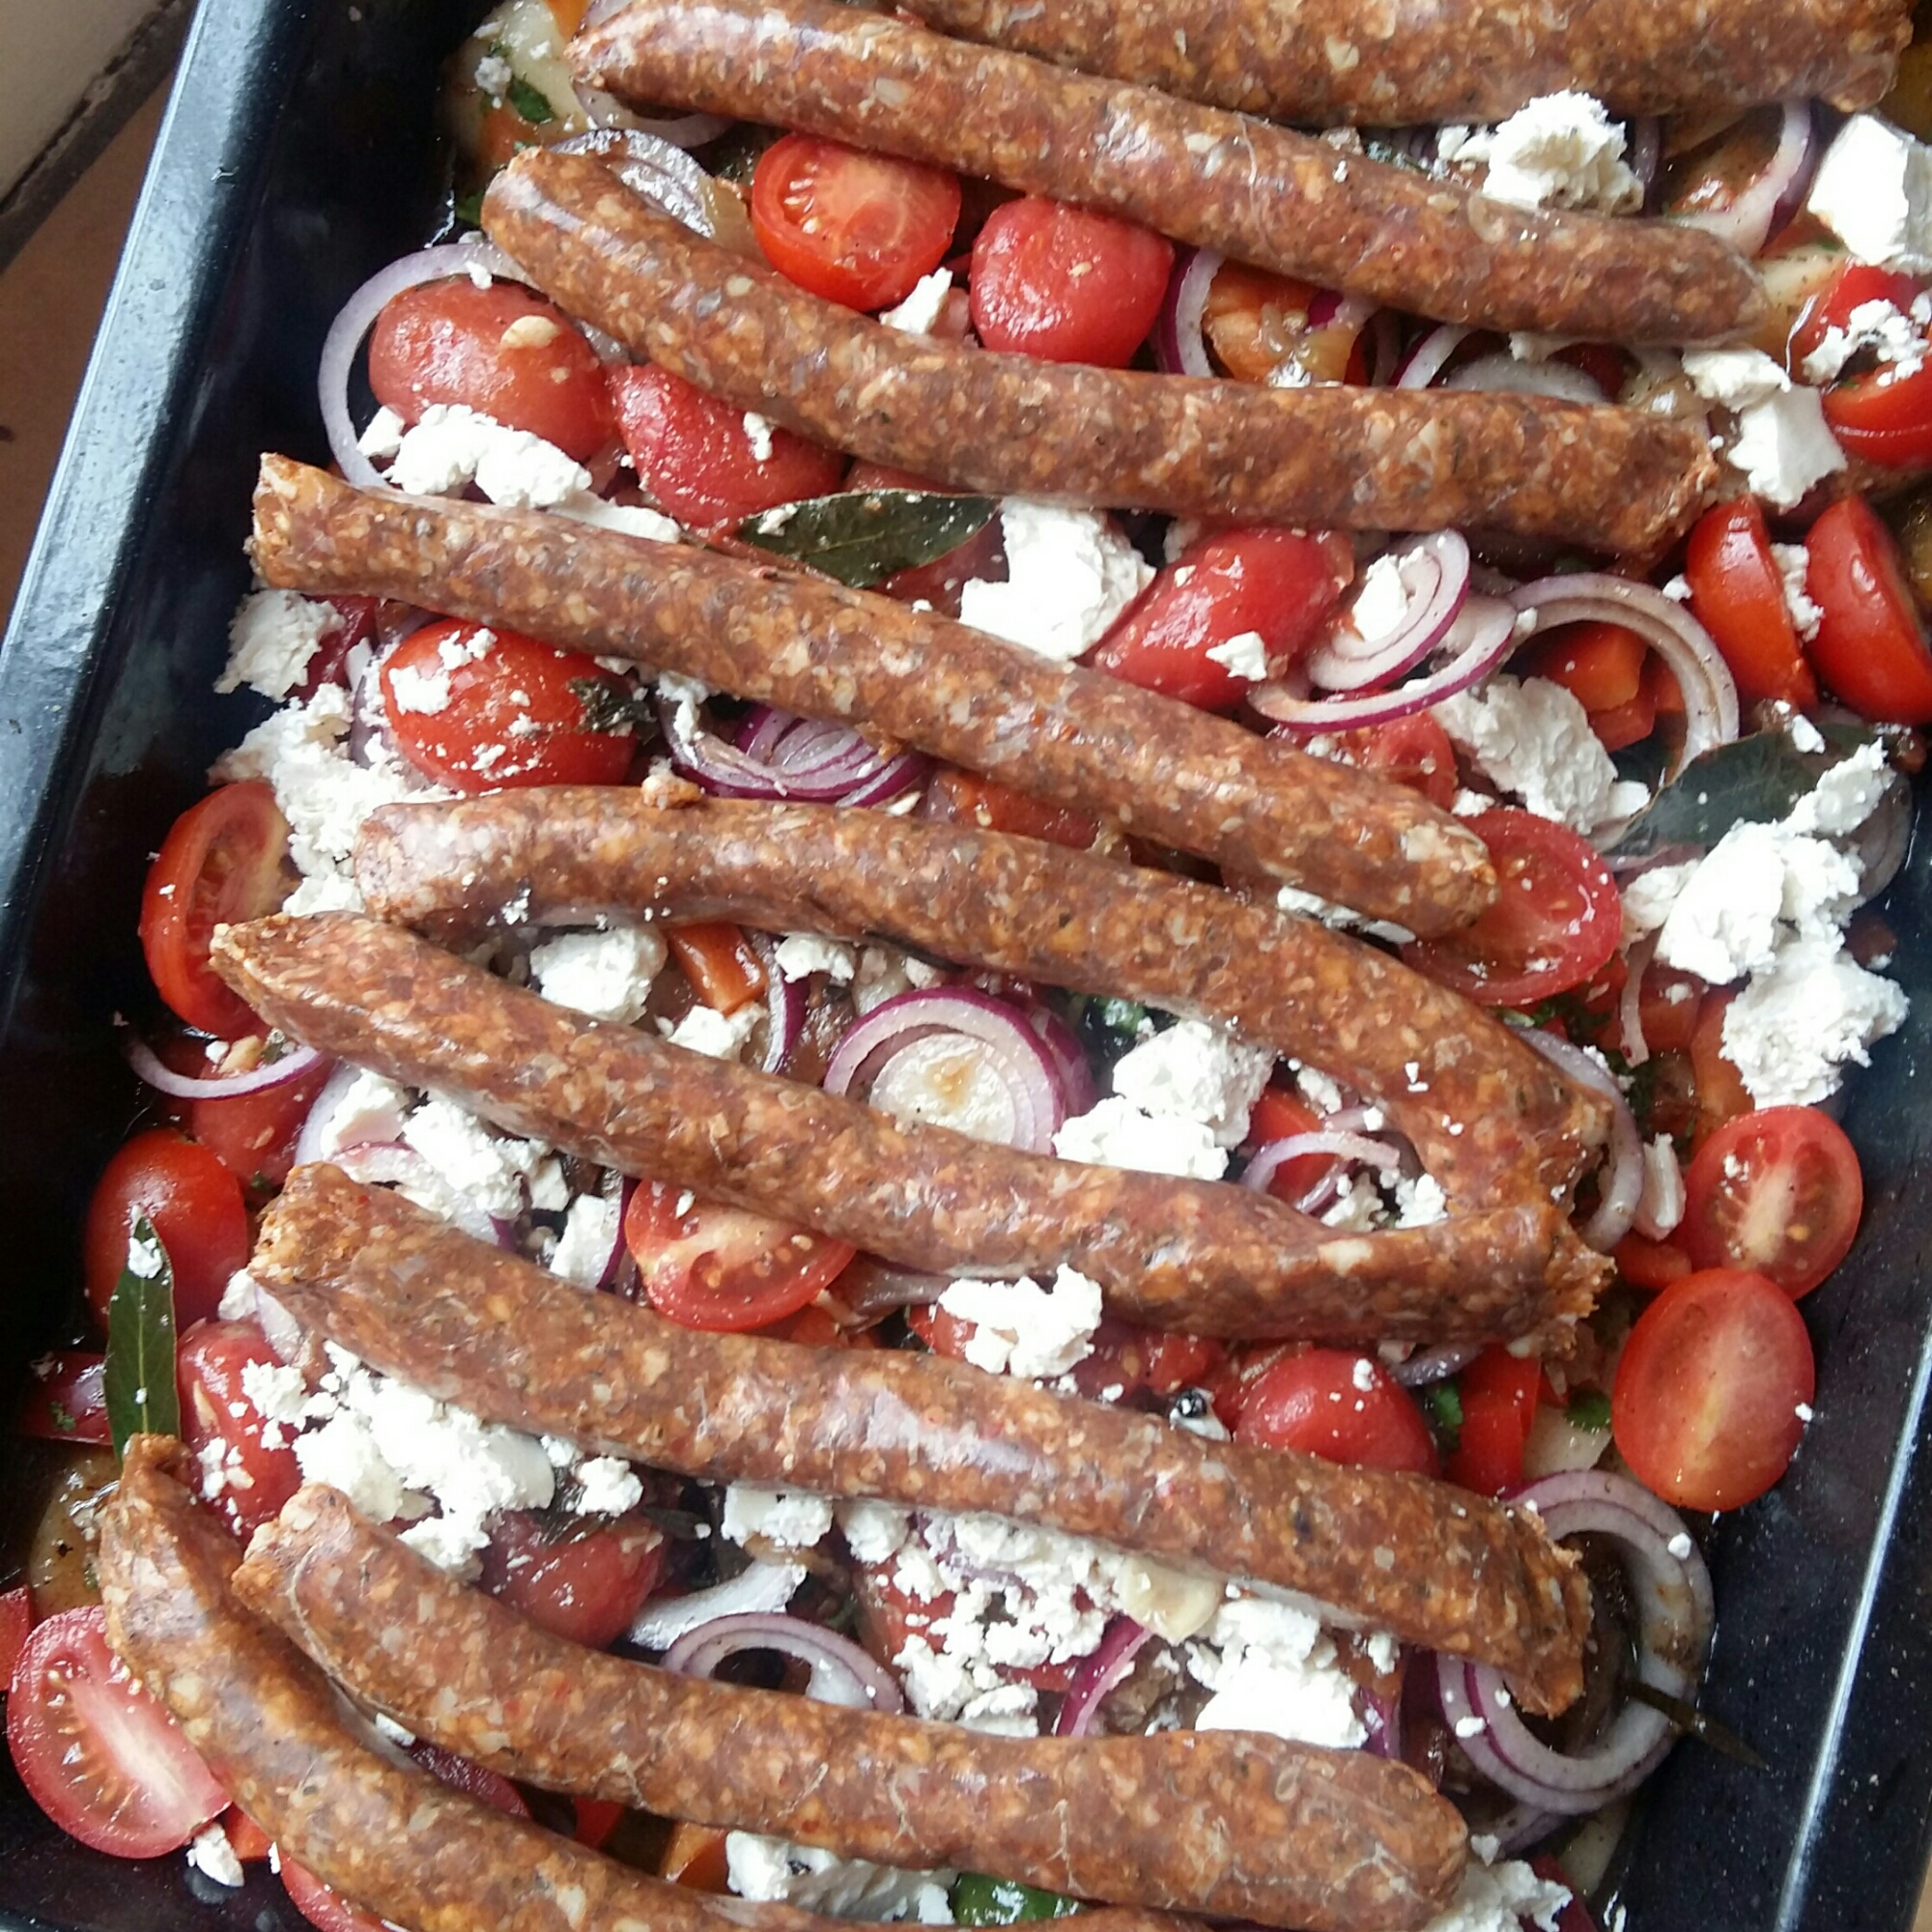
  1. Preheat the oven to 200 C. Grease a large roasting pan with a little of the oil Layer the vegetables as shown, starting with the potatoes and ending with the red onion rings. Remember to season each layer with the herbs, spices, garlic, bay leaves plus salt and pepper. Drizzle generously with extra virgin olive oil
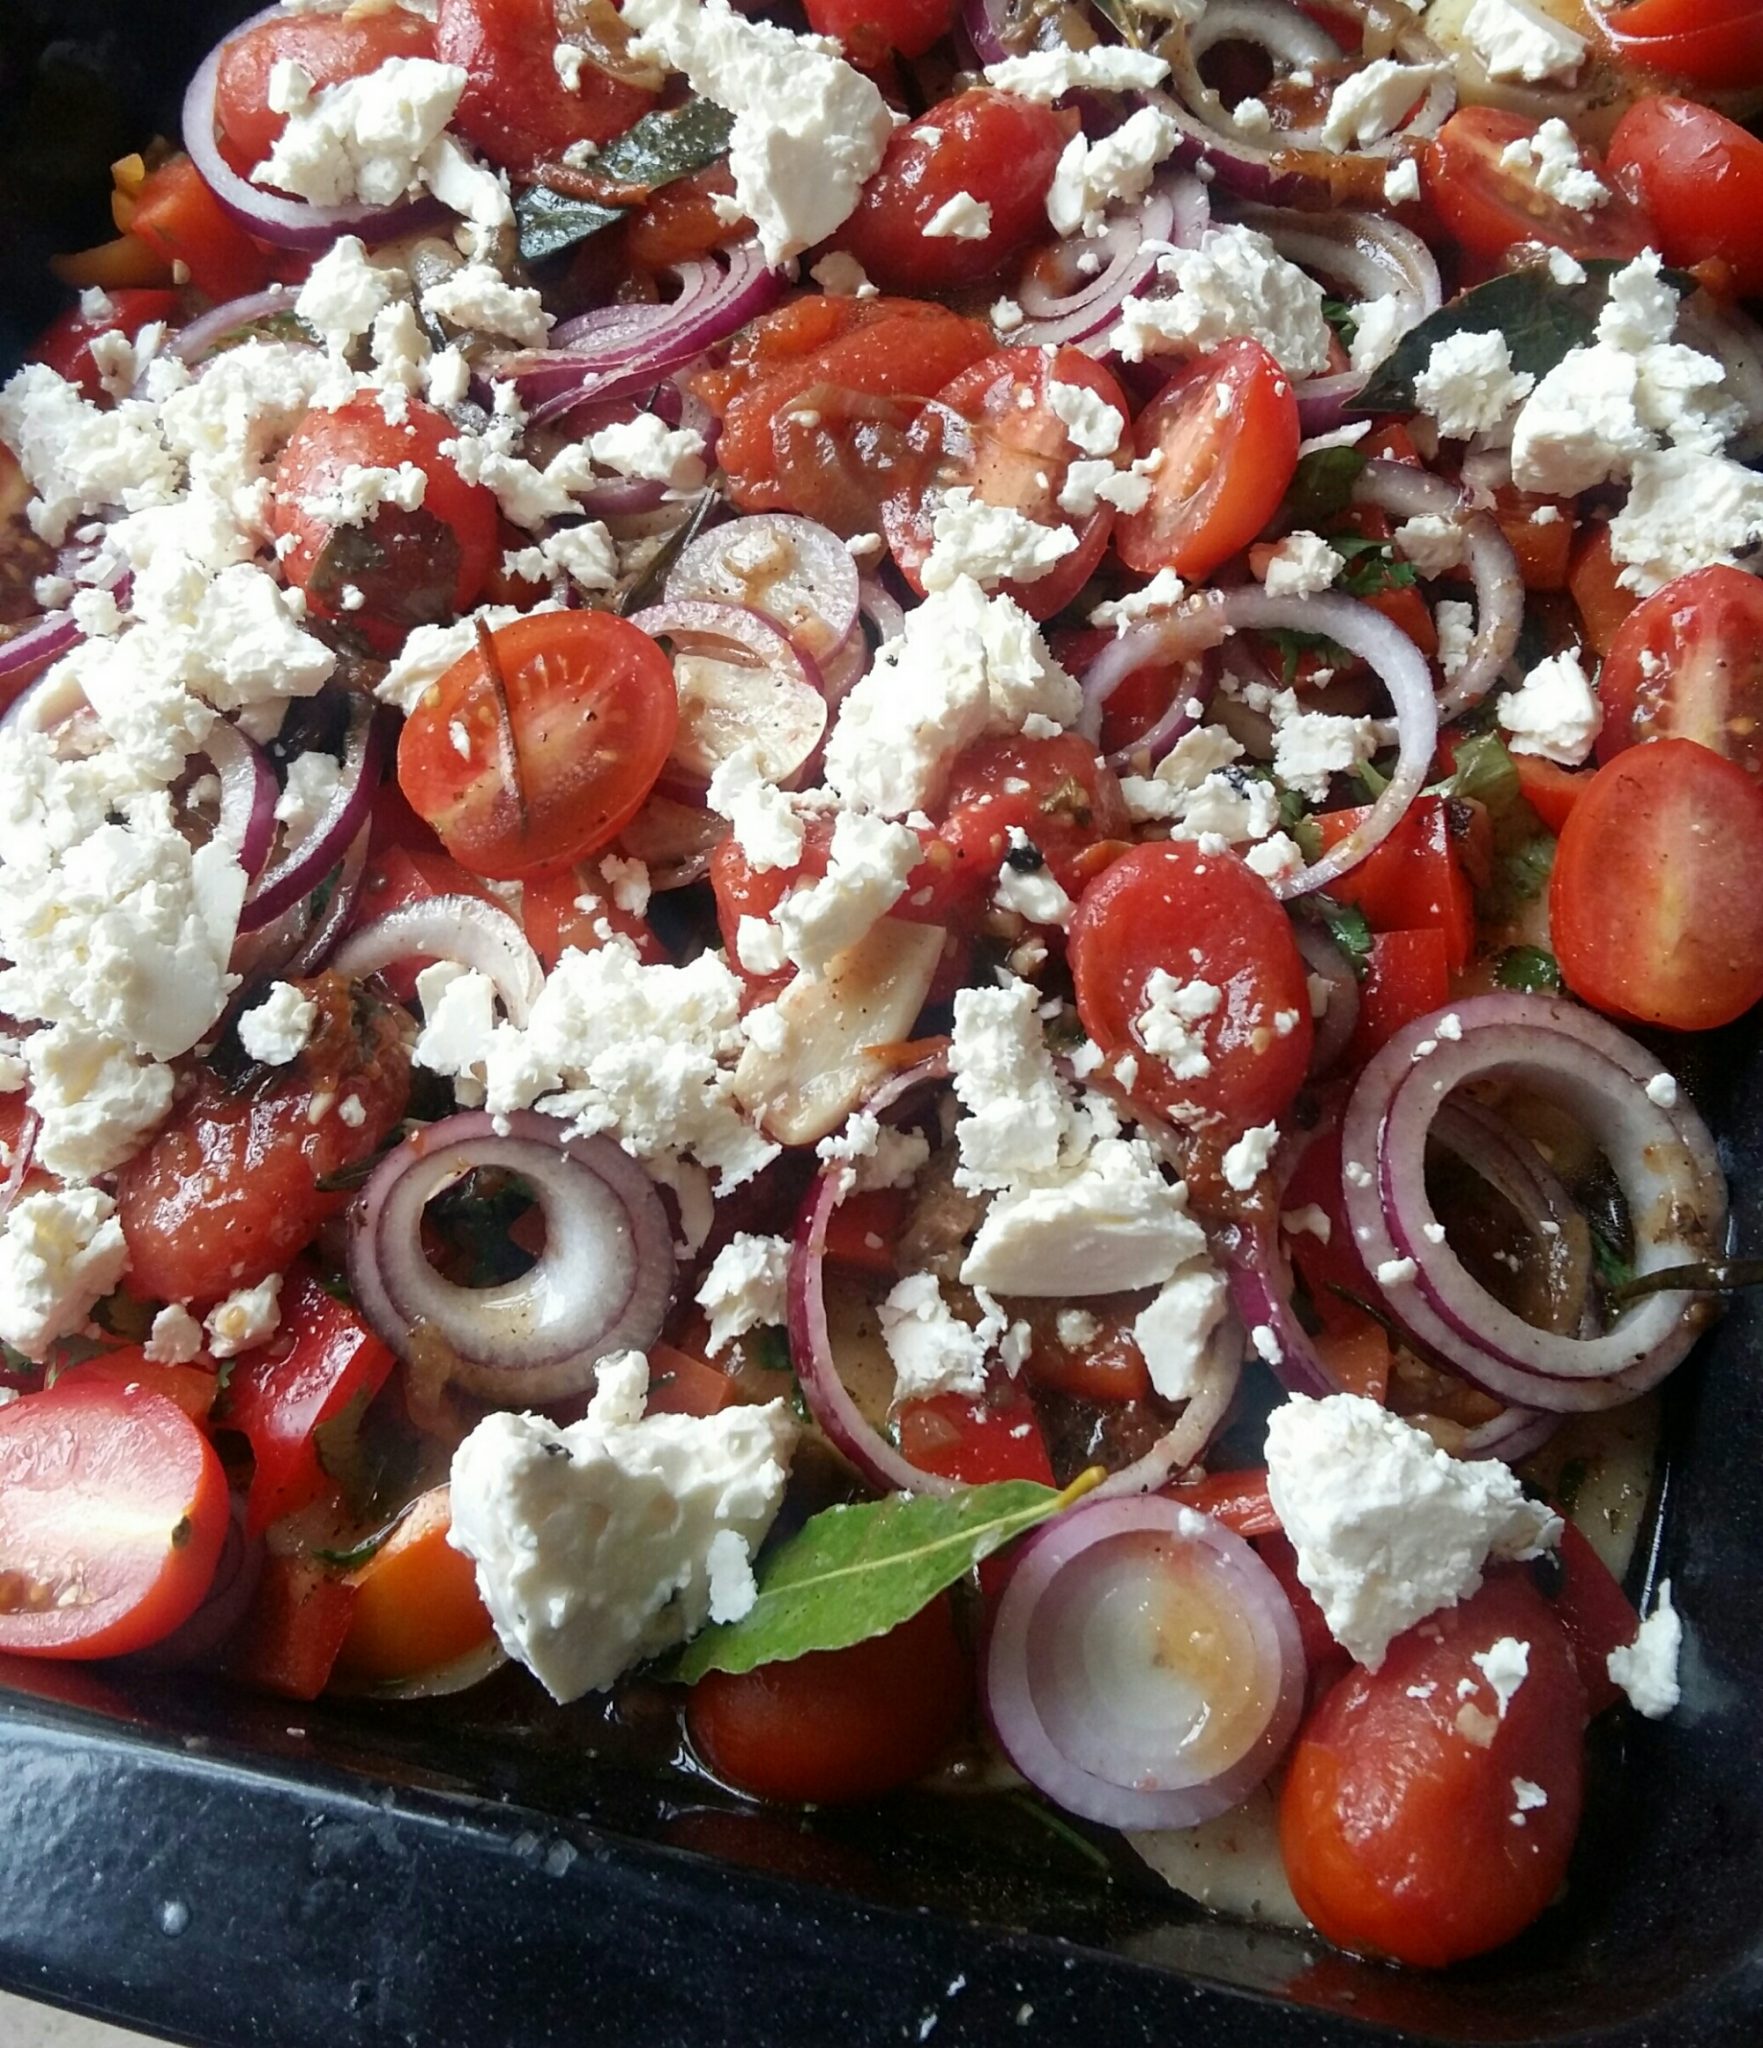
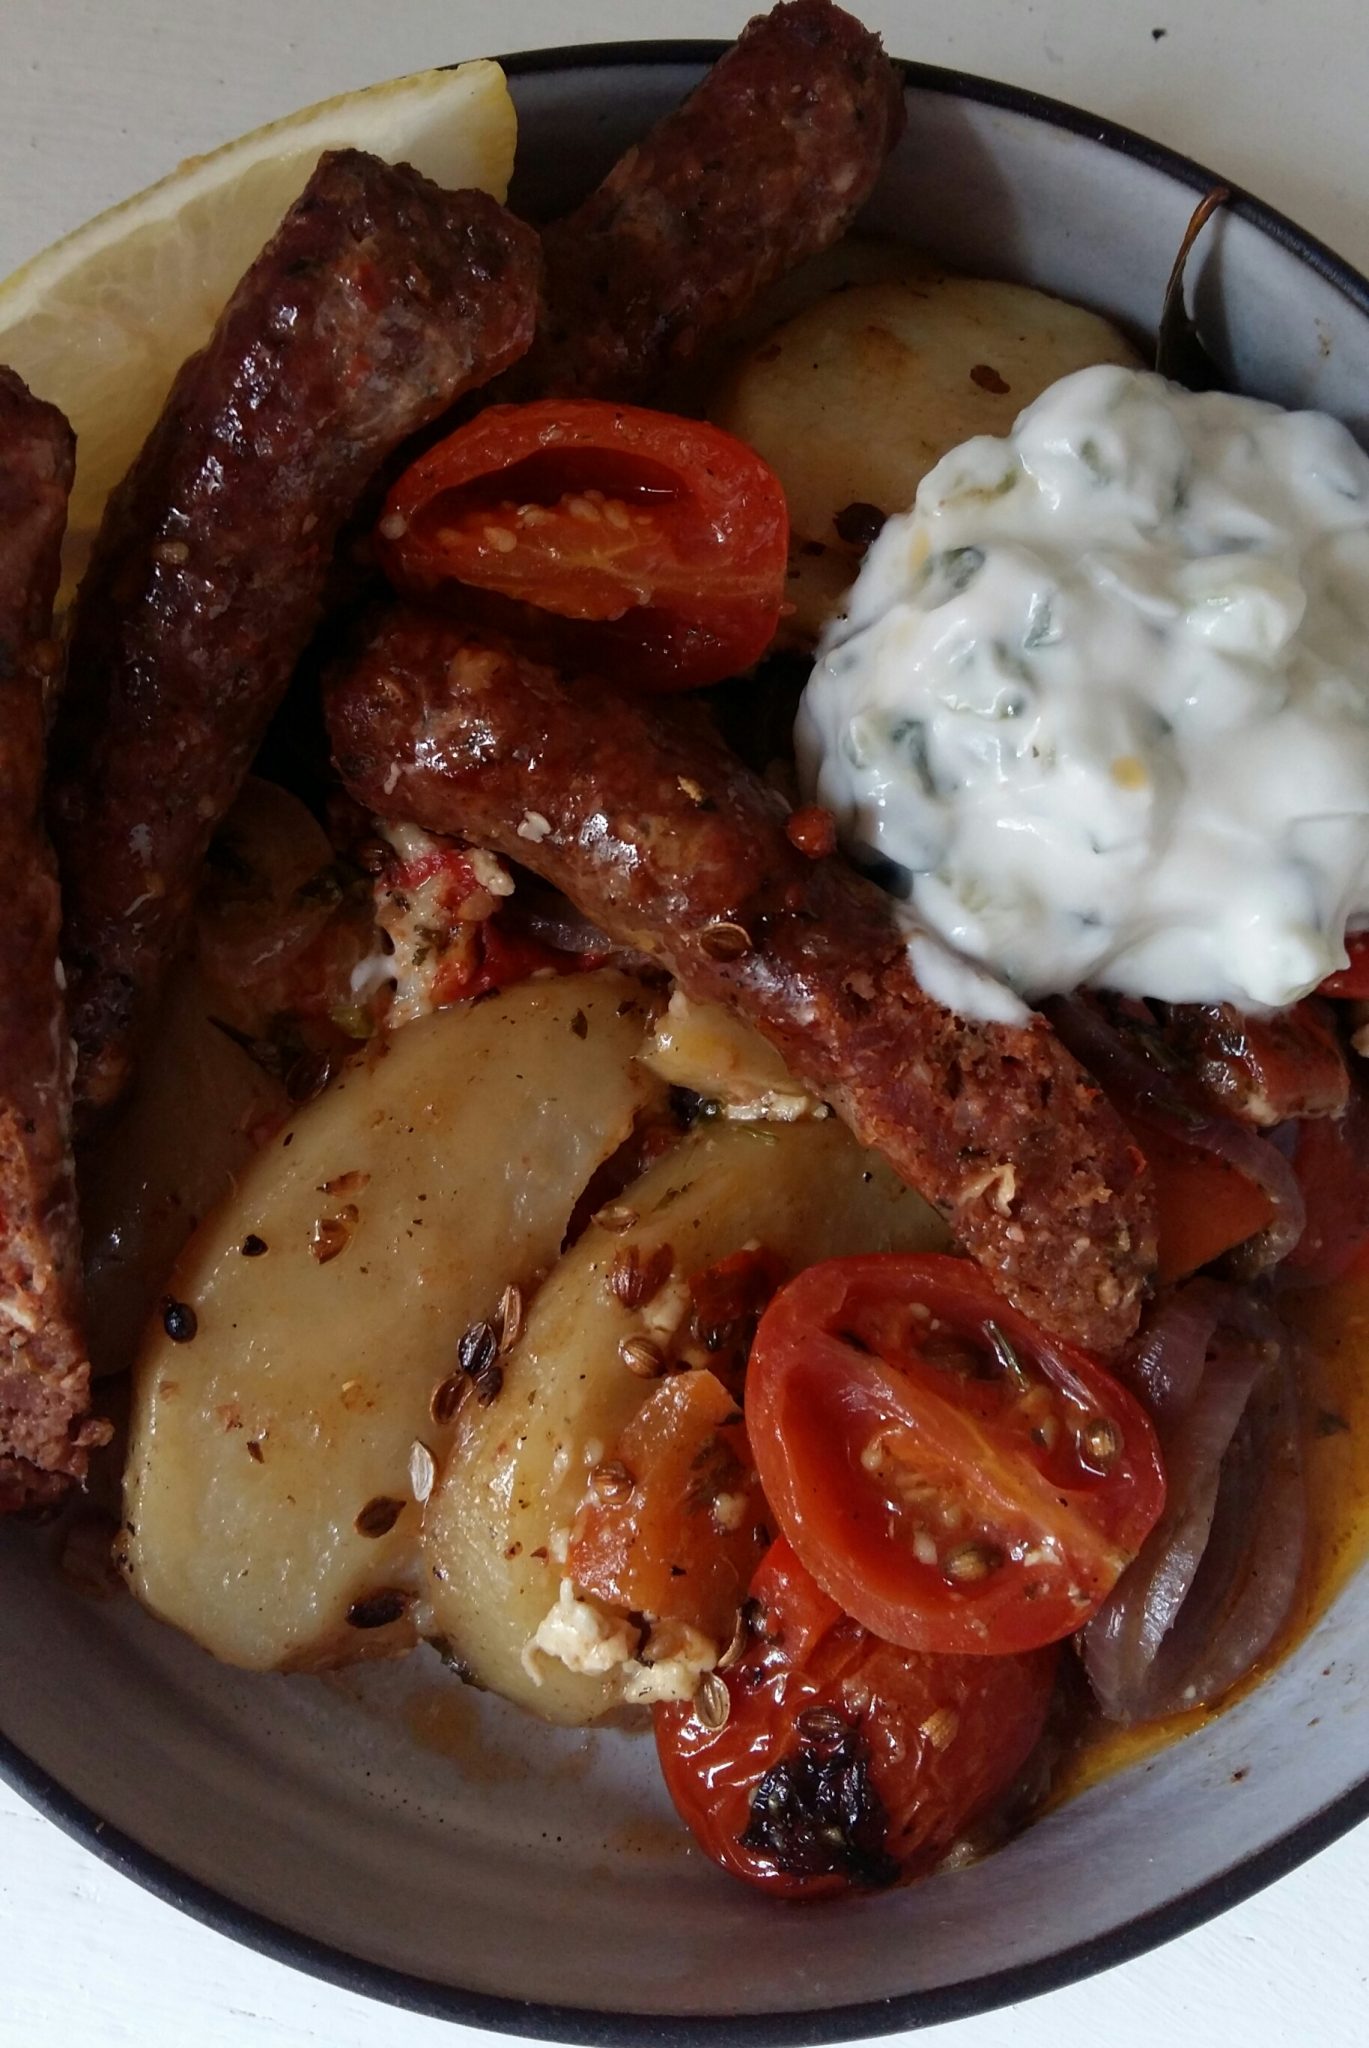
  2. Crumble over the feta and lay the sausages on top. Cover with foil and bake at 200 C for 45 minutes. Uncover and bake another 15 minutes or until nicely browned on top. Serve with tzatziki and warm toasted pitas.
First layer: sliced potatoes seasoned with smoked paprika, dried mint, generous amounts of olive oil, salt and pepper
Scatter over chopped sweet red pepper, chopped fresh coriander and Italian parsley
Add halved cherry plum tomatoes and red onion rings plus seasonings
Crumble and scatter over 2 wheels of feta
Lay sausages on top
Lay sausages on top
Cover tightly with foil and bake at 200 C for 45 minutes. Uncover, then bake 15 minutes longer until nicely browned
Serve warm or room temperature with tzatziki and pita bread

How To Make Spicy Roast Chilli Oil – Easy Recipe

2

Love chilli? Here’s your new addiction!

Making aromatic flavoured oils is as easy as pie. Really. It costs less and tastes better than commercial varieties, it’s fun and rewarding to make, plus you’ll have some nifty gifts to pass along to friends and family.

So with Xmas looming, best you get cracking – collect a few jars and bottles with tight-fitting lids, rustle up some ingredients and get busy. (I have a streak of the thrifty housewife in me, so I’m always saving up, rinsing and storing glass jars for future use.)

This gloriously fiery, salty, spicy chilli oil has been one of my favourites for decades. I first tasted it in a London Chinese restaurant during a slap-up Sunday dim sum feast, and I was instantly hooked. I need zero excuse to spoon some over whatever I’m having for lunch. Zero.

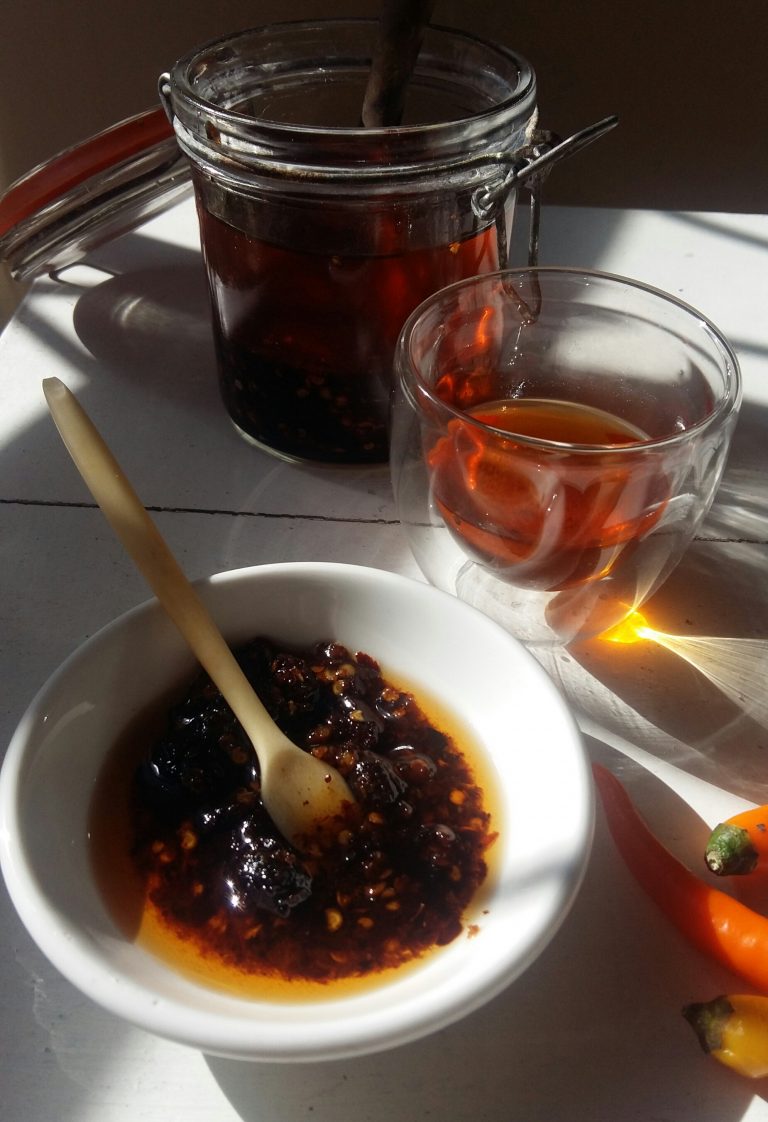
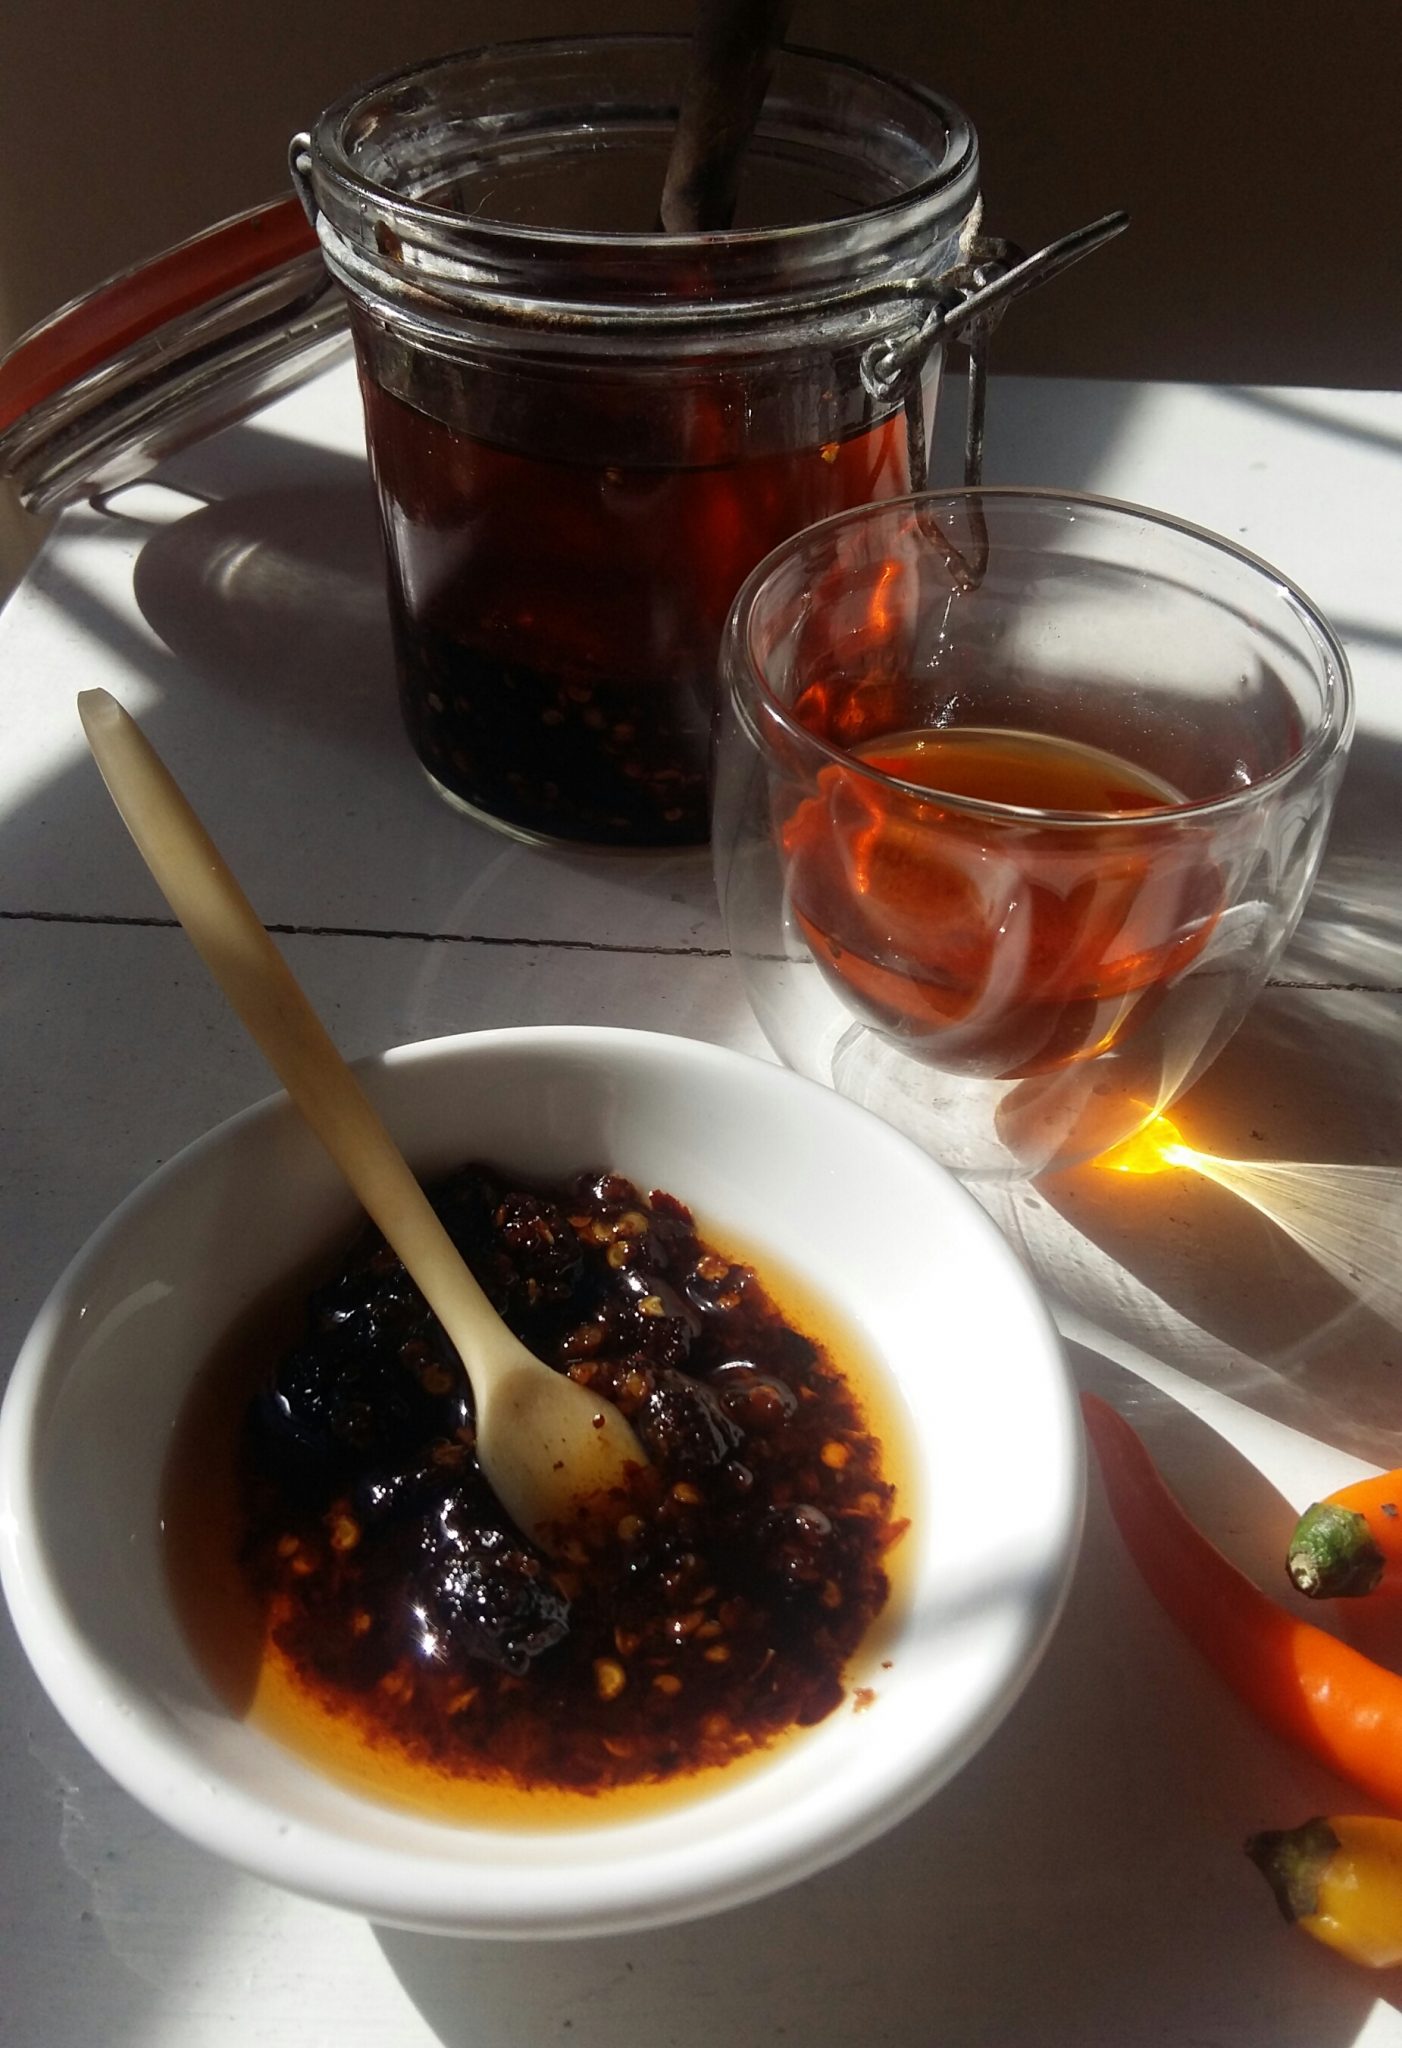
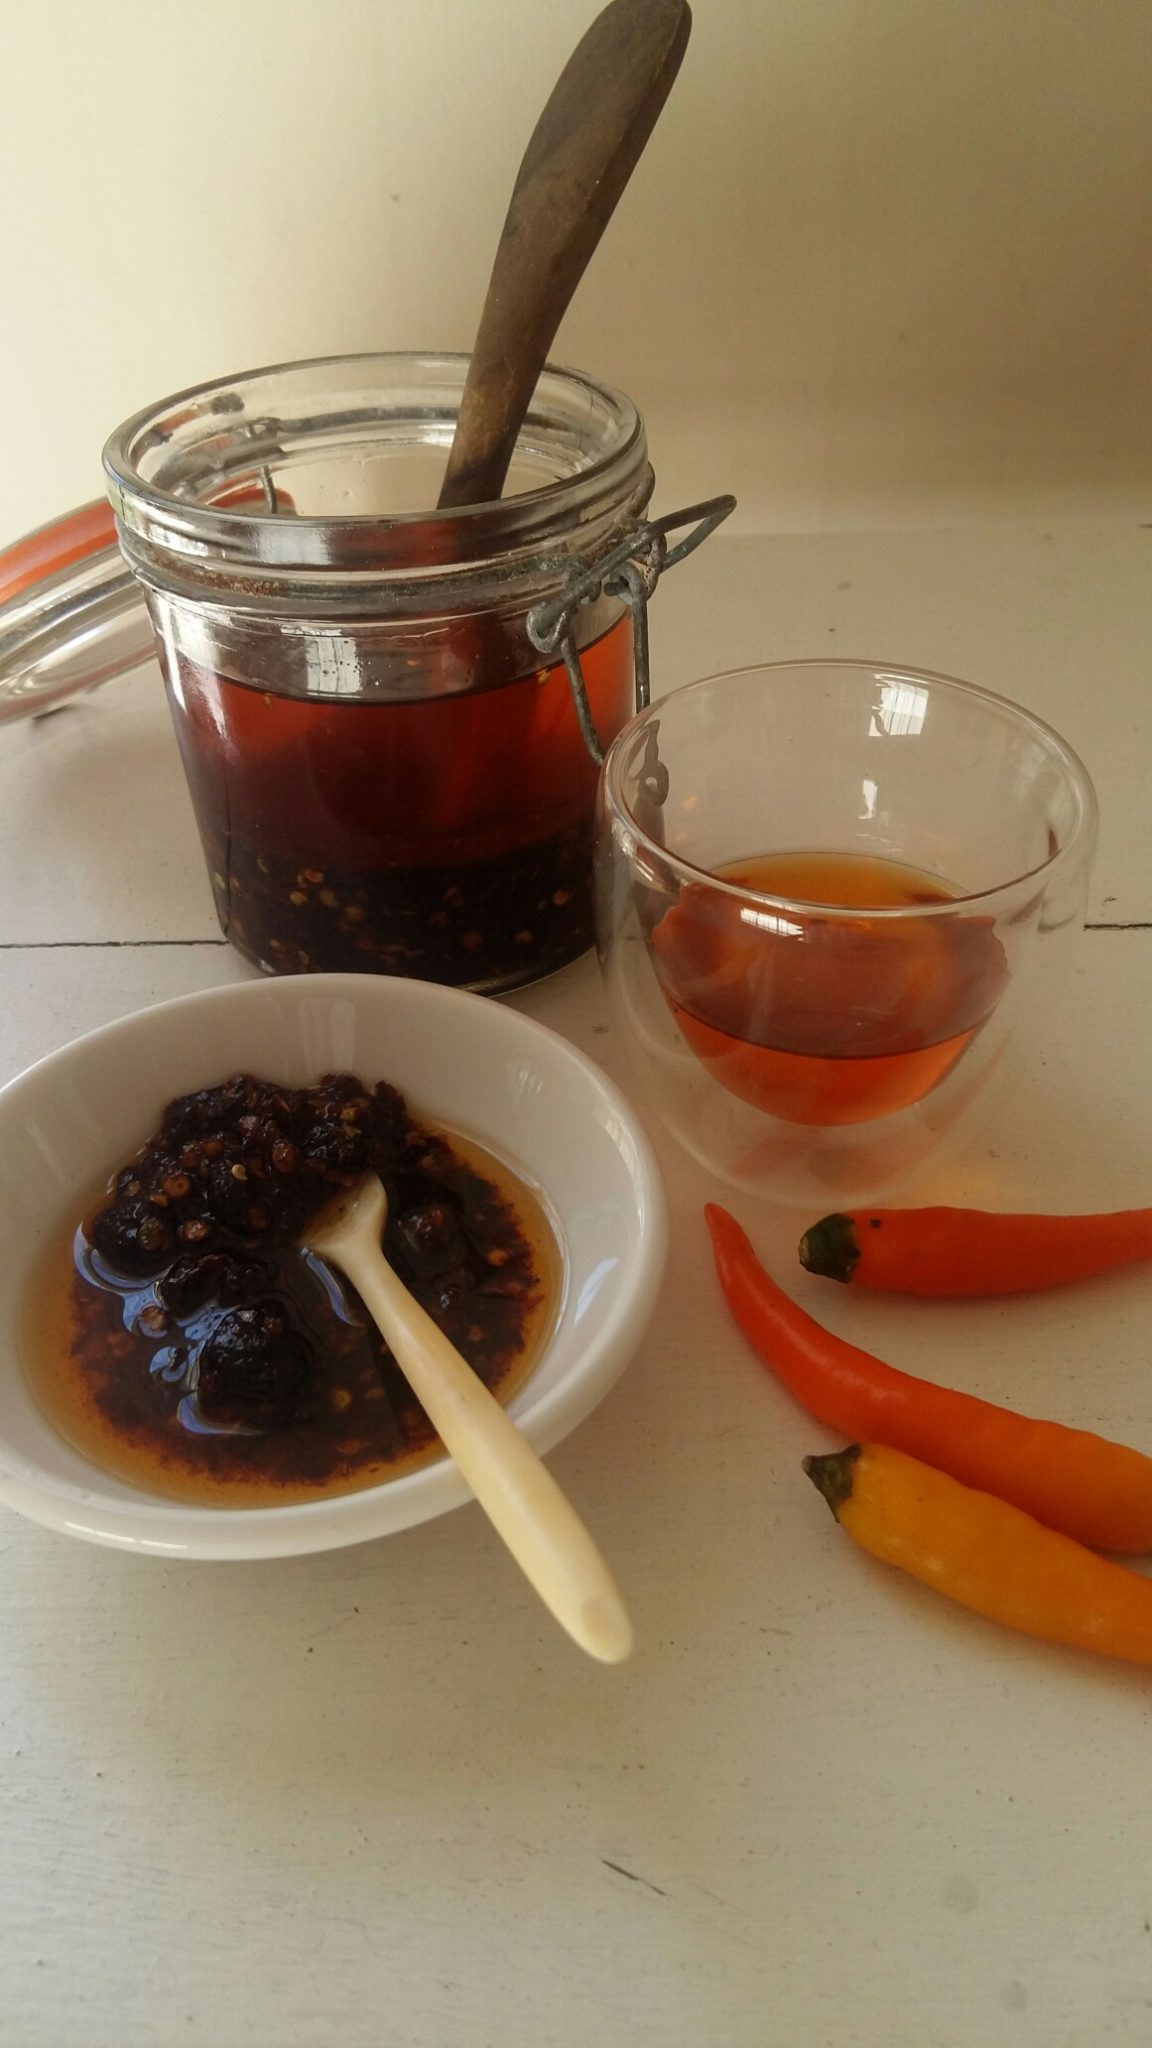
A blast of sunny flavour - spicy roast chilli oil
A blast of sunny flavour – spicy roast chilli oil

Roast chilli oil is not always easy to find commercially and even then it can be pricy – about R45 for a 200g jar last time I looked. At the rate my son and his dad (and I) consume it, making large quantities at home is really the sensible thing to do. I also actually prefer the taste of this home-made version to any I’ve ever bought, probably because commercial varieties might use slightly inferior ingredients. Also, you can tweak the recipe to your own taste, as long as you keep all the basics in. Recently I added a heaped teaspoonful of fermented shrimp paste to a batch of chilli oil I was making, and was blown away by the rich umami tang it added.

To ensure a really 5-star chilli oil, use fresh ingredients well before their sell-by date. No use digging out the semi-rancid bottle of oil and stale packet of chilli flakes from the back of your cupboard!

Use either peanut or sunflower oil, and a light, untoasted sesame oil. (Japanese brands are pretty good here.) A toasted sesame oil will end up making your chilli oil too heavy and dark.

Right! Let’s get cracking and cook up some fiery goodness, then, shall we?

SPICY ROAST CHILLI OIL

Use sparingly in Asian and Oriental dishes, with noodles or pasta or blend with other ingredients for your braai marinades. You can also use the chilli oil plain as a dip with steamed buns and dumplings.

Makes about 3 cups (750ml)

Ingredients:

2/3 cup very hot dried chilli flakes

1/3 cup Chinese fermented black beans, unrinsed and chopped (I’ve also used fermented black bean paste with perfect results)

6 garlic cloves, crushed to a paste

1 heaped teaspoon (about 7.5ml) fermented shrimp paste (optional, but really does add depth and loads of umami). Find at Thai or Asian groceries.

2 T (30ml) grated fresh ginger

2 ½ cups (625ml) peanut or sunflower oil

1/3 cup (180ml) light sesame oil

Method:

  1. Combine all the ingredients in a stainless steel saucepan and warm slowly over medium heat. Let it simmer gently for 15-20 minutes, stirring occasionally, before removing from the heat and leave to cool completely.
  2. Decant into sterilised glass jars with tight-fitting lids and store in a cool dark place. The heat will increase as time passes. Use the oil alone for a milder kick, and scoop up some of the delicious paste at the bottom for a blast of fire!
Rich umami tang: spicy roast chilli oil with fermented black beans, garlic and shrimp paste

How To Make Perfect Carrot Cake

2

Everyone needs a good carrot cake in their baking repertoire, and this is mine. I inherited the recipe from my mom Adele and have been making it for more than 30 years; heaven knows many times this gem of a recipe has been served both at home and professionally.

My mom loved baking and her carrot cake was legendary. It’s rich with spice, imbued with aromatic citrus zest and crowned with a glorious, tangy cream cheese and walnut icing. The recipe is a family heirloom and has been shared countless time with visitors, friends and family who insist on taking home a copy of Mom’s tried and tested recipe. The tangy cream cheese and chopped walnut topping make it fancy enough for celebrations and special occasions, too.

The cake will keep for several days in an airtight container.

Adele’s CARROT CAKE

Serves 12

Ingredients:

3 cups (375 g) unsifted white cake flour

2 t (10 ml) baking powder

1 t (5 ml) bicarbonate of soda

1 t (5 ml) ground cinnamon

½ t (2.5 ml) salt

500g carrots in weight after peeling and trimming

1 cup (250 ml) butter, softened but not melted

1 cup (225 g) light brown (caramel) sugar

1 cup (250 g) white granulated sugar

4 large eggs

2 T (30 ml) grated lemon zest

2 T (30 ml) grated orange zest

2 T (30 ml) lemon juice

2 T (30 ml) orange juice

1 cup (125 g) coarsely chopped walnuts

1 cup (155 g) sultanas, seedless raisins or cranberries (optional)

Cream cheese icing:

250 g low-fat cream cheese

1 T (15 ml) lemon juice

1 t (5 ml) grated lemon zest

1 ½ cups (225 g) icing sugar, sieved

1 cup (155 g) coarsely chopped walnuts

Method:

  1.  Since the batter is very dense, it’s customary to use a tube cake tin for this as the tube conducts the heat to the centre of the cake, which would otherwise remain raw while the exterior reached doneness. Spray the tin lightly.
  2. Sieve the flour with the baking powder, bicarb, cinnamon and salt into a large bowl.
  3. Mix the citrus zest and juices and set aside.
  4. Wash, peel and grate the carrots coarsely – you need 4 cups in total.
  5. Preheat the oven to 180 C.
  6. Beat the butter and both sugars at high speed in your blender until light and fluffy, for about 4-5 minutes. Stop beating every now and then to scrape the butter off the sides and bottom to reincorporate into the mix.
  7. Keeping the blender running, add the eggs one by one, making sure each egg is thoroughly incorporated into the batter before adding the next. Keep beating a further 3 or so minutes until the mixture is light and thick.
  8. Turn to the blender to low speed and add the flour mixture (in fourths) alternately with the citrus juice (in thirds), beginning and ending with flour. Beat lightly for 1 minute more, until smooth.
  9. Use a metal spoon to fold in the grated carrots, walnuts and sultanas if used. Stir lightly to blend very well, dispersing the additions evenly throughout the batter.
  10. Spoon the batter into the tube cake tin and bake in the centre of the oven for about an hour, or until a metal skewer inserted in the centre of the cake comes out clean. (Start testing at 50 minutes’ baking time). Remove from oven and let cool in tin on a wire rack for 20 minutes.
  11. Slide a very sharp knife around the edges between cake and tin to loosen it. Turn cake out of the pan onto a wire rack and let cool completely.
  12. Once the cake is completely cooled down, you can ice it: Beat all the ingredients for the icing except the nuts until very smooth in a medium bowl and keep cool until needed. Spread over top of the cake, scatter over chopped walnuts and serve.
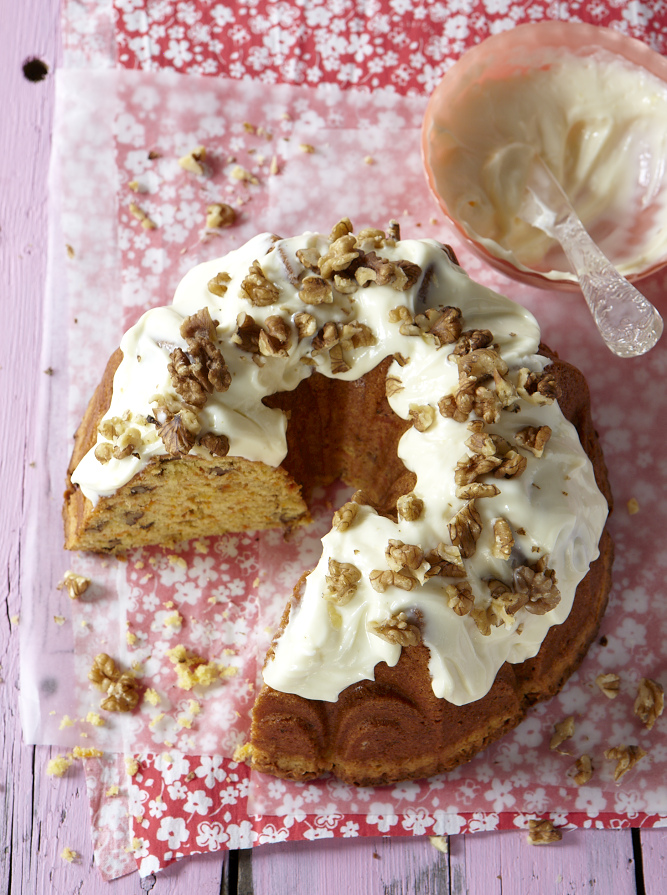
Adele's carrot cake
Adele’s carrot cake Photo by Sean Calitz courtesy RHS

Cape Chicken and Potato Curry

0

A random conversation on Facebook recently – about the differences between Cape Malay and Indian curries – ignited a massive craving for an old-fashioned Cape chicken curry. Yeah, I’m cheap like that – everything makes me hungry, you know, especially chatting to strangers about food on the Internet.

Many of my Facebook friends are brilliant cooks, and the photos they share of their home-style cooking often have me salivating and ready to munch my screen. In particular, there is a very yellow, turmeric-tinted chicken and potato curry that has been practically begging me to make it for weeks now. It’s the kind of thing your mom would have made when you were little – not too hot, with a very subtle and mellow blend of spices and a thinnish gravy, served with a pile of fluffy, steaming hot white rice and a few sambals.

The recipe I was after though was not a traditional Cape Malay one, nor an Indian one. It’s a generic kind of curry recipe, and you can crank the spice-o-meter up according to your own taste. This version is known as Cape Chicken curry, a boerekos recipe, and it differs a bit from the traditional Cape Malay curries we all know and love. It has added turmeric for that glorious, blazing buttercup yellow hue, and as you’re using a mild curry powder, very little heat. Quick and easy to make, too. I use chicken thighs and drumsticks for this, with perhaps one or two wings added for extra flavour. Since you’re cooking the meat on the bone, your sauce will have added richness and depth of flavour.

Cape Malay curries are generally less pungent and fiery than Indian curries, and also a little sweeter. I also think the use of turmeric is generally more pronounced in Cape Malay curries. The version of Indian curry that we South Africans are familiar with, or Durban curry as it is known, stems predominantly from the south of India, whence most of the indentured labourers sent to Natal originally came from. This region’s cooking makes lavish use of coconut milk.

The recipe below was adapted from one in Dine van Zyl’s magisterial Boerekos compendiums, Die Groot Boerekos Kookboek 1 and 2 – books to treasure and cook from every day, and to read for the beautiful storytelling too! Click here to read Dine’s lovely, informative blog.

DINE’S CAPE CHICKEN CURRY

Serves 6

Ingredients:

1.5 kg chicken portions, except breast, preferably bone-in

4 garlic cloves, crushed

1 T (15 ml) grated fresh ginger

1 large onion, finely chopped

2 T (30 ml) sunflower oil or ghee

1 T (15 ml) jam apricot jam

1 T (15 ml) mild curry powder (although Dine’s original recipe uses only 2 t (10 ml)

1 t (5 ml) turmeric

1 cinnamon stick or 2 pieces of cassia

8 cardamom pods, lightly crushed

1/2 t (2.5 ml) ground coriander

2 t (10 ml) salt

4 potatoes, peeled and cut into large chunks

1/4 cup (90 ml) boiling water

fresh coriander, for garnish

Method:

  1. Heat the oil in a heavy-bottomed pot and brown the chicken pieces lightly over medium heat. Remove from pot with a slotted spoon and set aside.
  2. Next cook the garlic, ginger and onion together in the same pot until the onion is soft and translucent. Be careful not to let it brown or burn, which will turn it bitter and you’ll have to start all over again!
  3. Add the apricot jam, curry powder, turmeric, cinnamon or cassia, cardamom, coriander and salt, stir well and add the meat.
  4. Pack the potato chunks around the meat, pour in the boiling water and put the lid on. Cook over very low heat for 30-30 minutes, until chicken and potato are tender. If your sauce looks a bit watery, turn the heat up and let it bubble fiercely for 5-10 minutes to reduce and thicken.
  5. Now add some hot rice, sambals and a garnish of fresh coriander leaves and you’re all set for a marvellous feast!

To make your own mild curry powder, simply follow the recipe below – easy, cheap and you get to tailor it to your own tastebuds!

MILD CURRY POWDER

Makes about 150 ml. Far superior to a commercial blend. To make a hotter masala, simply increase the quantity of cayenne to 2 t (10ml).

Ingredients:

Whole spices:

2 T (30ml) coriander seeds

1 T (15ml) cumin seeds

6 cardamom pods, dehusked

1 T (15ml) yellow mustard seeds

2 t (10ml) fennel seeds

1 t (5ml) cloves

½ t (2,5ml) black peppercorns

Ground spices:

1 t (5ml) ground cinnamon

½ t (2,5ml) cayenne pepper

1 T (15ml) ground ginger

2 ½ T (37,5ml) ground turmeric

Method:

  1. Grind whole spices finely in grinder and sieve to remove coarse bits.
  2. Mix throughly with ground spices and store in a clean, dry glass jar with tight-fitting lid. Keeps up to 3 months.
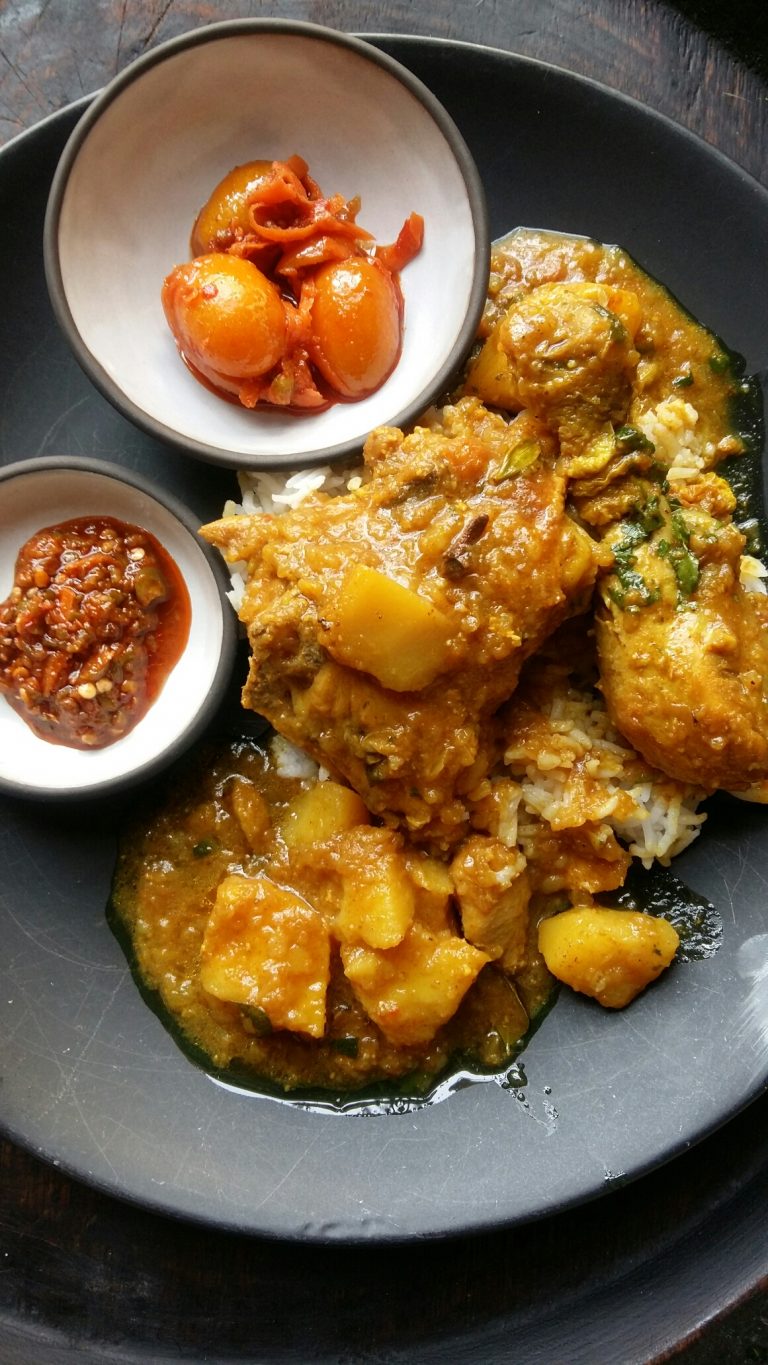
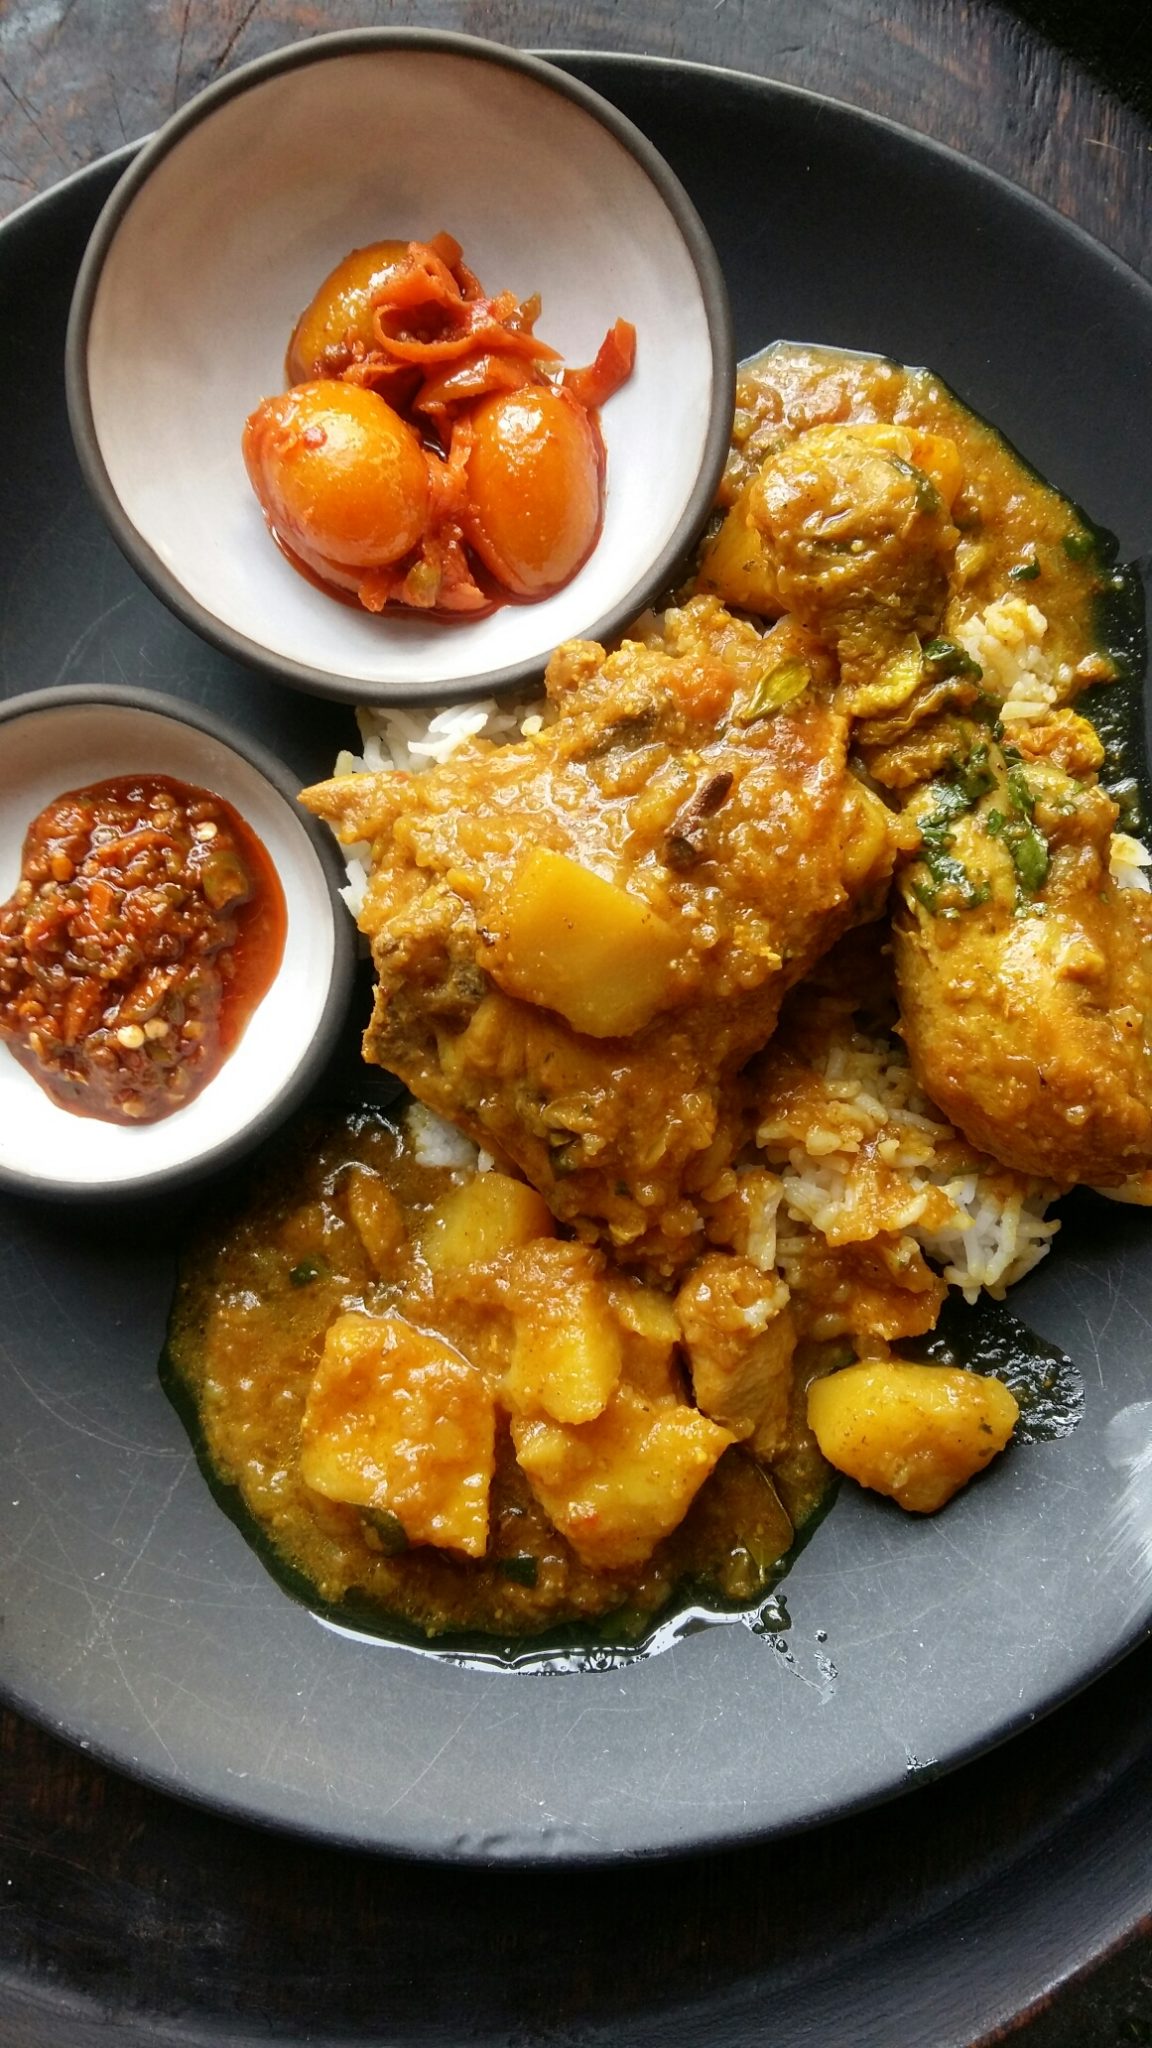
Easy Cape Chicken and Potato Curry with kumquat atjar

Easy All-Purpose BBQ Sauce and American Smoky Barbecue Sauce

2

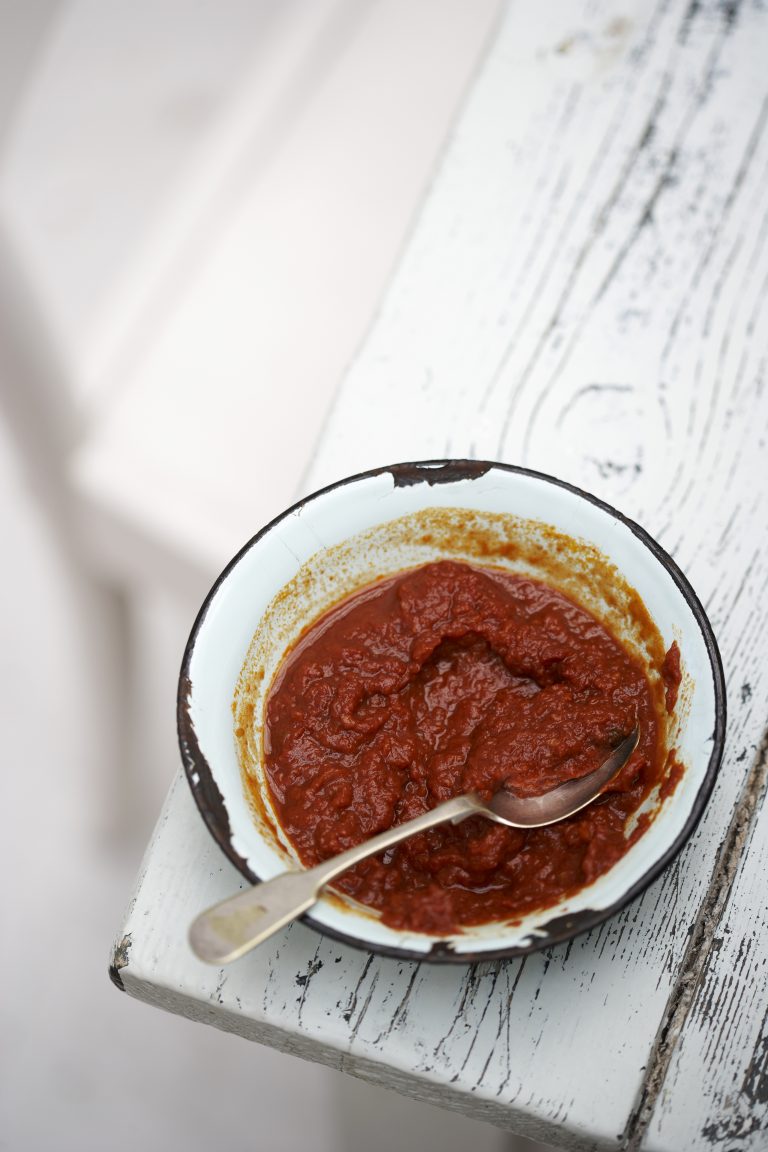
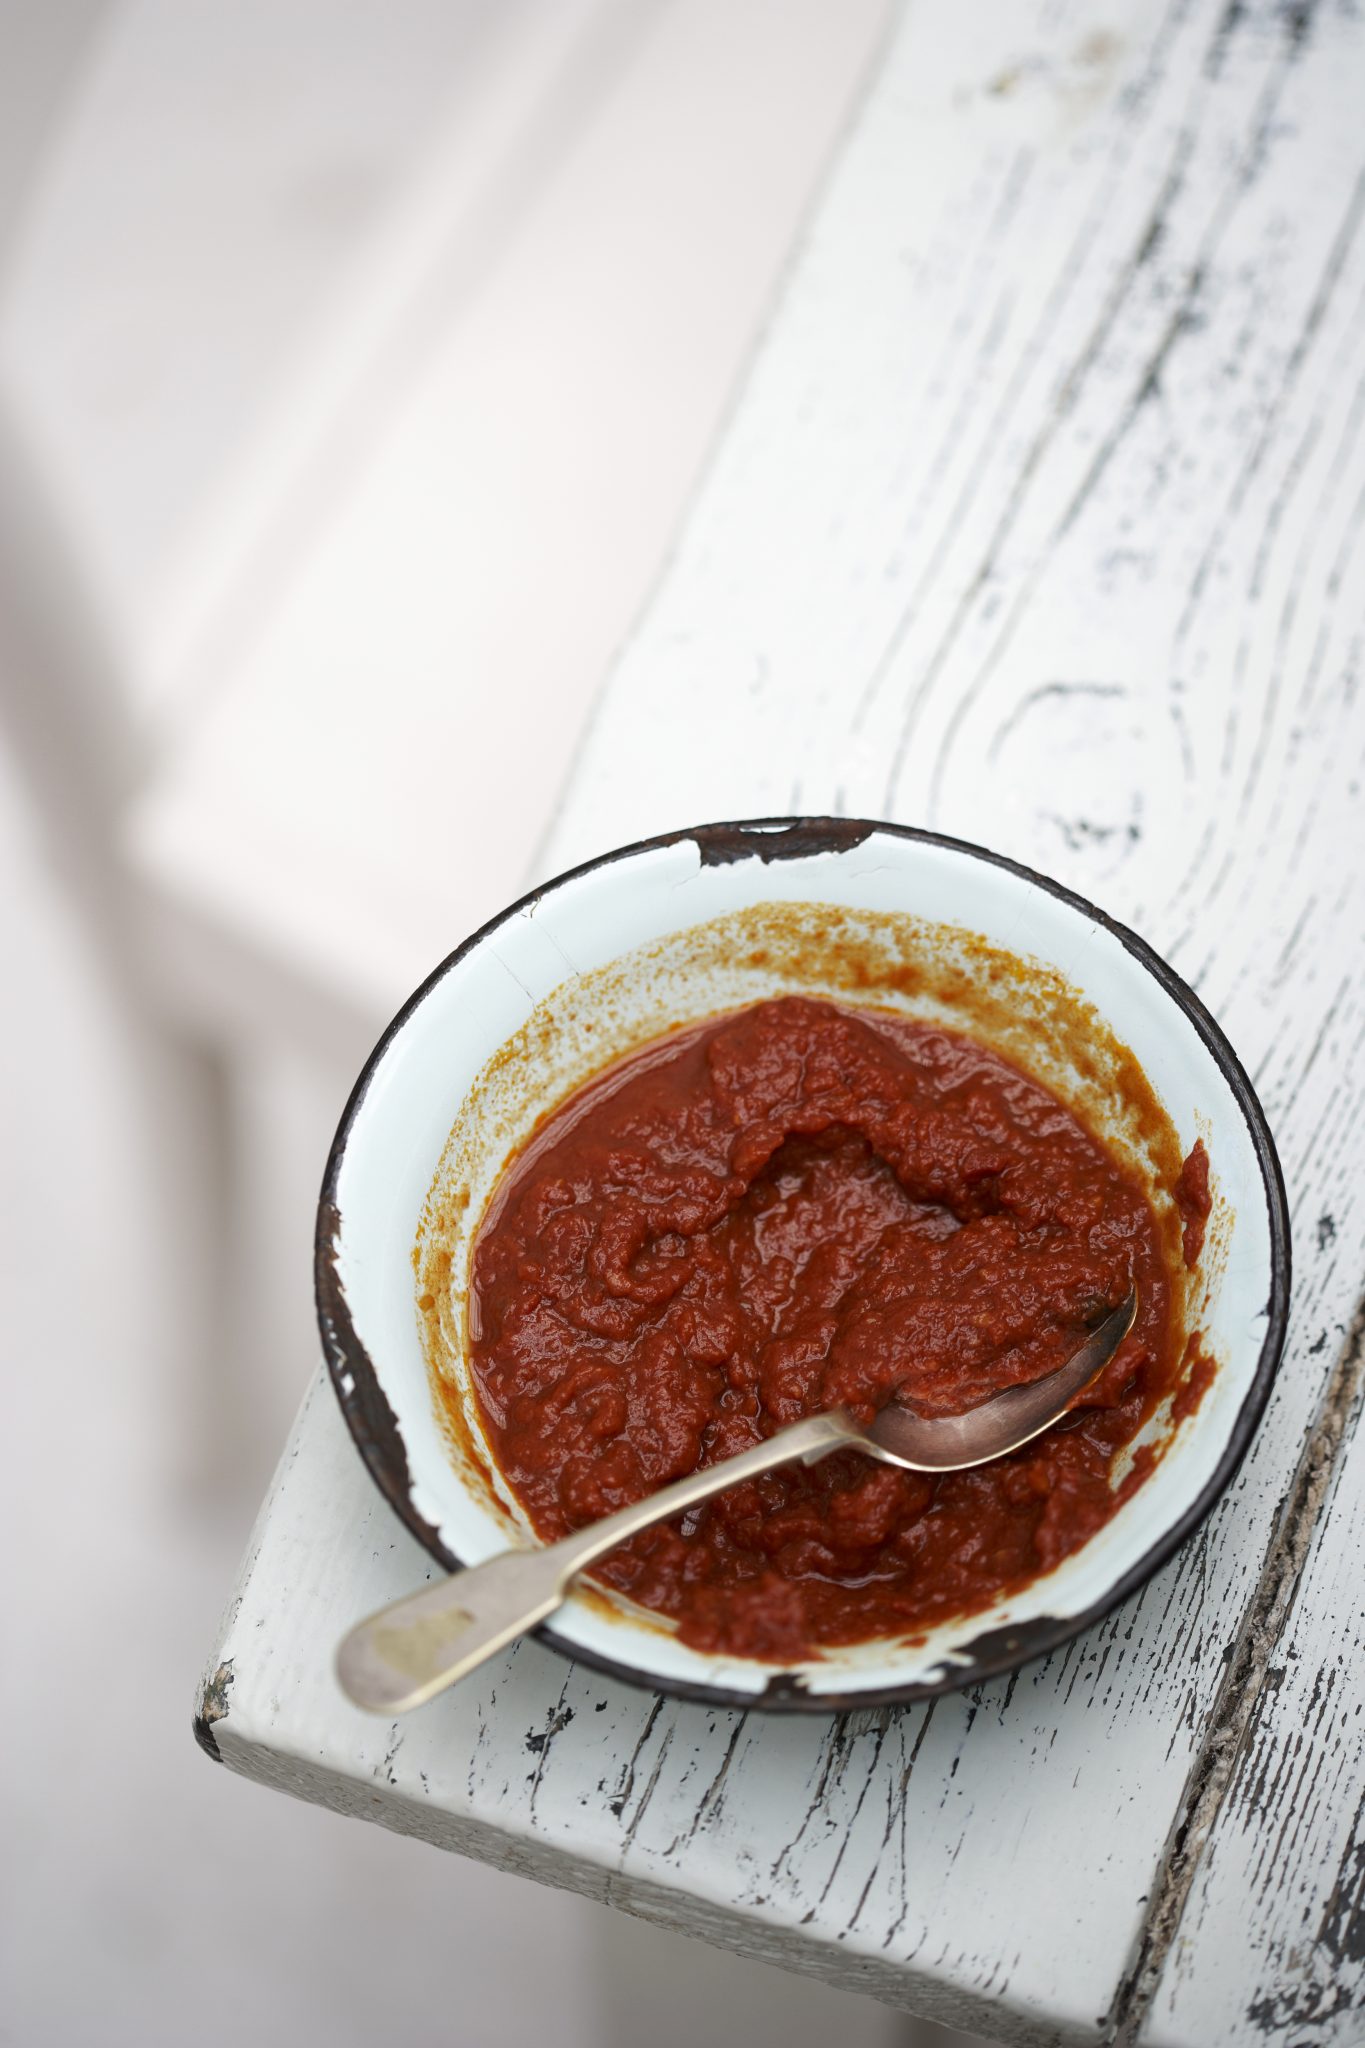
Braaing to celebrate Heritage Day tomorrow? Here are 2 very easy BBQ sauces/marinades you can make at home. Super tasty, with the added benefit that you’re not ingesting all those additives, stabilisers and preservatives in commercial sauces.

Both recipes were published in my cookbook Relish: Easy sauces, seasonings and condiments to make at home

EASY ALL-PURPOSE BBQ SAUCE 

Good on anything, especially burgers and beef.

Makes about 2 ½ cups (625ml) – enough for 1 kg meat.

Ingredients:

2 T (30 ml) sunflower oil

1 large onion, finely chopped or grated

2 t (10 ml) crushed fresh garlic

1 can (400g) tomato puree

4 T (60 ml) sun dried tomato paste or tomato concentrate

2 T (30 ml) soft brown sugar

2 T (30 ml) Worcestershire sauce

1 t (5 ml) cayenne

3 T (45 ml) red wine vinegar

2 T (30 ml) mild or Dijon mustard

Salt and pepper

Method:

  1. Cook the onion in the oil over medium heat until soft and translucent and just beginning to brown.
  2. Add the remaining ingredients and simmer for 5 minutes. If using as a marinade, let cool completely and pour over 1 kg meat to marinate between 1 and 24 hours.

If using as a sauce, continue to simmer until thick. Serve hot or cold.

AMERICAN SMOKY BARBECUE SAUCE

Enough for 6 lamb chump chops or 2 T-bone steaks.

Ingredients:

1 T (15 ml) molasses

1 t (5 ml) whiskey or bourbon

2 t (10 ml) smoked paprika

½ T (7.5ml) cider vinegar

1 T (15ml) tomato concentrate

2 T (30ml) tomato ketchup

Juice of one lime – about 1 T (15ml)

Method:

  1. Mix well until smooth and pour over meat. The sauce keeps well in the fridge for up to one month.
Easy All-Purpose BBQ Sauce. Photo Sean Calitz from my cookbook Relish

A Heritage of Preservation: La Motte Estate’s Culture of Winelands Cuisine

0

It’s no secret that I have an ongoing love affair with everything La Motte Wine Estate does. The only reason why I don’t write about it more often, is that I’ll then become an unofficial La Motte blog!

Besides, La Motte has its own blog, and a thing of beauty it is, too.

Click here to be taken to the La Motte Blog

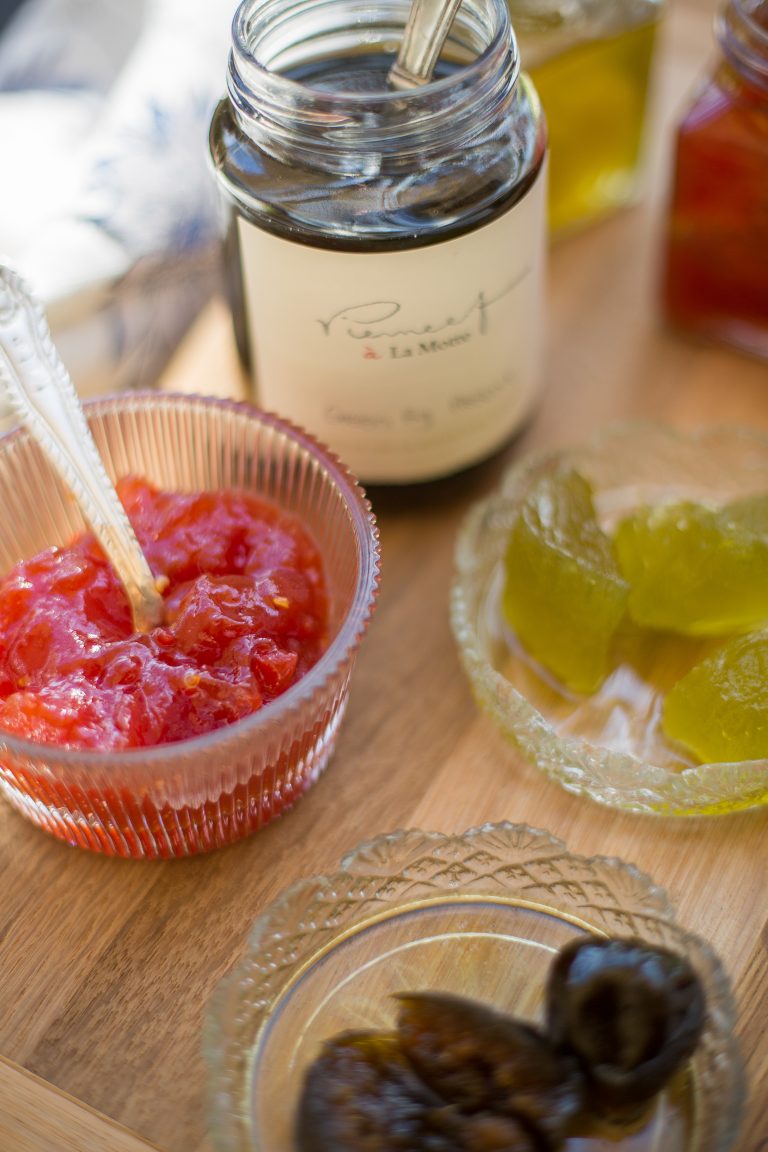
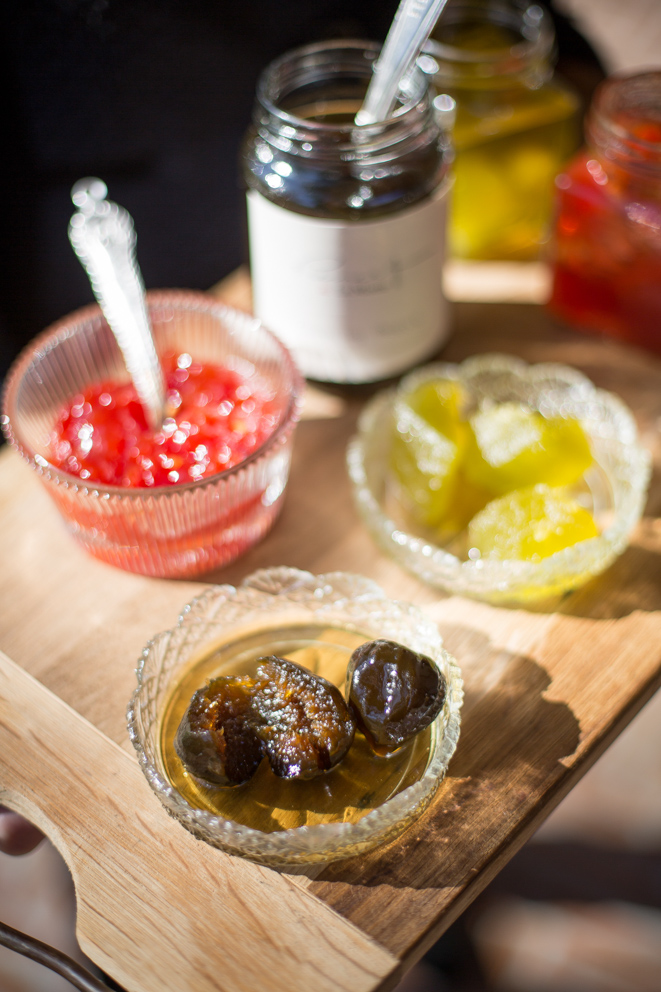
Yesterday I received a gift parcel of lovely hand-labelled preserves from their Farm Shop, and with it a media release about the Winelands Cuisine’s heritage of preserving. It’s so wonderfully well researched and written, I couldn’t possibly do it justice in my own words and so, with La Motte’s kind permission, I share with you here this article from their blog:

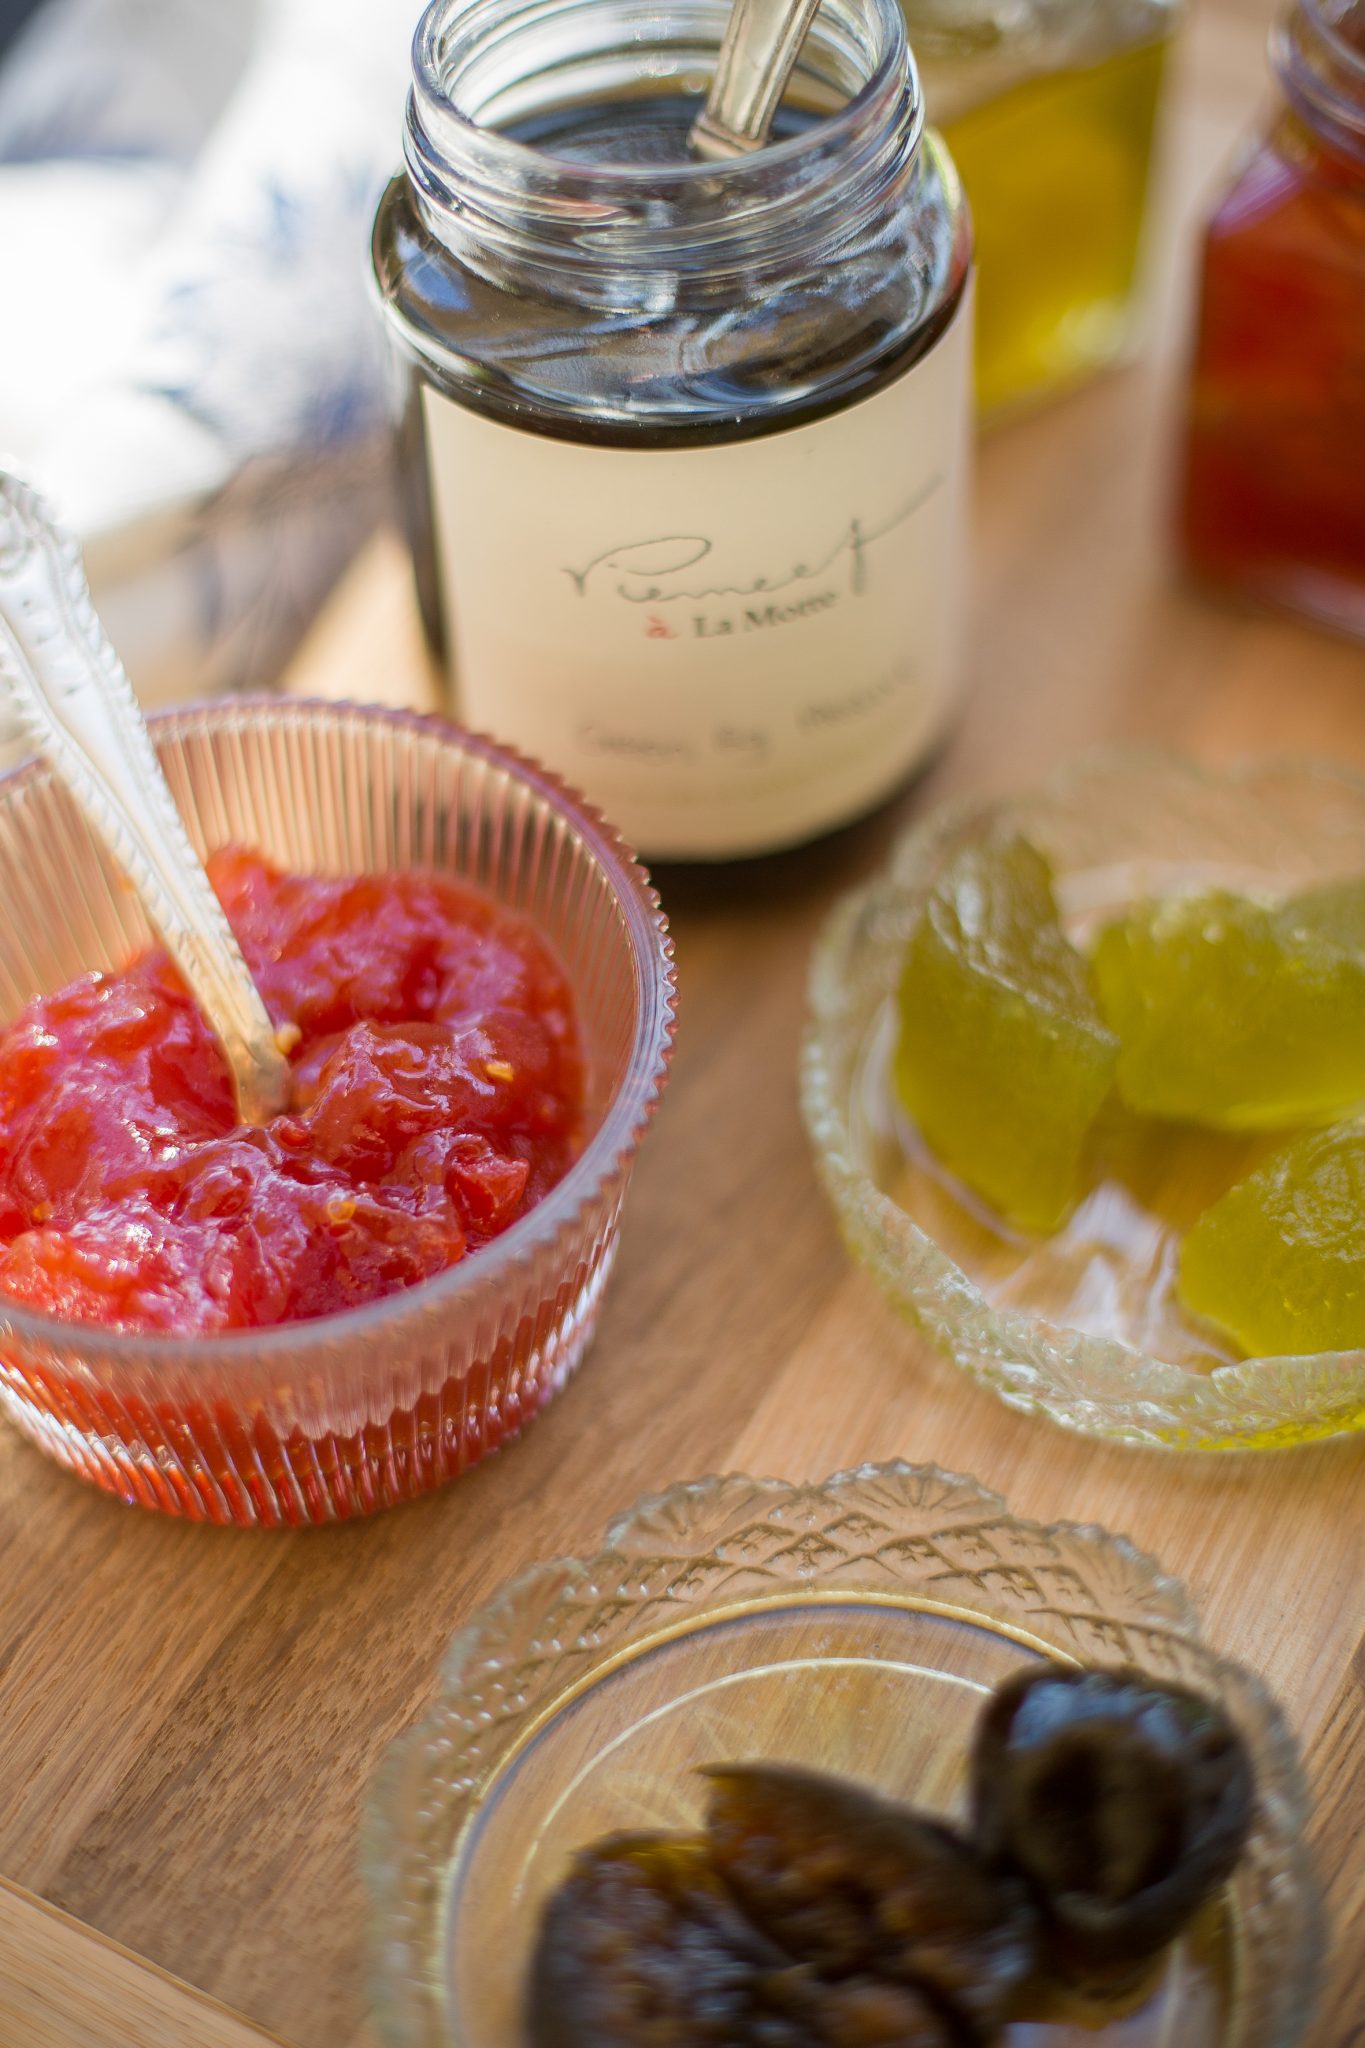
La Motte Preserves. Photo courtesy of La Motte

A HERITAGE OF PRESERVING

‘Being seasonal and sustainable is very fashionable at the moment – and with good reason. But as the saying goes: “there is nothing new under the sun”.  Even in the days when the first Europeans came to South Africa, seasonality and sustainability were of the utmost importance when it came to cooking. In fact, it influenced the culinary traditions of the Cape Winelands.

One such tradition is that of preserving fruit.

Although the preservation of fresh produce was not exclusive to the French, much of the tradition established at the Cape had a French origin. In celebration of Heritage Month we will be sharing some interesting facts, tips and traditions on the art of preservation.

Already in the time of Jan van Riebeeck, French chef, La Varenne, published a cookbook (1651) sharing recipes for jam and confiture using a variety of fruit such as cherries, quince, apricots, plums, peaches and green walnuts. These recipes covered the various techniques – from whole pieces of fruit to jelly, smooth jams, runny jams and syrups.

According to well-known food historian and culinary manager for La Motte,Hetta van Deventer-Terblanche, prior to the arrival of the French Huguenots at the Cape, the Dutch already had the habit of serving confiture after lunch.  The Huguenots did however make a significant contribution with their knowledge of preserves, jams and confiture as they came from a fruit-producing country. They also had exceptional skill when it came to cooking with grapes and producing must syrup.

Until the French established fruit orchids, green walnuts, turnips, quince and gherkins were often preserved at the Cape. The availability of a wider selection of fresh fruit encouraged its extensive use in confectionery (also read our blog Summer fruit and Sweet wine) and also main meals – from there the typical South African culinary tradition of having a sweetish element such as cooked apples or quince on the plate. Preserving the excess was however also priority and fruit was bottled and kept in the form of jams, jellies, confiture and chutneys.

The French influence is also clear in the Afrikaans terminology used to describe the various processes of preservation. It was customary in the Cape to serve whole pieces of fruit in dainty dishes with tea or coffee, not only after a meal. This fruit called konserf in Afrikaans is directly from the French conserve,which means canned. The French verb confire, meaning “to preserve”,  also translates as confiture or the Afrikaans konfituur.

Hetta shares some interesting facts:

Food Historian and La Motte’s Culinary Manager, Hetta van Deventer-Terblanche Photo coutesy of La Motte
Food Historian and La Motte’s Culinary Manager, Hetta van Deventer-Terblanche
  • I grew up in the Overberg where the belief was that green figs had to be preserved before October 15th or they would be hollow in the middle. The date might differ for other areas of course. Green figs preferably had to be cooked in a copper pot to ensure a good green colour. Rumour has it that some housewives added copper sulfate (blou fieterjoel), something I would never do!
  • Thought foraging was a new trend? Of course not! Food from the veld, such as sour figs (suurvytjies) also ended up as jams.
  • With limited resources, the new farmers at the Cape had to be innovative. The nectar of the Protea repens flower (sugar bush) was used to make syrup and when the first vineyard came into production, Brandy was distilled. That was followed by the well-known brandy-preserved grapes, called Kaapsejongens (translated as: young men from the Cape) and brandy-preserved small apricots, calledBoeremeisies (translated as farm girls).
  • While preserving the way our grandmothers used to do has become highly fashionable again, there was a time before the use of glass jars – not even mentioning sterilised jars! Fruit and vegetables were preserved in pottery and clay containers closed air-tight by using an animal bladder.
  • Quince has always been a favourite when it comes to preservation. In the time of the Pharaohs of Egypt, quince was already preserved with honey. (Although cane sugar has been known to mankind for millennia, in the West it has only been used in its current, refined form and as a commercial commodity since the 16th century.) Quince was also popular at the Cape and in Europe. Quince marmalade used to be similar to jam and it often ended up as a sweet, similar to today’s pâte de fruit.
  • Confused between jam, conserve, confiture, preserve and chutney? Food24 gives a great explanation, click here.

Inspired to do some preserving of your own? Here are some tips from thePierneef à La Motte kitchen:

  1. Fruit Jelly: Fruit jelly is not made with gelatin, but with the fruit’s own pectin. Lemon juice can be added to better the quality of the pectin, so keep that in mind when your jelly does not want to set. Add some lemon juice and cook it again. To ensure a lovely clear jelly, first filter the lemon juice and jelly through a muslin cloth. Choose fruit that are not too green or too ripe. When it is perfect for eating, it is perfect to preserve.
  2. Marmalade: Ensure that the strips of citrus have been cooked until very soft before you put it in the sugar syrup, otherwise it will not soften.
  3. Chalk: When you have to soak fruit such as makataan (wild melon) overnight in chalk water, use 2 tablespoons chalk on 4.5 litres of water. The fruit has to be properly covered by the chalk water – use a weight to keep them there! The chalk water adds a lovely crunch to the makataan.
  4. Sterilise bottles and lids.
  5. To test fruit such as apples and pears, poke them with a match. It has to go in easily but the fruit should not be too soft.
  6. To prevent fruit such as quince, pear and apples from discolouring while peeling, put the peeled fruit in lightly salted water.
  7. A squeeze of lemon juice works well with very sweet fruit jam such as ripe fig jam or peach jam.
  8. Fruit and sugar should never come to the boil before all the sugar has melted. Otherwise the sugar will form hard crystals.

September is the official start of Spring and early fruit now comes into season. Guavas, strawberries and early peaches such as Nectarines are already available in the Franschhoek Valley and Chef Michelle will be making some delicious preserves with the early harvest.

Pierneef à La Motte’s Chef Michelle Theron

Are you visiting us on 24 September for Heritage Day? Do chat to Pierneef’s à La Motte’s chef Michelle Theron about the art of preservation. She will be in Pierneef à La Motte restaurant’s demonstration kitchen and will be handing out jars of her delicious preserves to take home!

Chef Michelle’s recipe for Kumquat & mulled wine preserve

Chef Michelle’s recipe for Strawberry, lemongrass & ginger preserve

So there you have it! Make your Heritage Day extra special this year by visiting La Motte, and savouring the rich tradition of Winelands Cuisine.

La Motte preserves Photo courtesy La Motte

How To Make Meatloaf with Sticky Glaze

0
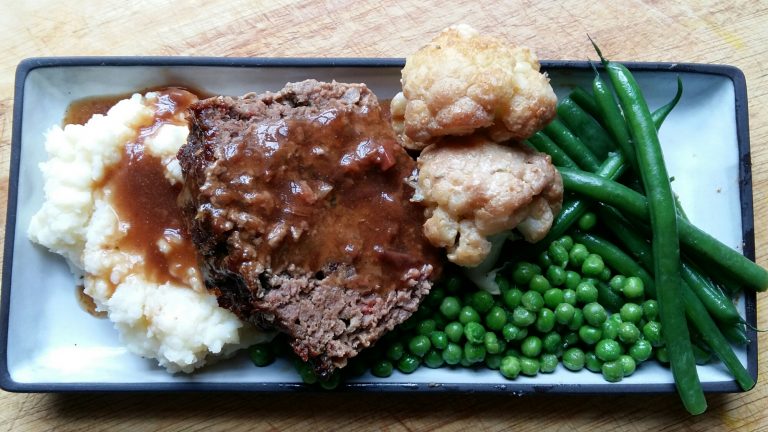
meat loaf sticky glaze sonia cabano blog eatdrinkcapetown
Meatloaf with sticky glaze, peas and mash with LOTS of gravy!

Meatloaf is such a sturdy, comforting thing. The name says it all doesn’t it?

No nasty surprises lurking there: just meat, minced, baked in a loaf shape. Simple, done.

It’s also a sure-fire way to make mince more appealing to teenagers. My own brood’s raging appetites seem to be matched only by their endless fussiness about food, and they LOVED this meatloaf, especially the sticky glaze.

‘Cook Western food, Ma’, my son pleaded recently, ‘no more curries, spicy or crazy Asian food, please!’

Thus instructed, I’ve been plowing my way through some of my mom’s old-fashioned recipes and came across this retro delight. I added minced bacon to the beef mince, but you can equally leave it out. Make gravy from a packet, and glam it up by adding some plum sauce or spicy plum chutney. Yes, really. Once cold, the meatloaf will firm up, and it will keep happily in the fridge for three days (if it lasts that long).

You probably don’t need telling that cold sliced meatloaf makes a brilliant sandwich filling too – I like loads of butter, soft lettuce, English mustard and tomato ketchup on my meatloaf sarmie. But served hot, it’s still a magnificent meal for young or old.

Meatloaf + mash + gravy + peas + tomato ketchup = classic goodness.

COOK’S NOTE: This recipe easily doubles up, which I’d recommend if you’re feeding men or teenagers. Because the meatloaf is just so damn good, everyone will have seconds.

MEATLOAF WITH STICKY GLAZE

Serves 4

Ingredients:

Meatloaf:

750g lean beef mince

125g back bacon, chopped (optional)

2 t (10 ml) fresh or 1 t (5 ml) dried oregano, finely chopped

1 t (5 ml) mustard powder

1 onion, very finely chopped and cooked until translucent in a little oil

1 clove fresh garlic, crushed

1 egg

1 T (15 ml) Worcestershire sauce

2 T (30 ml) tomato sauce or tomato puree

1/4 cup (60 ml) evaporated milk

1/2 cup (125 ml) breadcrumbs

salt and pepper

Glaze:

1/4 cup (90ml) fruity sweet chilli sauce

1 T (15ml) Worcestershire sauce

1 heaped teaspoon mustard powder

Method:

  1. Preheat oven to 180 C. Spray a 1 kg loaf tin with non-stick spray.
  2. Mix all the meatloaf ingredients together in a bowl until very thoroughly blended. Spoon into prepared loaf tin and press down slightly to compact the meatloaf before baking.
  3. Wrap the loaf tin in foil and place wrapped tin on a baking tray. Bake meatloaf in centre of oven for 55 minutes or until done – insert a sharp knife in centre of loaf to make sure that juices run clear. If still pink, bake another 15 minutes. Remove meatloaf from oven and discard foil.
  4.  Warm the sweet chilli sauce, Worcestershire sauce and mustard powder together in microwavable bowl, whisk until smooth and pour/brush liberally over top of meatloaf. Return to oven for another 15-20 minutes, until glaze looks dark and sticky.
  5. Remove from oven and let stand for 20 minutes before cutting into thick slices and serving with creamy mash, buttered baby peas and gravy.