Rice Krispie Marshmallow Treats

2

Sticky, chewy, crunchy and luridly coloured, Rice Krispie Marshmallow Treats have no nutritional value and a load of sugar, which makes them perfect for a children’s party.

I once came across a very sad little boy whose mum had sent him to a kiddies’ birthday party with a small plastic bag full of carrot sticks, cherry tomatoes and cheese cubes.

Determined to rescue the lad from his dietary purgatory, I led him by the hand to the festive table and encouraged him to pile his plate high with everything that would induce an apoplectic fit in his dear (absent) mama.

He loved it all, but it was the Rice Krispie Marshmallow Treats that lured him back again and again. He might even have stuffed a few in his trouser pockets to smuggle home, and who can blame him? They are utterly delicious.

Someone was looking for the recipe on Twitter a few days ago, which prompted me to dig out my late mom’s handwritten cookbook and look up her foolproof recipe.

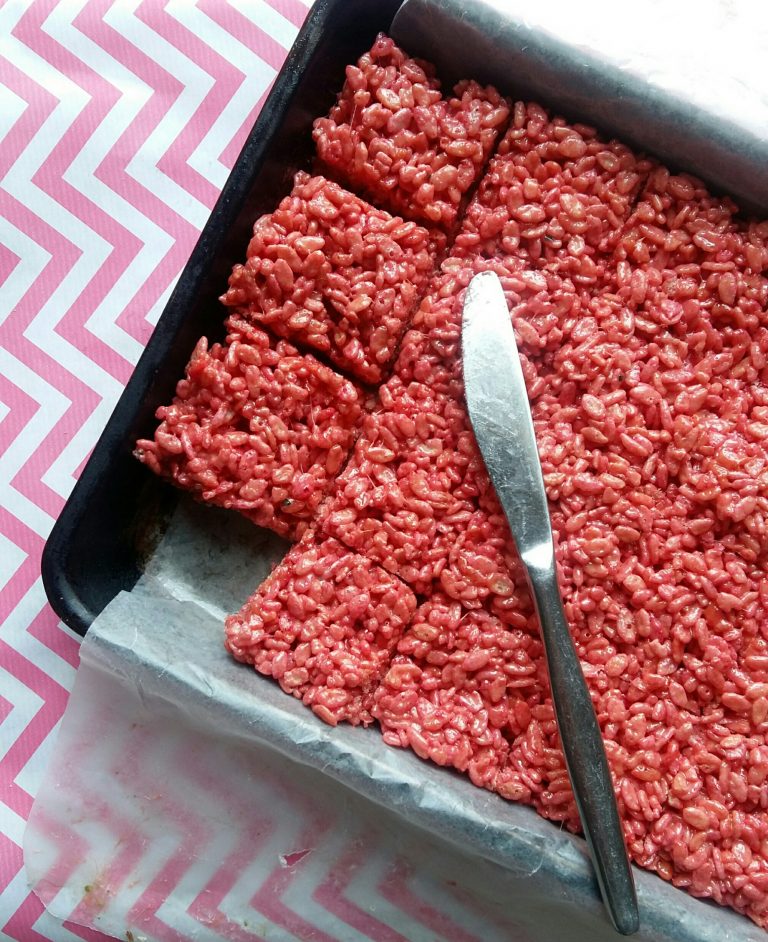
I used Strawberry Pops and added a few drops of red food colouring to get the full garish neon-pink effect but you can and should colour plain Rice Krispies every colour of the rainbow. If you felt like fiddling about you could even roll the mixture into balls, but ain’t nothing wrong with a plain, straight-up square or bar.

Here is the recipe:

RICE KRISPIE MARSHMALLOW TREATS

Makes 24 squares

Ingredients:

75g butter or margarine

3 T (45 ml) golden syrup

200g marshmallows

6 cups Rice Krispies or Strawberry Pops

Method:

  1. Use a 3cm deep baking tray that’s 24cm wide and 34 cm long. Spray the base with Cook & Spray, line the tin with wax paper and spray that too.
  2. Melt the butter, golden syrup and marshmallows over medium heat in a heavy-bottomed pot, stirring briskly all the while. Take care not to overheat the pot, as the marshmallows will turn colour. Keep stirring until the marshmallows have melted completely – it will become a weird-looking streaky goo but just keep stirring.
  3. Tip in all the cereal at once and stir very fast to mix completely.
  4. Tip the pot over the prepared tin and scoop all the mixture into the tin. Spray your palm with Cook & Spray and use it to flatten and smooth the Rice Krispie mixture. Let stand to set for 15 minutes before cutting into squares using an ordinary table knife. Make chopping movements with the blade to avoid dragging the setting mixture.
  5. Let cool completely and once the squares are hard and firm, remove from the tin and store in an airtight container. Will keep for a week in a cool dark place. The ideal accompaniment is a glass of pink Sparletta soda pop.
Smooth the Rice Krispie mixture in the prepared tin and leave to cool and set


Let stand until firm and cut into squares
Rice Krispie Marshmallow treats - delighting children and horrifying mothers since 1972
Rice Krispie Marshmallow treats – delighting children and horrifying mothers since 1972

Brazil Nut and Marshmallow Rocky Roads

0

There isn’t a child alive who doesn’t love a Rocky Road. Or a grown-up, for that matter. Unhealthy, I hear you say? Far from it! Dark chocolate is practically the poster child for the antioxidant brigade, brazil nuts are packed with cancer-fighting selenium, marshmallows remind you of the happy innocence of your youth…Rocky Roads are good  for you and I think you should have some.

In fact, I think you should go and make some right now.

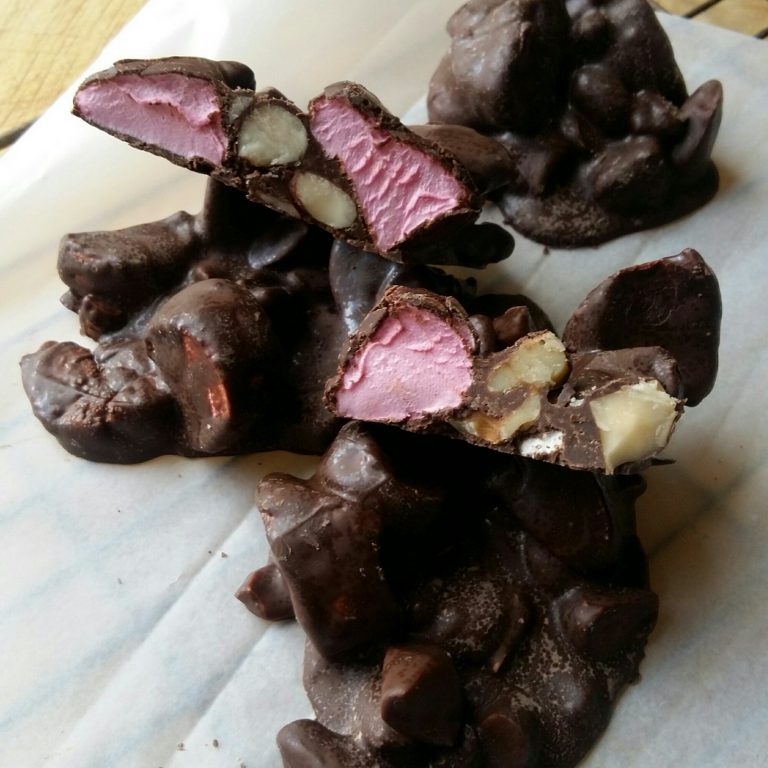
Nothing to it! You melt a little chocolate, you chop and stir in some nuts and marshmallows, you spoon the results into little heaps on a wax-paper lined tray, you wait for it to set, and HEY PRESTO: you got yourself some mouth thrills. Yummy, chewy, crunchy, nutty chocolate heaven right here –>

BRAZIL NUT AND MARSHMALLOW ROCKY ROADS

Makes 20-24 depending on size

100 g brazil nuts, roughly chopped (hazelnuts, almonds, walnuts and pecans or a mix of them all can also be used)

1 cup snipped-in-half mini-marshmallows

250g milk chocolate

200g good quality dark chocolate

Method:

  1. Mix the chopped nuts and snipped-up marshmallows in a large bowl. Line a large tray with wax paper.
  2. Place a large metal bowl over a saucepan filled with hot water. Break the chocolate into small squares and place in the bowl. Heat the water over gentle heat and as the chocolate begins to melt, stir with a wooden spoon. Do NOT let the water boil; this will cause the chocolate to seize and become granular and you’ll have to throw it away.
  3. Once all the chocolate is melted, immediately pour it over the nuts and marshmallows, using a rubber spatula to scrape all the chocolate out of the bowl.
  4. Use the same spoon to mix the nuts, marshmallows and chocolate together thoroughly. Use two metal spoons to scoop little mounds onto the wax paper and leave to cool and set completely before storing in an airtight container. Try not to eat them all at once.
Use two metal spoons to scoop little mounds onto the wax paper, leave to set and cool completely
Brazil Nut and Marshmallow Rocky Roads


Cherry Berry Apple Crumble

3


bowl cherries sonia cabano blog eatdrinkcapetown
Life is a bowl of cherries
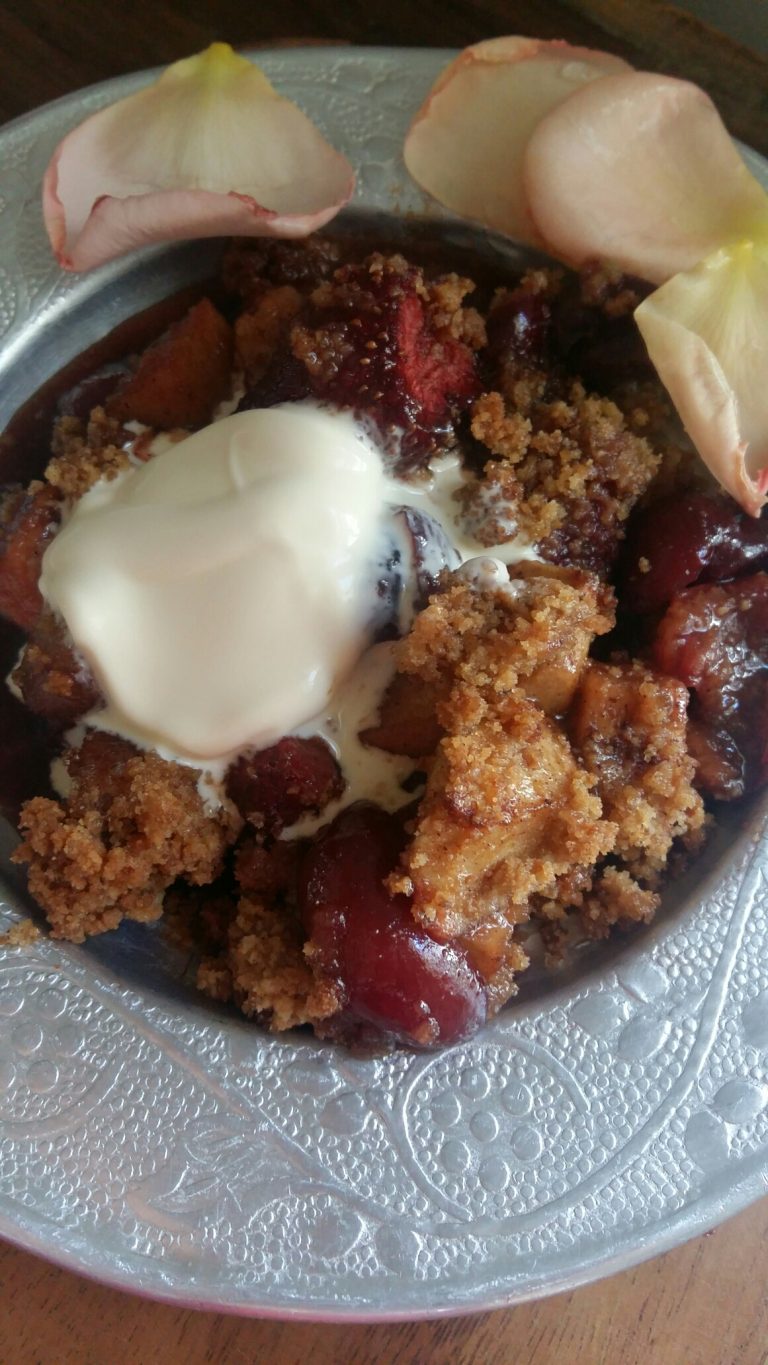
Cherry berry crumble with cream sonia cabano blog eatdrinkcapetown
Serve cherry crumble with cold, thick cream!

You can make this easy crumble with almost any mixture of fruit and berries, but the combination below is one of my all-time favourites. I have to physically restrain myself from eating third, fourth and fifth helpings and sometimes I only stop because my family want some too.

You could also add a few drops of almond essence to the fruit mixture before baking, and scatter a handful of flaked almonds on top before popping the crumble into the oven.

Served hot from the oven with a dollop of cold, thick cream on top, or cold with rich vanilla ice cream, it’s the kind of pud that makes you clap your hands and sing hallelujah, rejoicing that you have tastebuds.

CHERRY CRUMBLE WITH APPLE, STRAWBERRIES AND BLUEBERRIES

Serves 4-6, depending on level of greed

Ingredients:

1 1/2 cup fresh cherries, stoned and destalked before measuring

3 apples, peeled, cored and cut into smallish chunks

10 large strawberries, hulled and sliced into quarters

1 cup (250 ml) blueberries

1 t (5 ml) ground cinnamon

1/2 t (2.5 ml) ground nutmeg

1/2  cup (125 ml) brown sugar

1/2 t (2.5 ml) ground ginger

juice and grated zest of 1 orange

1/2 t (2.5ml) almond essence (optional)

Crumble topping:

1 1/2 cup (375 ml) fine cookie crumbs, flour or fine oats

1/2 cup (125 ml) brown sugar

1/2 t (2.5 ml) ground ginger

3/4 cup (180 ml) melted butter

Handful of flaked almonds (optional)

Method:

  1. Place all the berries and fruit in a bowl, add the spices and sugar and stir well. Drizzle over the juice and sprinkle the zest on top. Stir very lightly without bruising the fruit too much. Let stand for 30 minutes to 1 hour.
  2. Meanwhile, preheat the oven to 180 C and lightly butter the inside of a baking dish.
  3. Make the crumble topping: rub the butter lightly into the crumbs/flour/oats, sugar and ginger until loosely combined.
  4. Spoon the fruit and berries into the baking dish. Spoon the crumble topping over to cover completely, scatter over the flaked almonds if using and bake in the centre of the oven for 30 -35 minutes, until golden brown on top and the filling is bubbling out on the sides. Serve warm with cold, thick cream, or serve cold with rich vanilla ice cream.
cherries berries apple cerrhy crumble sonia cabano blog eatdrinkcapetown
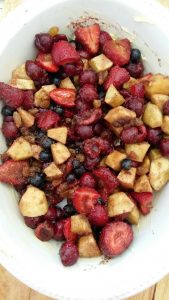
Combine stoned fresh cherries, chunks of cored, peeled apple, sliced strawberries and blueberries in a bowl 
cherry crumble apple spices sugar sonia cabano blog eatdrinckapetown
Combine cherries, strawberries, blueberries and apple in bowl, add sugar and spices. Drizzle over orange juice and grated orange zest, stir lightly. Spoon in a lightly buttered oven-proof dish.
Cherry berry crumble with cream sonia cabano blog eatdrinkcapetown
Cover with crumb mixture and bake at 180 C for 30 – 35 minutes until golden brown. Serve hot or cold with cream or ice cream


Daily Juice : Mighty Mary with avocado, yoghurt, celery & lemon

0

Need a pick-me-up after a rough night? Ditch the booze and reward yourself with this refreshing, slushy version of the traditional Bloody Mary instead! It’s soothing and nourishing, ideal for a hot summer’s day. Perfect for your lazy Sunday breakfast or brunch!

Adding yoghurt and ripe avocado amps up the nutrient value, and since it’s high in potassium and magnesium, it’s a fab smoothie for alleviating morning sickness or PMS symptoms. The probiotics in the yoghurt are very effective against nausea.

Avocados are an all-round wonder food, containing many vitamins and good fats. The high levels of folic acid and B vitamins make them a particularly good choice for pregnant women. Read here about the nutritional benefits of avocados: Why avocados are good for you

Use frozen plain yoghurt if you have some, to get the full ‘slush puppy’ effect.

(If you still feel like adding a tot of vodka, hey, I’m not stopping you!)

MIGHTY MARY TOMATO COCKTAIL

Serves 1

Ingredients:

1 cup (250 ml) tomato passata or tomato juice

1 cup (250 ml) plain Bulgarian yoghurt with live probiotic cultures

1/2 a ripe avocado, chopped into chunks

1 t (5 ml) balsamic vinegar

1 t (5 ml) lemon juice

1/2 t (2.5 ml) celery salt

dash of Tabasco or any other hot sauce

Method:

  1. Use a stick blender or your food processor to work all the ingredients into a smooth liquid and serve immediately, garnished with some fresh celery stalks.
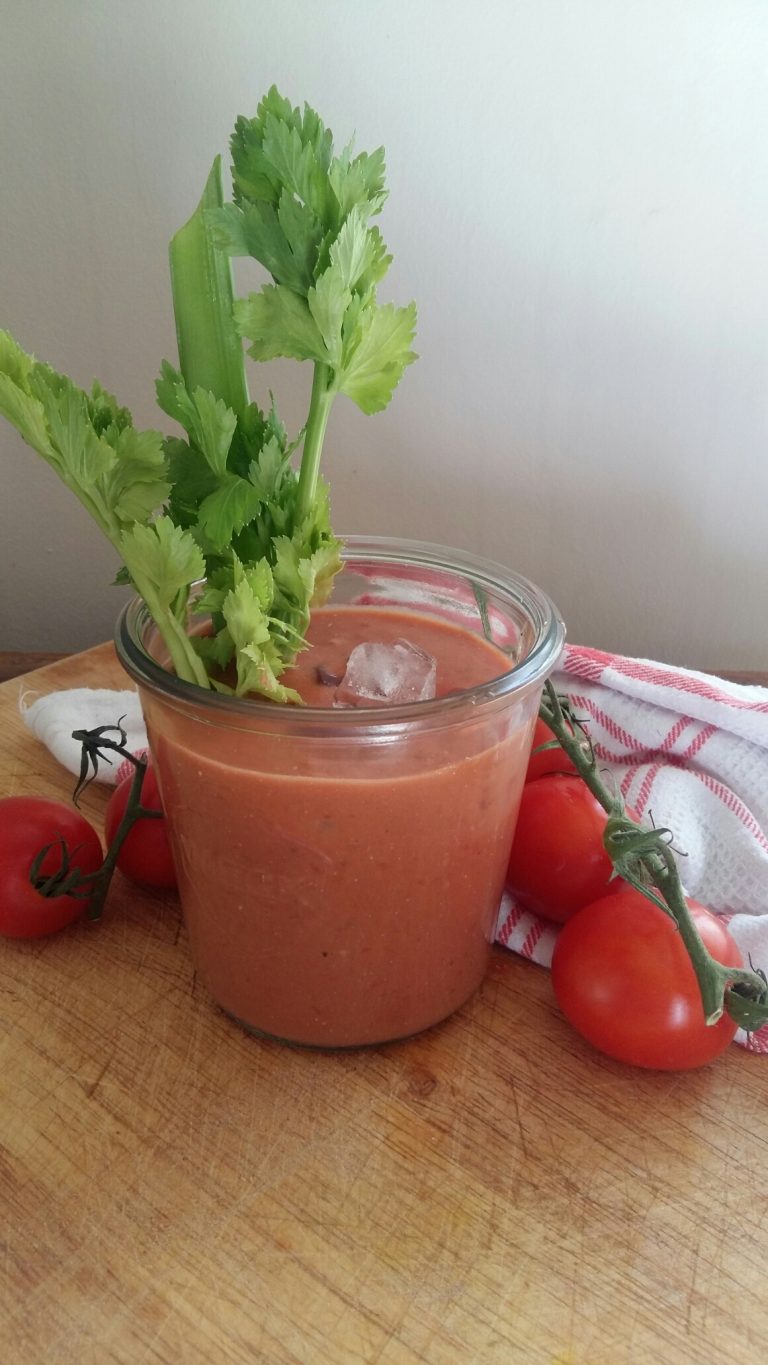
Mighty Mary tomato cocktail with avocado, lemon, balsamic vinegar and celery salt
Mighty Mary: tomato smoothie with yoghurt, lemon, avocado, balsamic vinegar and hot sauce

Pickled Cherries, Cherry Chutney and Cherries in Brandy or Vodka

0
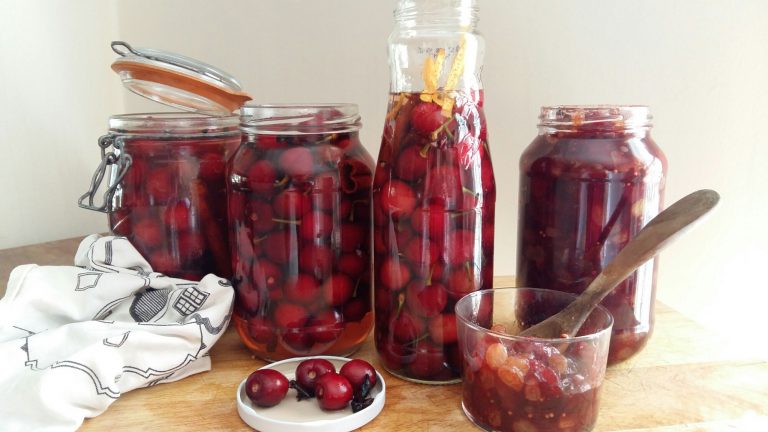
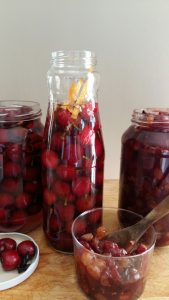
preserved cherries pickled cherries cherries in vodka cherry chutney sonia cabano blog eatdrinkcapetown
Preserving fresh cherries: pickled, in vodka and chutney

Cherry season is all too short and one of the highlights of my cooking year.

A few weeks ago, I suddenly realised that I’d seen no cherries around yet, even though October had come and gone. Had I missed the season? Could I really have been that preoccupied? Surely not – my cherry radar is always set on high alert…

Clutching my heart, I immediately started making enquiries on Facebook and was quickly reassured: not only was cherry season still to come, but I could now also order directly from the farm for fresh deliveries in town. Oh joy of joys! I spread the news with evangelical zeal, and sent in my order.

What a treat was in store for me…

Love cherries? Then I have two words for you: Cherry Time.

Find their Facebook page, give them a like, and email them tout suite at cherrytime@dutoit.com before all the cherries are sold out!

Cherry Time delivers beautifully packaged 2 kg boxes for the duration of the season in Ceres, Riebeek-Kasteel, Paarl, Stellenbosch, Somerset-West, Franschhoek, Cape Town. At a mere R150 per box – yes, that’s R150 for 2 kg of the plumpest, juiciest, biggest and most delicious cherries you’ve ever seen.

I literally did a double take when I picked up my order – I have really never seen such gorgeous cherries in my life. Ever. They make those scrawny little imported jobs you find in teeny-tiny, hyper-expensive punnets look positively anorexic.

cherry time delivery sonia cabano blog eatdrinkcapetown
Cherry Time delivery
box cherry time sonia cabano blog eatdrinkcapetown
Cherries from Cherry Time delivery

Needless to say, I’ve been having loads of fun in my kitchen, cooking & baking up a storm (first up was a proper cherry pie, and a rich cherry-brandy sauce with roast duck) and also preserving some for future enjoyment.

I’m happy to share some of my favourite cherry recipes with you in the next few posts.

CHERRY CHUTNEY

This will be brilliant with your Xmas ham!

The hardest part of this recipe is stoning and destalking the fruit.

(Save the stalks, by the way, and steep them in boiling water for up to an hour to make a great tea/extract to use against cystitis and urinary tract infections in young and old.

Makes about 3 cups (750ml)

Ingredients:

1 kg stoned and halved cherries, weighed after removing stones

2 1/2 cups (625ml) golden sultanas or cranberries

1/2 cup (125 ml) white grape vinegar

1 cup (250ml) soft brown sugar – treacle sugar

1/2 t (2.5ml) ground ginger

2 star anise flowers

1 T (15ml) yellow mustard seeds

1 cinnamon quill, about 5cm length

2 small dried chillies

Method:

  1. Halve and pit the cherries and weigh them. Place in a large non-reactive, heavy-based pot and add the rest of the ingredients. Stir through lightly to mix well.
  2. Bring to the boil and cook briskly for 3-5 minutes until the sugar is completely dissolved. Stir.
  3. Lower the heat and simmer gently until the chutney thickens and becomes sticky – about 20 minutes. Ladle into clean, sterilised glass jars while warm and let cool before screwing caps on. Store in a cool dark place for up to 6 months but refrigerate once opened. 
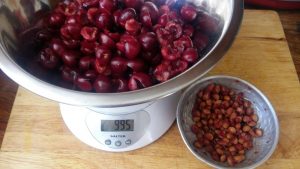
weigh cherries cherry chutney sonia cabano blog eatdrinkcapetown
Stone and destalk the cherries and weigh out 1 kilogram
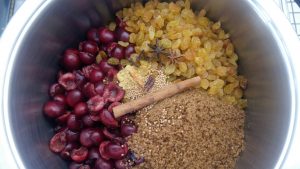
cherry chutney pot rest of ingredients sonia cabano blog eatdrinkcapetown
Place cherries in a large pot with rest of the ingredients
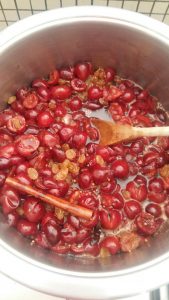
boil cherry chutney sonia cabano blog eatdrinkcapetown
Bring to the boil for 5 minutes to dissolve the sugar, turn heat down and cook gently for 20 minutes until thick and sticky
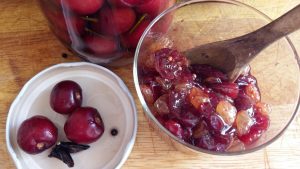
spoon into sterilised jars cherry chutney sonia cabano blog eatdrinkcapetown
Ladle into clean sterilised jars while hot and seal once cooled down. Keep in a cool dark place for up to 6 months but refrigerate once opened

SPICED CHERRIES IN VODKA

You can also make spiced cherries in brandy or grappa. It needs to stand for at least 1 month before serving. The remaining alcohol makes a delightful digestive in wee nips.

Makes about 2 kg

Ingredients:

2 kg cherries, rinsed and left to dry completely

10 cloves

2 cinnamon quills, snapped in half

8 coriander seeds

1 t (5ml) black peppercorns

4 strips of orange peel, white pith cut away

250g castor sugar

6 cups (1.5l) brandy or grappa

Method:

  1. Use sharp scissors to trim the cherry stalks, leaving a bit for handling. Prick each cherry 7 or 8 times with a clean sterilized sewing needle.
  2. Layer in sterilized jars with the sugar and spices. Cover with brandy or grappa and screw on the sterilized lids. Leave in a cool dark place for at least one month. Will keep for up to a year.
cherries in vodka sonia cabano blog eatdinkcapetown
Cherries in vodka

PICKLED CHERRIES 

Delicious with cold meats and cheese.  For best results, let the chutney mature for at least one month before serving.

Makes about 1 kg

Ingredients:

1 kg cherries

850ml white wine or cider vinegar

700g castor sugar

25 black peppercorns

1 star anise flower

12 cloves

6 bay leaves

2 whole cloves of garlic, peeled and thinly sliced

Method:

  1. Rinse the cherries and leave to dry completely. Discard any that are bruised and trim the stalks to 1 cm.
  2. Boil the vinegar with the sugar and spices for 10 minutes and let cool completely.
  3. Pack the cherries in sterilized jars and cover with the pickle syrup. Screw on the sterilized lids and leave in a cool dark place for 1 month.
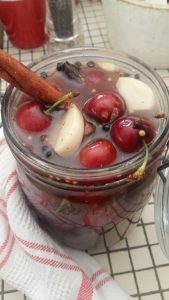
pickled cherries sonia cabano blog eatdrinkcapetown
Pickled cherries
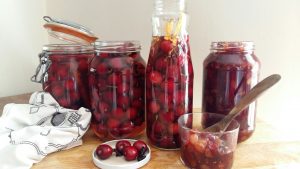
preserving cherries pickled vodka chutney sonia cabano blog eatdrinkcapetown
Pickled cherries, cherries in vodka, cherry chutney


Daily Juice: Cherry Berry Bang

0
image
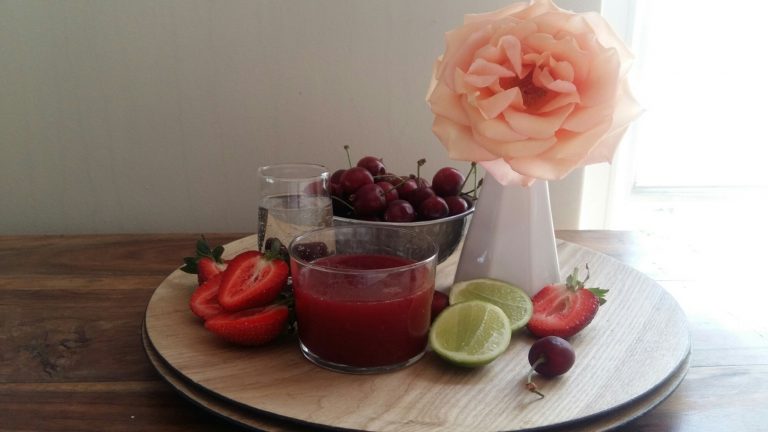
Summer’s Best: Cherry Berry Bang with fresh cherries

What do you do when you’ve bought 6 kgs of fresh cherries wholesale? Well, just about everything you can!

Last week I picked up a delivery of 3 x 2 kg boxes of the freshest, plumpest, juiciest cherries I’ve ever come across. I’d ordered them online from local supplier Cherry Time and these beauts make supermarket (mostly imported) cherries look positively anorexic. At R 150 per 2 kg box (yes, you read that right) you should hurry up and order before the season comes to an end in December!

I’ve already made spiced pickled cherries and cherries preserved in vodka, cherry and apple pie, eaten vast quantities fresh and concocted a cherry sauce for roast duck. What next?

This morning I blitzed up a cup of stoned cherries with a cup of Sir Fruit’s The Berries and 5 nice, plump strawberries. Once liquidized, in went a dash of fresh lime juice, a cupful of soda water and boom! Cherry Berry Bang was created!

Cherries have been prized for centuries for their cleansing and detoxifying properties. The juice helps remove excess fluids and toxins, aids and assists the kidneys and is super high in anti-oxidants. A tea made from the stems is a very good diuretic and especially helpful against cystitis and urinary tract infections. Cherries cleanse the gut, relieving constipation and irritable bowel syndrome. It is also a known remedy for rheumatism and gout, as it removes excess acidity from joints and muscles.

Strawberries freshen the breath and aid against high blood pressure. They help cleanse the blood and clear the skin, settle irritated digestive systems and are also useful for dry coughs and week respiratory systems.

Besides all this, a Cherry Berry Bang is damn delicious, so don’t deprive yourself of one!

CHERRY BERRY BANG

Serves 1

Ingredients:

1 cup pitted fresh cherries

1 cup Sir Fruit The Berries juice (alternatively use Sir Fruit cranberry, pomegranate or strawberry juice)

5 large fresh strawberries, hulled and chopped up

juice of half a lime

1 cup (250 ml) sparkling mineral or soda water

Method:

  1. Liquidise the cherries, strawberries and juice together until smooth. Stir in the juice of half a lime, add the soda water or sparkling mineral water and serve immediately.
Cherry Berry Bang with fresh cherries and strawberries, Sir Fruit The Berries, a dash of lime and soda water!


How to Make Tofu Baked with Tomato and Basil Pesto

1

A lot of people find tofu tricky but I love it. Granted, it doesn’t look, smell or taste like much on its own but boy, treated properly with some good flavourings it sure turns into a knock-out meal. Packed with protein, low in fat and easily digested, you’d really do well to consider a little fling with tofu sometime soon. A big bonus is that tofu dishes are really quick to prepare, too, and depending what you add to it, perfectly fine on the Banting or low carb’high fat diets

Knowing what kind of tofu to use in which dishes goes a long way towards guaranteed success, and observing a few basic rules.

  1. Yes, tofu is tasteless on its own, but readily slurps up the flavours of whatever it’s cooked or marinated with. Sweet or savoury, cut in steaks or scrambled, cubed and poached in delicate broths or whipped into egg-free mayonnaise – as long as the accompanying ingredients are good ‘n’ tasty, so will your tofu be.
  2. Firm, block or ‘pressed’ tofu is sturdier and therefore used in stir fries, grills. kebabs etc. Silken tofu has a much softer, almost quivering texture and this is used in puddings, mousses, scrambles and sauces like egg-free mayonnaise.
  3. Buy fresh – like most food, tofu is best when freshly made. I buy blocks in water from my local Asian supermarkets, and at R6 per block it’s HUGELY cheaper than the tetrapak variety sold in supermarkets. There are also a few good local brands of pressed tofu for sale in health shops like Wellness Warehouse – although pricier than the Asian versions, it’s really tasty and come in plain or smoked. These retail at about R44.00 – R54.00 per 400 g block. The advantage of these brands is that they’re pretty firm and don’t need additional pressing to drain excess water.
  4. All tofu has a high water content and will yield better results if pressed before use – place tofu blocks on a plate lined with clean kitchen towel or absorbent kitchen paper, cover with another towel and place a plate on top. Weight down with a can of beans or similar, and let stand for at least 30 minutes before patting dry and seasoning or marinating.

As I was pottering about the kitchen the other day planning my daughter’s vegetarian meals, I looked at a block of tofu and went ‘Mmm…I’m taking this baby to the Mediterranean. Bring on the pesto and tomatoes!’

And whyever not?

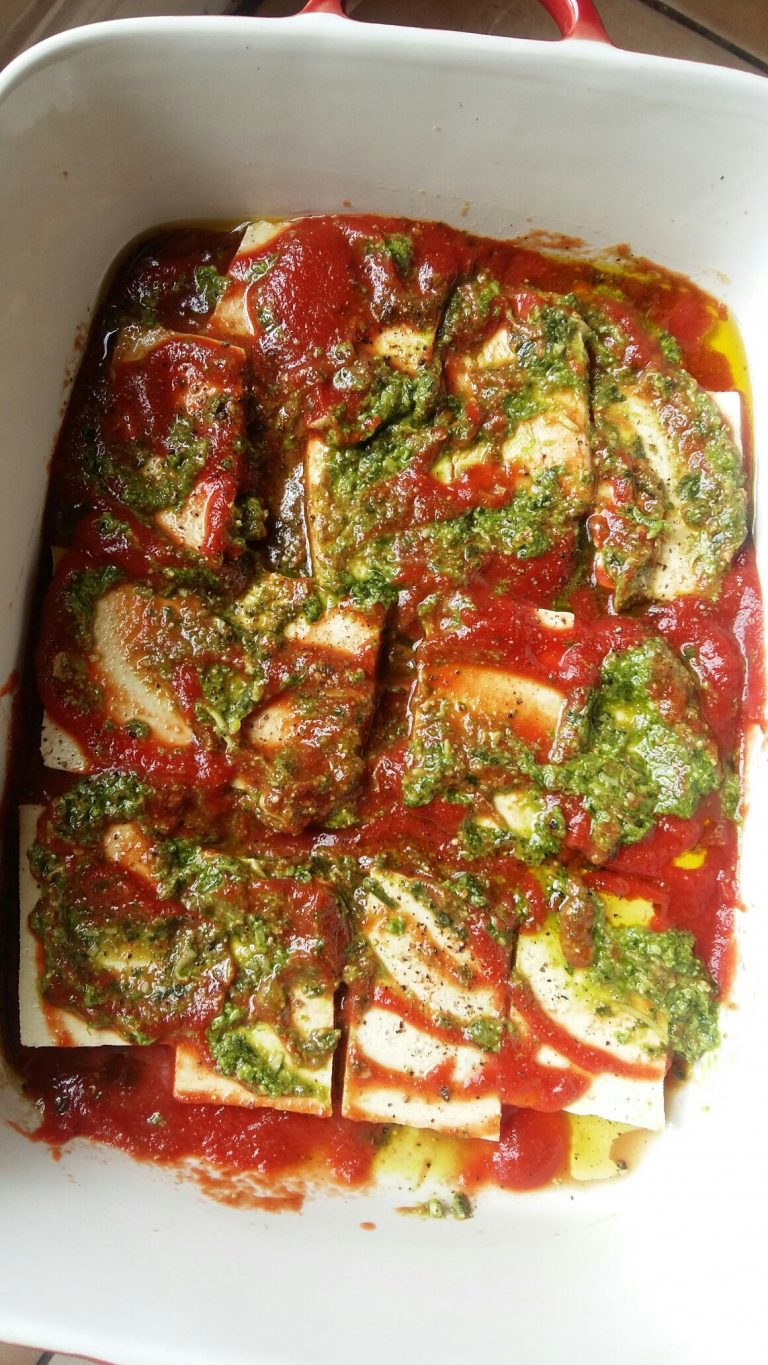
Cut the tofu into 3/4 cm thick slices, place them in a single layer in an ovenproof dish and slather both sides generously with basil pesto and tomato passata. (You could also use tomato puree.) Several glugs of fruity extra virgin olive oil for the tofu to bathe in, some salt and a few grindings of black pepper and voila! Your tofu is now well on its way towards becoming Mediterranean.

Let stand for at least an hour, perhaps turning it over now and then, and bake for 25 minutes at 180 C. (I also drizzle over some Braggs’ liquid aminos before baking, because I’m totally addicted to it.)

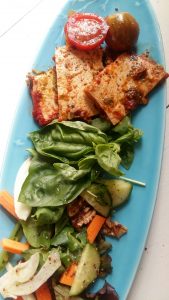
Enjoy your tomato and pesto baked tofu while still warm with a hearty bean salad and some greens, or let it cool and stuff into a crusty ciabatta roll along with ripe red tomato slices, rocket, thin red onion rings and another smear of basil pesto.

prepare baked tofu sonia cabano blog eatdrinkcapetown
Prepare an ovenproof dish by spreading some olive oil, tomato passata and basil pesto on the base. Season well with salt and pepper.
tomato pesto tofu sonia cabano blog eatdrinkcapetown
Layer the sliced, firm tofu in the dish and spread with 1/2 cup (125ml) tomato passata and 1/2 jar Pesto Princess basil pesto
baked tofu salad sonia cabano blog eatdrinkcapetown
Bake for 25 minutes at 180 C and serve with hot or room temperature with green salad or a hearty bean salad. Keeps well in fridge up to 2 days.


Eggplant Rolls Baked with Halloumi, Rocket and Red Peppers

1

My 14 year-old daughter recently decided to be vegetarian. Much as I support her lifestyle choices (hear hear for the plant food lovers), I suddenly find myself thinking a lot more about food and cooking than I usually do.

It’s so easy to just fling a chop or steak in a pan, prep some sides and call it lunch or dinner, right?

Fact is, I live on plant food most of the time. OK, and a lot of starch as well. I’m pretty sussed when it comes to my own nutritional needs, but when it comes to taking responsibility for someone else’s wellbeing, you suddenly start taking it a lot more seriously.

My main concern is that my daughter will get enough protein. And that she will continue to find food fun and interesting.

She’s pretty vocal in her disappointment when I make dishes she doesn’t like but hey, we’re on a learning curve here…while I can live very happily on rice and lentils with a bit of spice added for a week or so, my daughter demands variety and a lot more excitement on her plate.

But then again, it’s high time she learned to cook for herself.

As my mom used to say, ‘Hunger is the best sauce’.

My challenge at the moment is to make plant food interesting and delicious for my daughter.

And this is still one of my all-time favourite vegetarian recipes. It’s got texture, flavour, colour, boldness and punch.

EGGPLANT ROLLS BAKED WITH HALLOUMI, ROCKET AND RED PEPPERS

Serves 4

Ingredients:

2 medium-sized eggplants

4T (60ml) olive oil

Salt and pepper

4T (60ml) tahini

1 large or 2 medium sweet red peppers

50g (large handful) rocket

200g halloumi

4T (60ml) basil pesto

1 x 410g can chopped tomatoes, plain or seasoned

3T (45ml) olive oil

4T (60ml) breadcrumbs or grated Parmesan, or both

Method:

  1. Preheat oven to 200 C. Lightly grease a baking tray.
  2. Pour the contents of the tin of tomatoes and 3T (45ml) olive oil in a baking dish and season. Set aside while you roast the eggplant.
  3. Slice eggplants lengthways into ¾ cm thick slices. Brush lightly on both sides with olive oil, season and roast on a baking tray in a hot oven until golden brown, about 15 minutes. Remove and let cool but leave the oven on.
  4. Brush one side of each eggplant slice with some tahini.
  5. Cut the peppers and halloumi into strips about ½ cm thick.
  6. Place a few strips of pepper and halloumi horizontally across the thin end of an eggplant slice, add a few rocket leaves and a little drizzle of pesto.
  7. Roll up the eggplant slices around the filling and place in the oven dish with chopped tomato and olive oil. Sprinkle over breadcrumbs or Parmesan and bake for 35-40 minutes until golden brown.
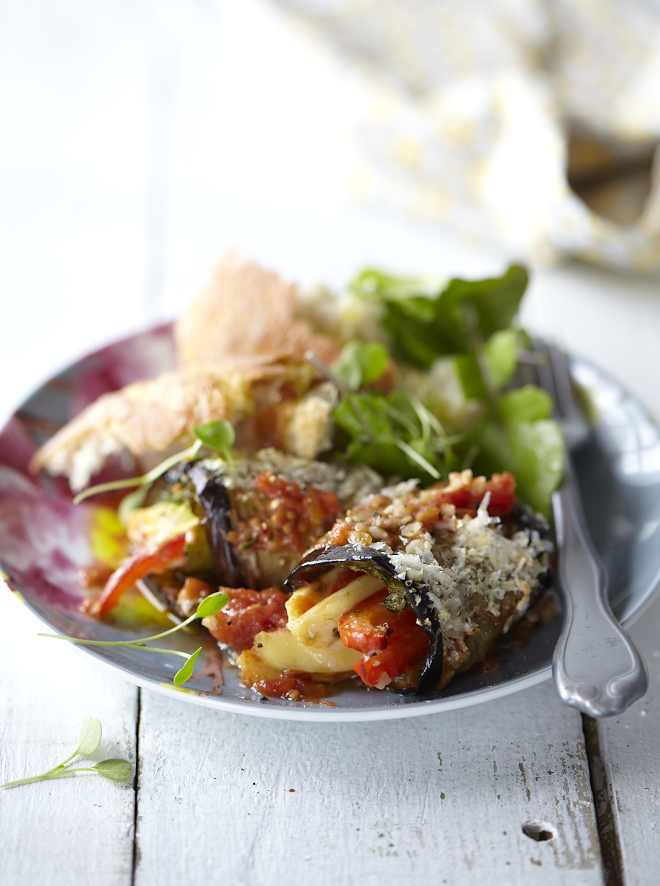
Eggplant rolls baked with halloumi, rocket and red peppers Phot by Sean Calitz
Eggplant rolls baked with halloumi, rocket and red peppers Photo by Sean Calitz

Arroz de Mariscos – Portuguese Seafood Rice

4
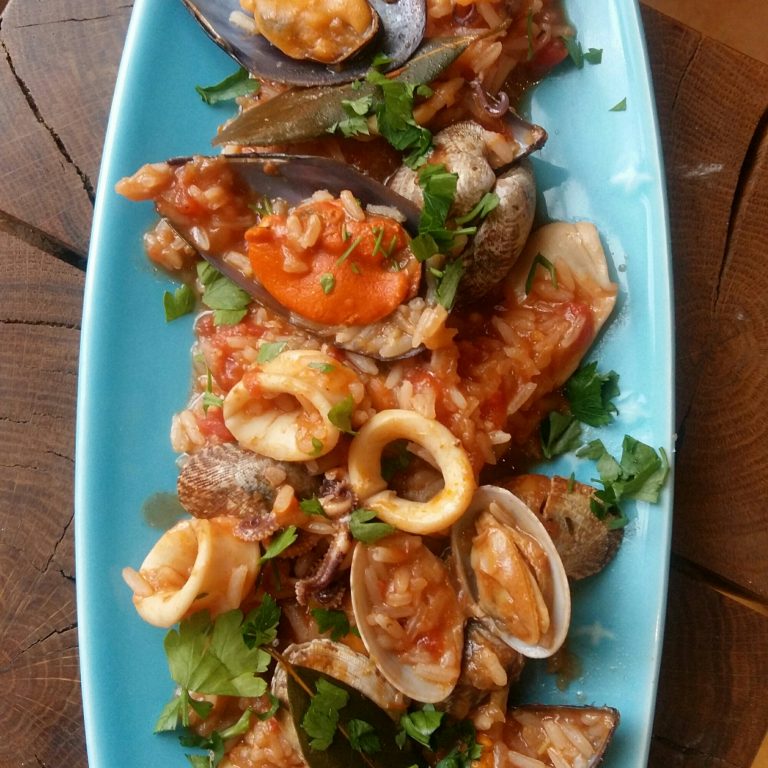
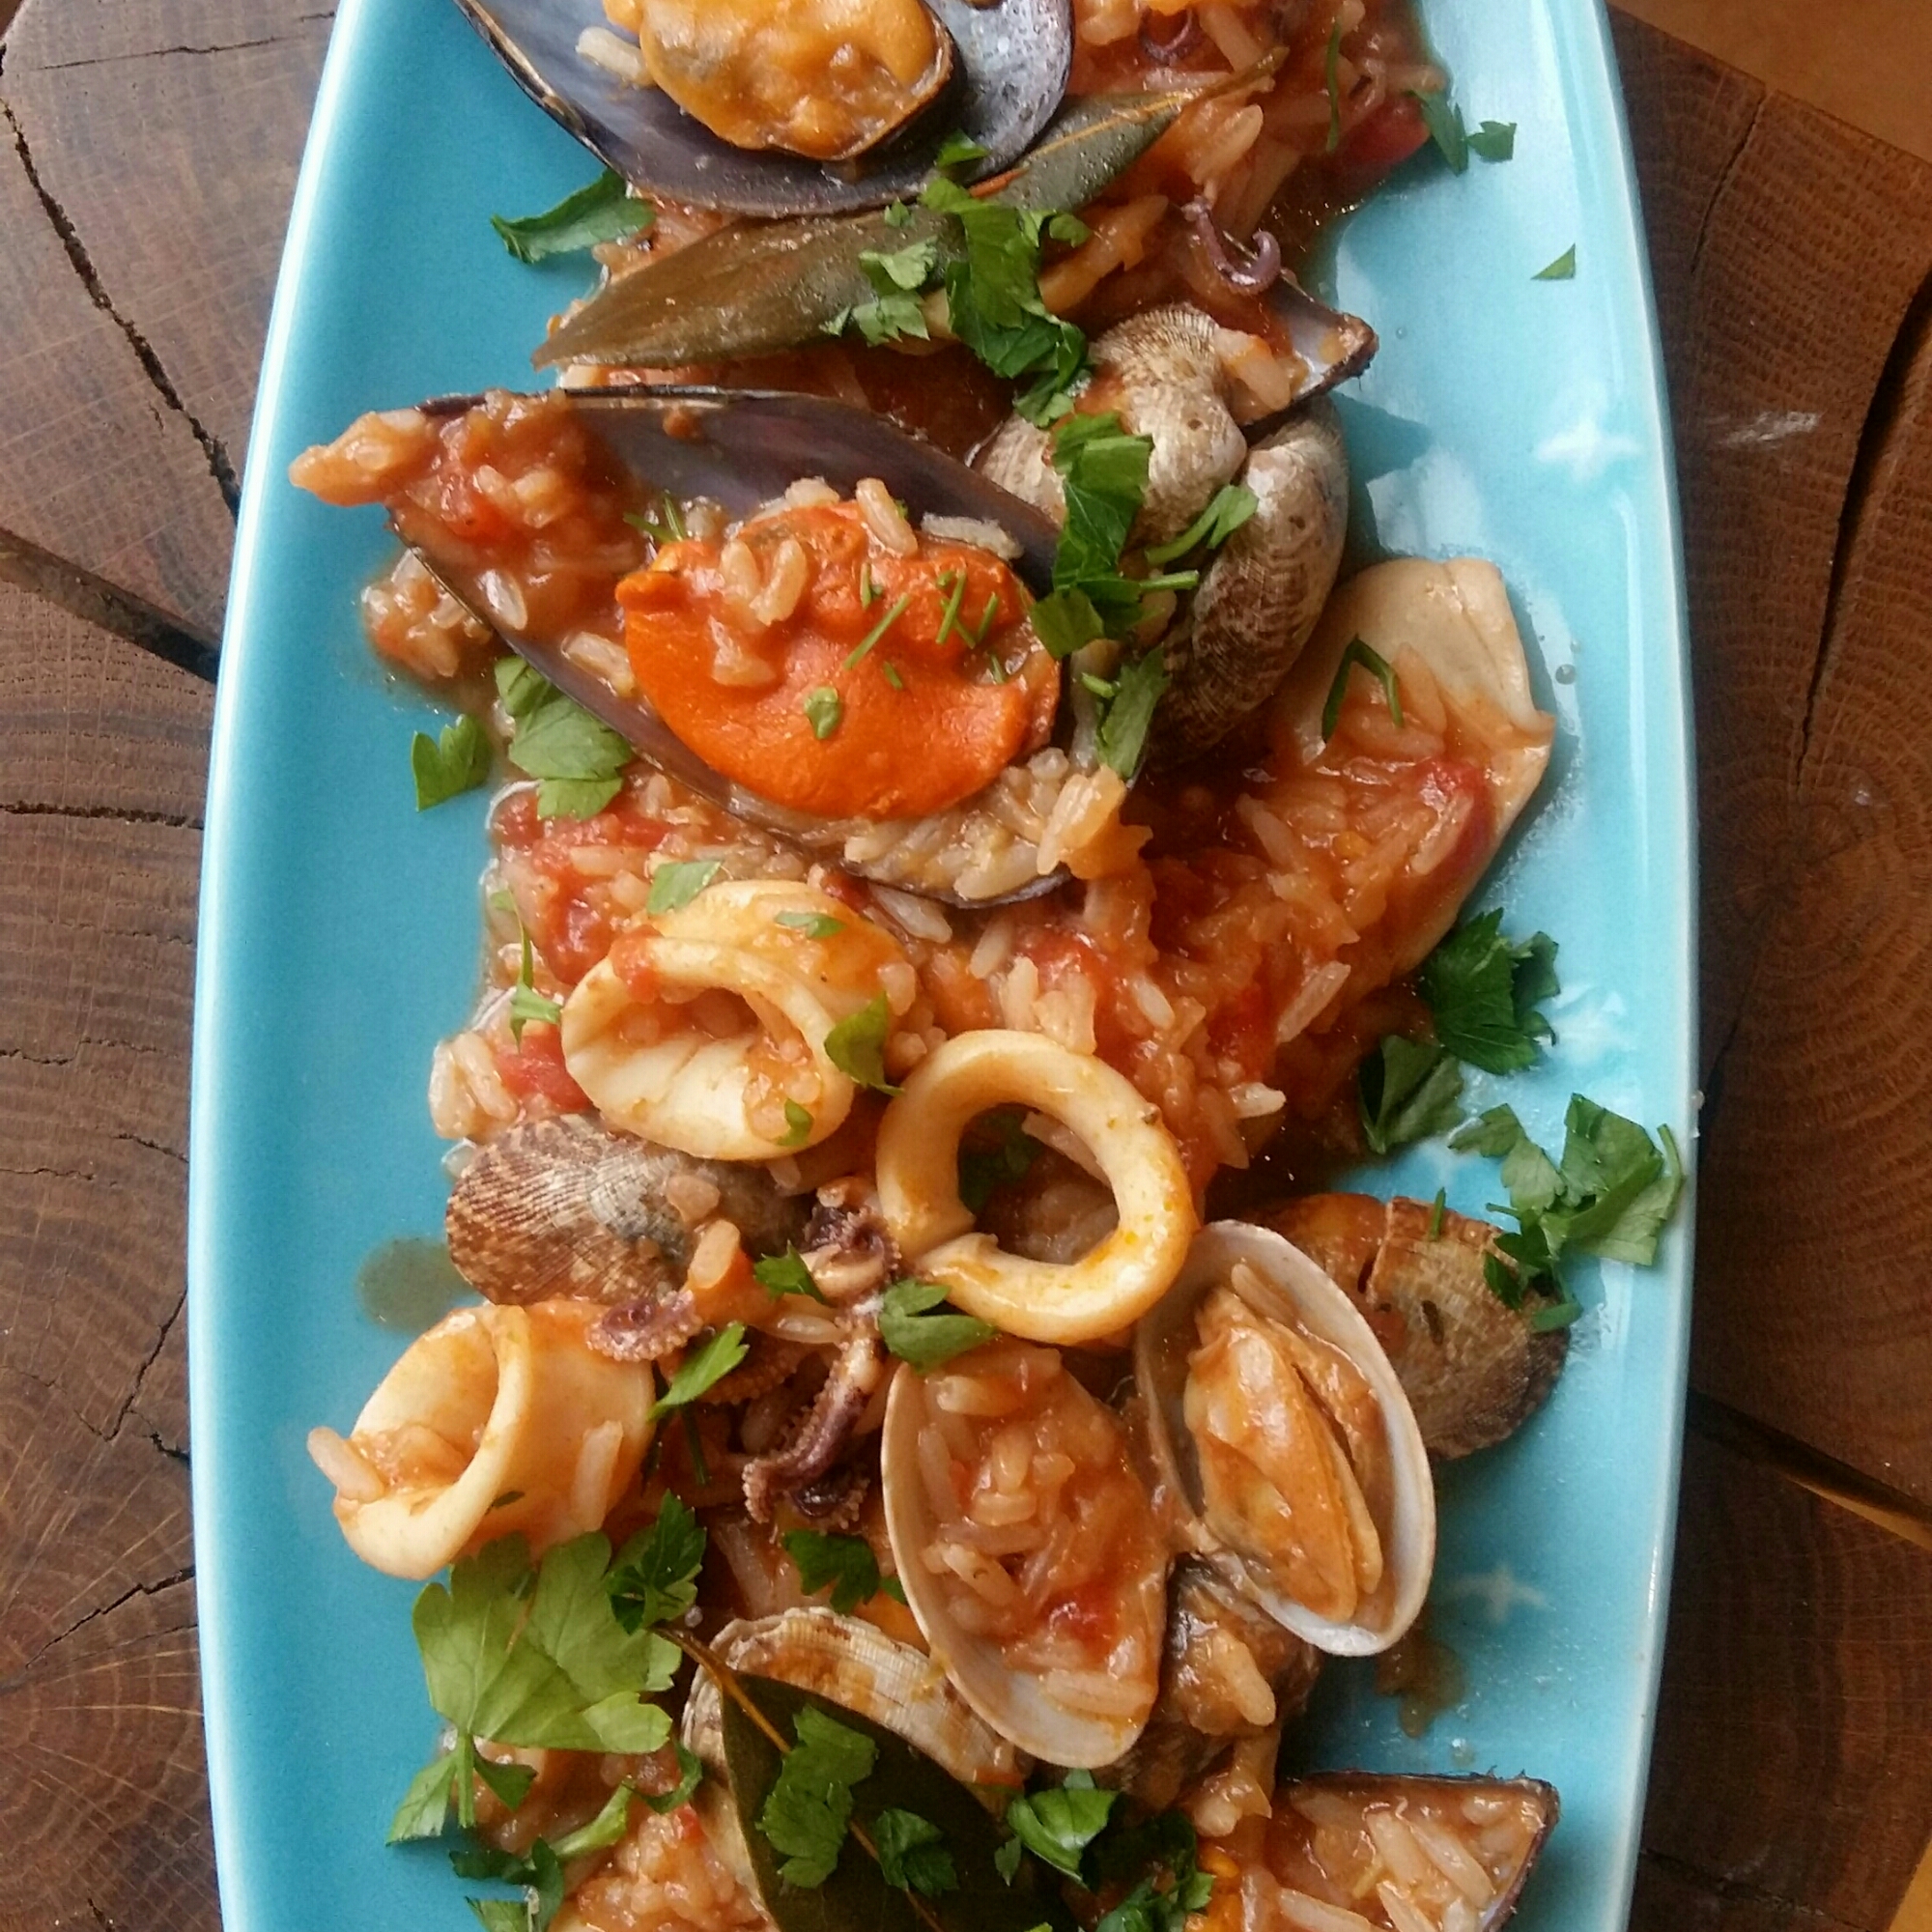
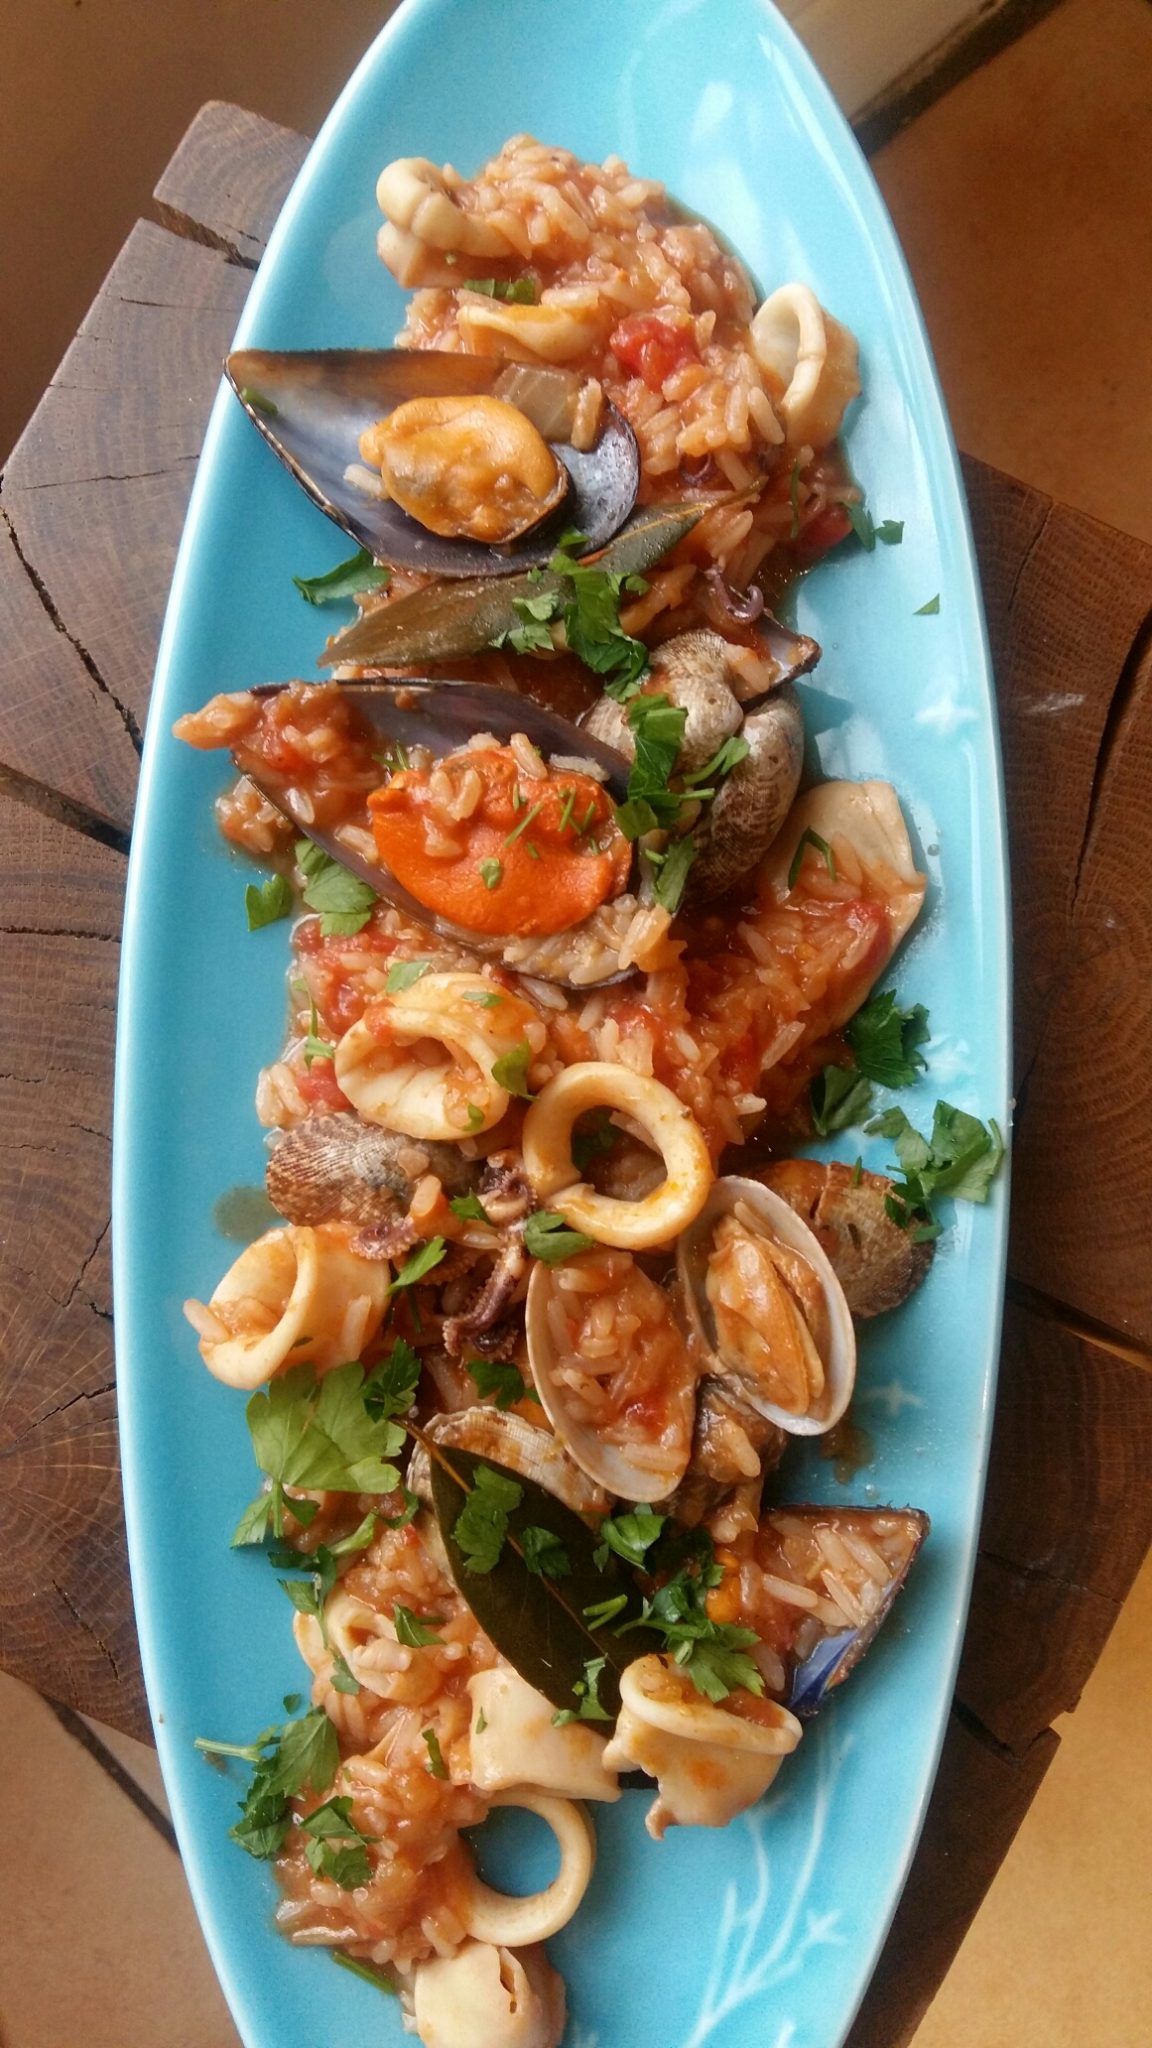
Ready in a flash: Portuguese seafood rice with clams, calamari and mussels

If you find paella a schlep to make, then quick ‘n’ easy arroz de mariscos is for you. A wonderful, soupy seafood-y rice dish of Portuguese origin, it’s comfort food and bowl food at its best. You can glam it up for special occasions by adding prawns, crayfish and saffron too.

I make this using the finest frozen seafood that I get variously from Willoughby & Co in the V & A Waterfront or Ocean’s Jewels Fish run by Julie Carter. Julie stocks and sells only top quality sustainably caught fish, mostly fresh, and she delivers free of charge throughout Cape Town and surrounding suburbs. Julie trades at Neighbourgood Market on Saturdays, and during the week from her bustling little shop/café at Woodstock Exchange. Drop in for a quick bite to eat, while Julie and her crew prepare your order of flipping fresh fish, seafood and shellfish to take home. I got the tender little baby calamari and mussels on the half shell from her, both sold frozen. Both cook in mere minutes, which makes them ideal ingredients to chuck into a seafood chowder, soup or this seafood rice.

Tonight, deep bowlfuls of arroz de mariscos, accompanied by perfectly chilled glasses of Glen Carlou Chardonnay 2013, made a lovely supper at the end of a long week. A few minutes in front of the stove, a  bit of stirring, and bam! you’re ready to eat.

NOTE: Order from Julie Carter: Ocean Jewels Fish oceanjewelsfish@gmail.com

Arroz de Mariscos

Serves 4-6 generously

Ingredients

1 medium onion, peeled and very finely chopped

2 celery stalks, very finely chopped (I just pulse both onion and celery in the food processor until very finely minced)

3 T (45 ml) olive oil

1/2 cup (125 ml) dry white wine

3 bay leaves

1 can (420 g) chopped tomatoes in juice

1 cup (250 ml) tomato passata or puree

300g – 450g frozen clams, rinsed briefly in a colander under cold running water

450g frozen baby calamari, thawed

300g frozen mussels on the half shell

1 cup (250 ml) white rice (not risotto rice, just plain white rice)

1 cup (250ml) boiling water

salt and pepper to taste

fresh Italian parsley, to garnish

Method:

  1. Heat the oil in a large heavy-bottomed cast iron pot and cook the onion with the celery until softened but not brown.
  2. Add the frozen clams, stir well and put the lid on the put. Cook over mild heat for 10-12 minutes.
  3. Add the wine, bay leaves, tomatoes and passata. Cook briskly for 5–7 minutes.
  4. Add the rice, stir well, turn the heat to medium and cook for 12 minutes. Keep stirring and scraping the bottom of the pot so the rice doesn’t stick.
  5. Meanwhile, rinse the calamari in a colander under cold running water. Shake off excess water and slice the calamari into wide rings. Leave the tentacles whole. Add to the pot and stir to mix thoroughly. Cook for 5 minutes.
  6. Add the mussels, season well with salt and pepper and cook gently until the rice is tender but not mushy. Scatter over lots of chopped fresh parsley, add a little spritz of lemon juice and serve piping hot in bowls. A drizzle of fruity extra virgin olive oil wouldn’t go amiss.
Arroz de Mariscos - easy Portuguese seafood rice
Arroz de Mariscos – easy Portuguese seafood rice

Daily Juice: BlackBerry Booster

1

Blackberries have a relatively short season, so I always pounce when they arrive in the shops. The intense colour and flavour means a little goes a long way, so you only need a scant handful of blackberries for this lovely cocktail.

Mango juice is quite thick, so I’ve added the juice of a freshly squeezed orange to thin it out a bit. Use Bos ice tea or regular apple juice instead of orange juice if you prefer. Sir Fruit is far and away my favourite brand of mango juice – so rich and thick, it’s almost a sauce. I like pouring some over ice cold slices of fresh pineapple for a refreshing snack when the summer heat gets unbearable.

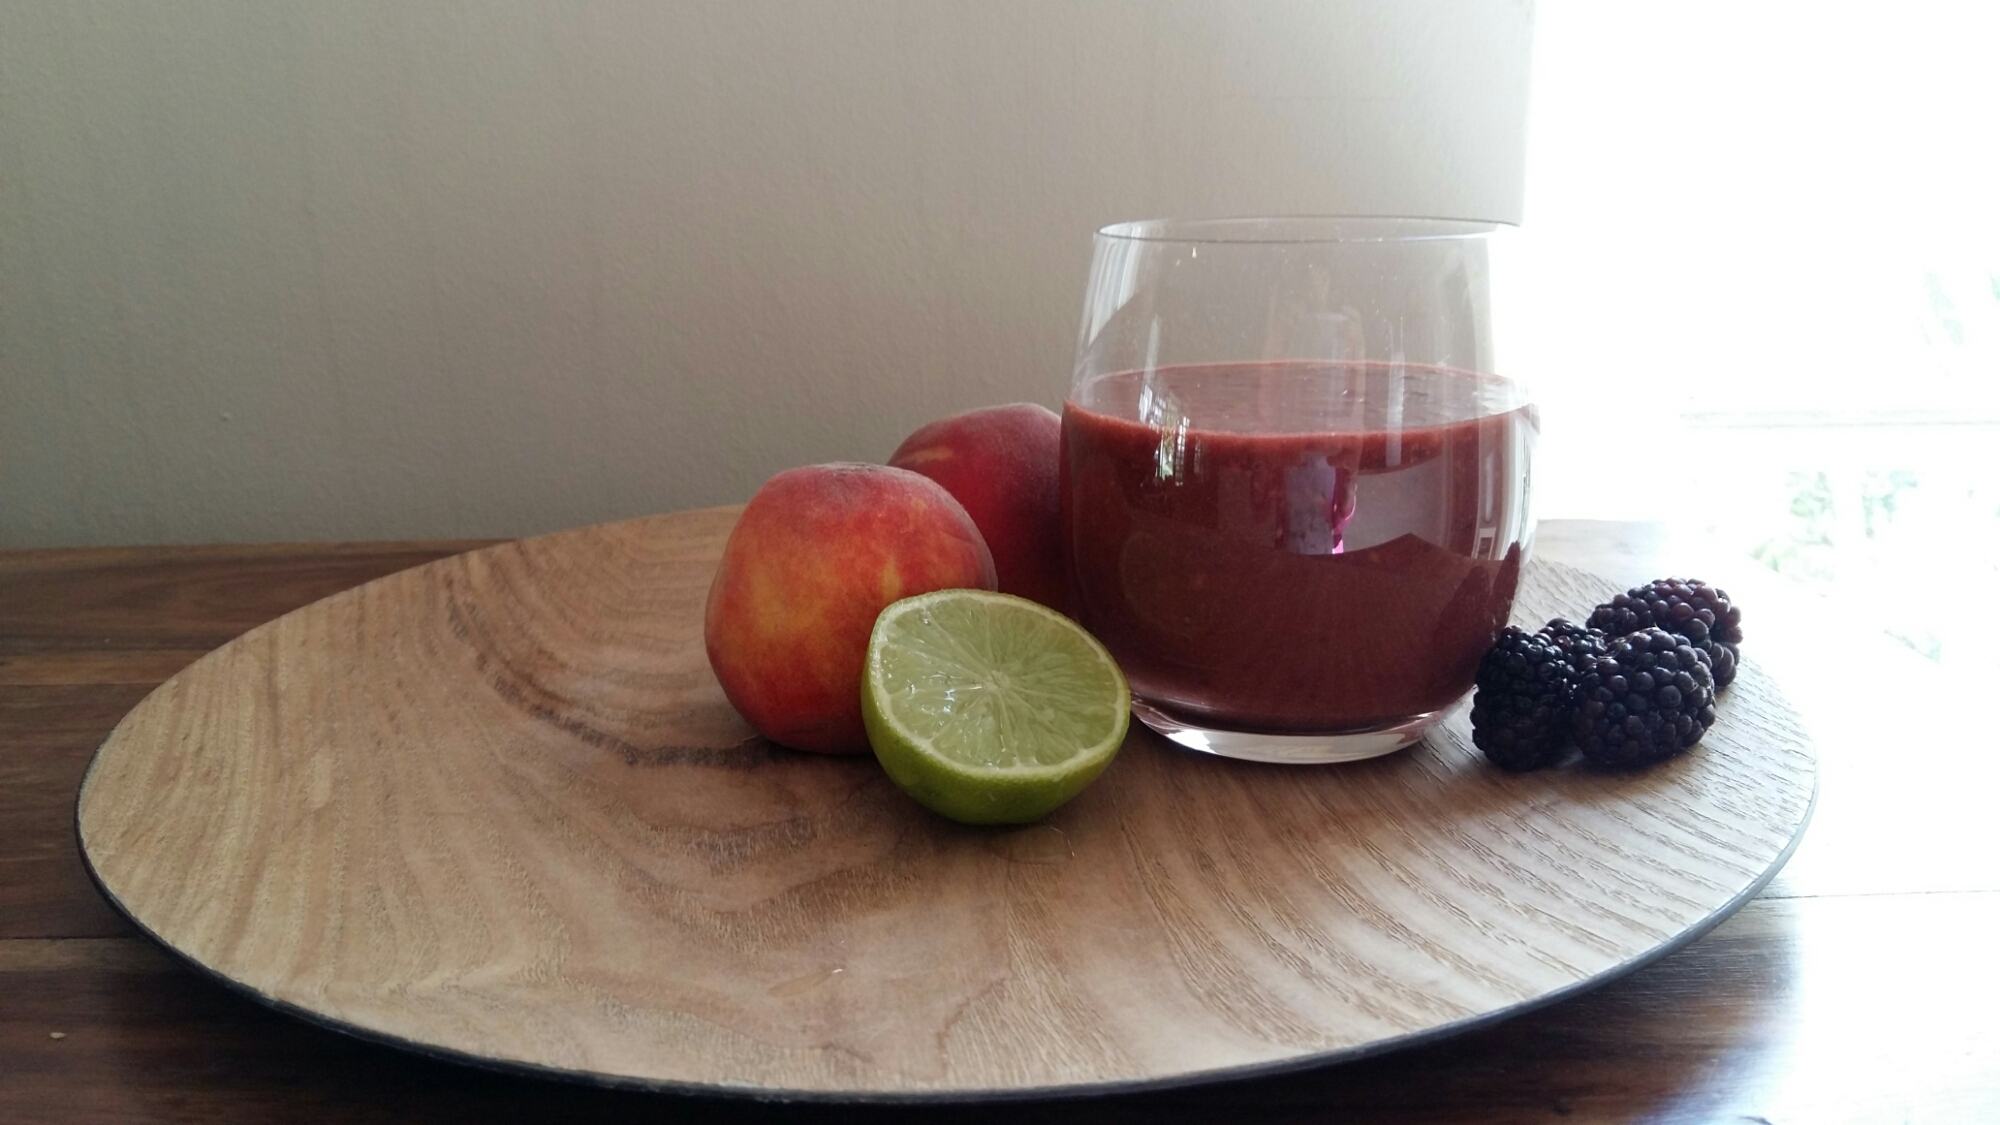
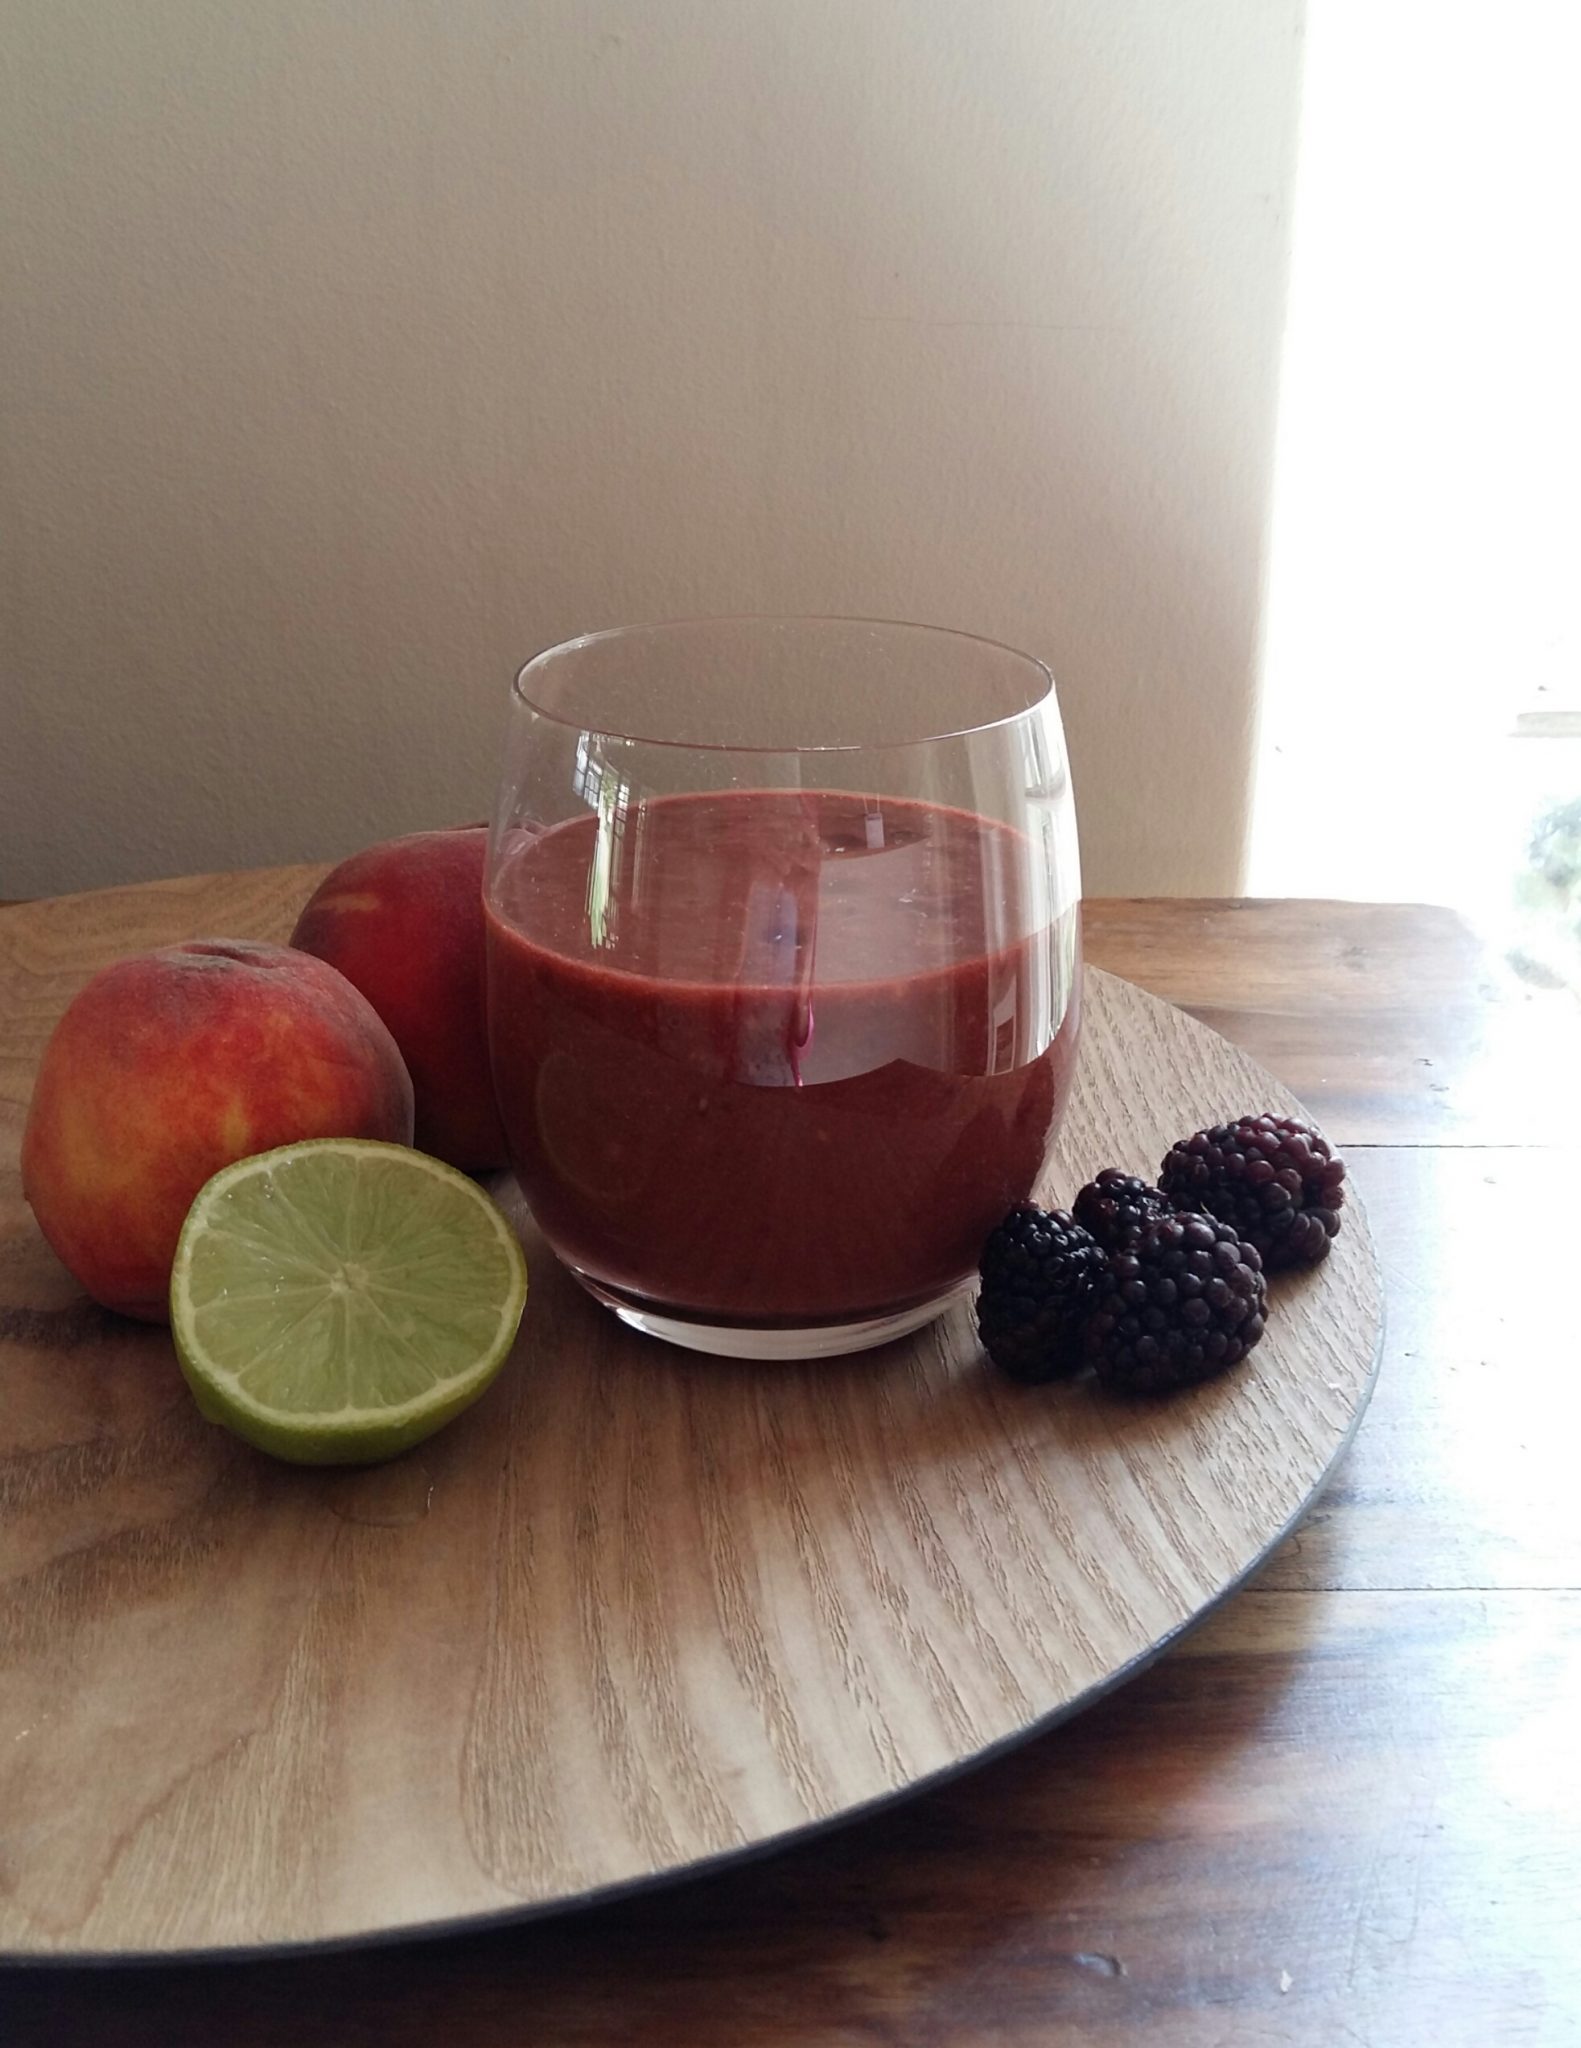
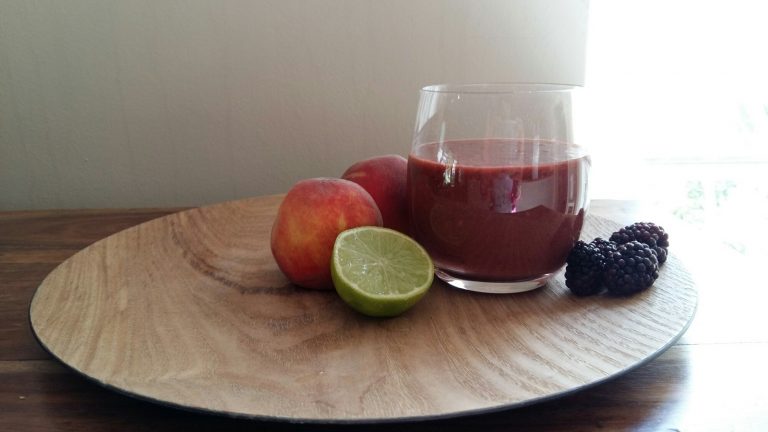
Blackberry booster: crammed with anti-oxidants, beta-carotene, calcium and magnesium, it's good for your bones, hair and skin. Soothes inflamed digestions and cools overheated bodies in a flash!
Blackberry booster: crammed with anti-oxidants, beta-carotene, calcium and magnesium, it’s good for your bones, hair and skin. Soothes inflamed digestions and cools overheated bodies in a flash!

Talking of heat, all the fruits used in this cocktail have cooling, cleansing and soothing properties. This blackberry booster is a real powerhouse of anti-oxidants, beta-carotene, calcium and magnesium. That makes it good for your skin, hair and bones, too!

The combination of fruits in this cocktail is also very alkalising, so it’s a good remedy for excess acidity like rheumatism and inflamed, sore joints.

Orange and lime cool fevers and are mildly antiseptic, which is good not only for flu and colds, but also the digestive system and conditions like cystitis.

Mango is especially cooling and soothing, especially for thin, nervous people who are overactive and tend to feel the heat easily. Mango calms the mind and emotions whilst giving an energy boost.

The first peaches of the season are very watery, which makes them ideal for juicing since they don’t have much flavour anyway. Peaches are cooling to the digestive system and are mildly laxative and diuretic, working in a gentle way to relieve dryness and heat.

For a cocktail that’s more like drinkable dessert, that’s a whole lot of goodness in a glass!

Blackberry Booster

Serves 1

Ingredients:

scant handful of blackberries

2 peaches, peeled, stoned and chopped

3/4 cup (180 ml) mango juice

juice of one orange

juice of half a lime

Method:

  1. Liquidise the blackberries and peaches until smooth. Add the mango, orange and lime juices, stir briskly and enjoy!
Blackberry, mango, peach and lime cocktail