Peri-peri Prawns à la Sonia

2

I like my seafood simple and prawns are no exception. Peri-peri is one of my favourite ways to cook and eat prawns, and I can vividly recall the very first time I had it, aged 5, on holiday in Durban. The sauce was so violently hot that tears streamed down my face as I was eating, but it was just so darn good I polished the plate and then begged some off my dad’s plate too. I’ve been hooked on peri-peri ever since.

The nice thing about making peri-peri at home is that you can dial the heat up or down to your own liking. Use real dried pili-pili chillies, cayenne pepper, chopped red Thai chillies, chilli paste or whatever you prefer. Just not bottled peri-peri sauce, I beg you. Prawns are precious, and all bottled sauces contain additives and preservatives that will taint the taste of your sauce. Besides, whipping up a peri-peri sauce is so quick and easy, why bother with bought bottled sauces anyway?

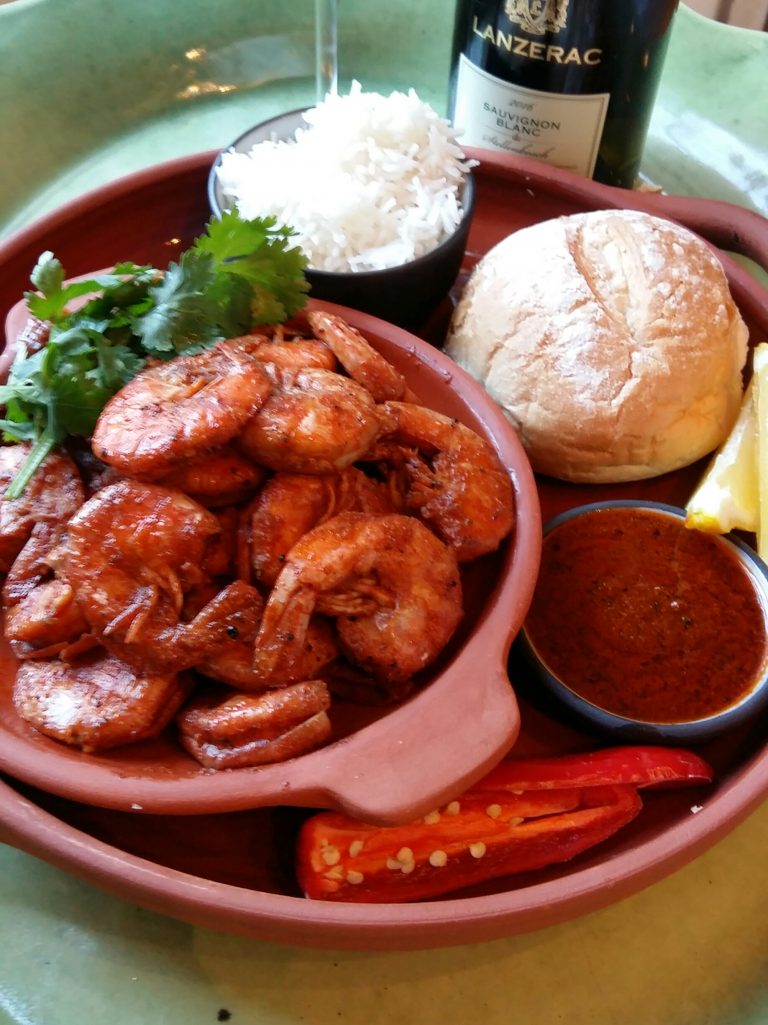
Now, there are about as many different peri-peri prawn recipes as there are cooks. And everyone thinks their own sauce is the best. Of course! That is as it should be. I’m not saying mine is the World’s Number One, but it is my own favourite, and the one I prefer. It also goes very nicely with the Lanzerac sauvignon blanc 2015 my friend Zelda Furstenberg sent me as a gift, although beer, riesling and chardonnay are pretty sexy sipping mates for chilli prawns too. To read more about this silky, fresh sauvignon blanc, click here Lanzerac sauvignon blanc

Let’s talk about prawns, chilli, lemon and wine. Prawns have a sweet, delicate meat, and generally need a very short cooking time, whether that’s on the braai, in the oven or on the stovetop in a frying pan. Even when you are using them raw in a ceviche, 30 minutes tops marinating time should do. Marinating prawns before cooking isn’t really necessary and whatever you do, don’t ever add lemon or any acid to a marinade for prawns, as this will ‘cook’ the meat and turn it rubbery.

Prawns are contentious due to production methods, especially in the Far East, where most of the prawns imported into South Africa comes from. Due to this, my household put a blanket ban on eating prawns which caused me no end of regret, but I don’t particularly fancy ingesting a cocktail of heavy metals, tetracyclines and sulfas with my food. Since prawns are hardly a South African staple, you can and should ask about the source of your prawns before buying.

If you’ve bought decent, sustainably wild-caught pink Argentinian prawns from the icy waters off Patagonia’s coast, you’ve done well. The GREAT news is that Food Lovers Market sells these beauties, at the pocket-friendly price of R185 a box, in the shell with heads on. The meat of the Patagonian prawn is akin to crayfish and the shell somewhat thicker, which adds a lot of flavour to the sauce. Also, they need a very brief cook, otherwise the flesh turns mushy. It also loves a dash of lime or lemon, and chilli suits it particularly well.

So does sauvignon blanc, surprise, surprise. Fresh coriander is a herb that happily pairs with both prawns and sauvignon blanc, so if that’s your choice of tipple with your prawns, feel free to add a generous handful to your sauce. Use tomato judiciously in this sauce when you want to drink sauvignon blanc, preferably tomato passata, Pesto Princess’ new tomato pesto or your own, rehydrated sundried tomato paste. NOT tinned tomatoes – this has a really bad metallic clash with sauvignon blanc. I have even used straight ketchup or tomato cocktail in my peri-peri sauce, and it worked beautifully by being both slightly sweet and concentrated in flavour and texture. I usually add a dash of top quality paprika to my peri-peri sauce, but have found that this is not a great idea when paired with sauvignon blanc – the bitterness of the paprika fights with the acidity and minerality of the wine and flattens it.

Use preciously little lemon juice. Really. Just take a cut half lemon in your hand and give it one, brief, hard squeeze into the sauce at the start. Seriously, that’s it. The trick of a good peri-peri is the balance between sweet, sour, salty and hot. This is why you should make the sauce separately after flash-frying your prawns, only adding the prawns for a brief 3 minutes towards the end. At its best, peri-peri is just 1) chilli 2) garlic 3) lemon 4) butter or oil – use a neutral-tasting oil like sunflower, peanut or grapeseed and 5) salt.

Salt is crucial when cooking fish and seafood, in my opinion, and since you’re preparing a special dish, go all out and use gentle, pure sea salt flakes here, like Maldon, or Oryx Kalahari salt. In fact, make each and every ingredient you use for this recipe the very best you can afford, and that includes the wine.

One final tip: when defrosting your prawns (all prawns sold are blast frozen on the ship at sea, unless of course you’re holidaying on the coast somewhere exotic like Mozambique and Thailand), preferably do so in a bowl in the fridge overnight, or else in bowl of salted cold water. Never put your prawns in fresh unsalted water to thaw. Never. BECAUSE I SAY SO. (It spoils the lovely briny, ocean-y taste.)

Now. Let’s get cooking, shall we?

PERI-PERI PRAWNS À LA SONIA

Serves 4 as a starter, 2-3 as a main

Ingredients:

500 g frozen Argentinian or other top quality prawns

1/4 cup (60 ml) neutral tasting oil, like sunflower, peanut or grapeseed

1 t (5 ml) chopped red chilli or cayenne/6 crushed dried birds’ eye chillies or to taste

2-3 cloves fresh garlic, finely chopped. Use fresh garlic, as bottled pre-crushed garlic will totally overpower the rest of the ingredients. You don’t even have to chop your fresh garlic, just slice very thinly

1 lemon or lime

salt and freshly ground black pepper

1/4 cup (60 ml) dry cider or light apple juice

1/3 cup (75 ml) tomato passata or 1 T (15 ml) Pesto Princess tomato pesto

water

handful or chopped fresh coriander

lemon wedges, cooked white rice, crusty Portuguese rolls to serve

Method:

  1. Whisk the oil, chilli and garlic together and let stand for an hour or even overnight,  so that the flavours can infuse.
  2. 15-30 minutes before cooking, pour this chilli garlic oil over the thawed prawns and stir through so that each prawn is covered in sauce.
  3. Heat a heavy-bottomed pan over very high heat and pour a thin film of oil into the pan – just enough to coat the bottom. Remove the prawns from the sauce with a slotted spoon and fry in batches in the pan. Use kitchen tongs or two forks to turn the prawns over, cooking no more than 2-3 minutes in total. Remove from pan with a slotted spoon and set aside while you make the sauce.
  4. Sauce: Once the prawns have been flash-fried, pour the remaining ingredients except water and coriander in the pan, using a wooden spoon to scrape up the caramelized bits from the bottom. Add salt and pepper and a squeeze of lemon or lime to taste. Cook while stirring for 4-5 minutes, adding dashes of water to prevent it getting too thick. Add the prawns while there is still enough sauce to coat them generously. Turn the heat way down low, and let the prawns swim in the sauce for about 3 minutes. Turn the heat off, and remove from the stove. Place a lid on the pan to cover it completely, and let stand for another 2- 3 minutes – this forces the flavour into the prawns and makes them extra good. Well, that’s my story and I’m sticking to it. Pour yourself a glass of wine and serve with plenty of rice, breadrolls or chips.

NOTE: If you want to read more about which herbs, seasonings and foods go well with which wines, have a look at these links:

Herb and wine pairing chart 

Beer, spirits and wine pairing with spicy foods

Best food pairings with sauvignon blanc 
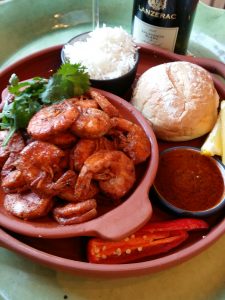
recipe peri peri prawns chilli garlic lemon sonia cabano blog eatdrinkcapetown
Peri peri prawns à la Sonia

Braai4Heritage at Franschhoek Uncorked Festival

0
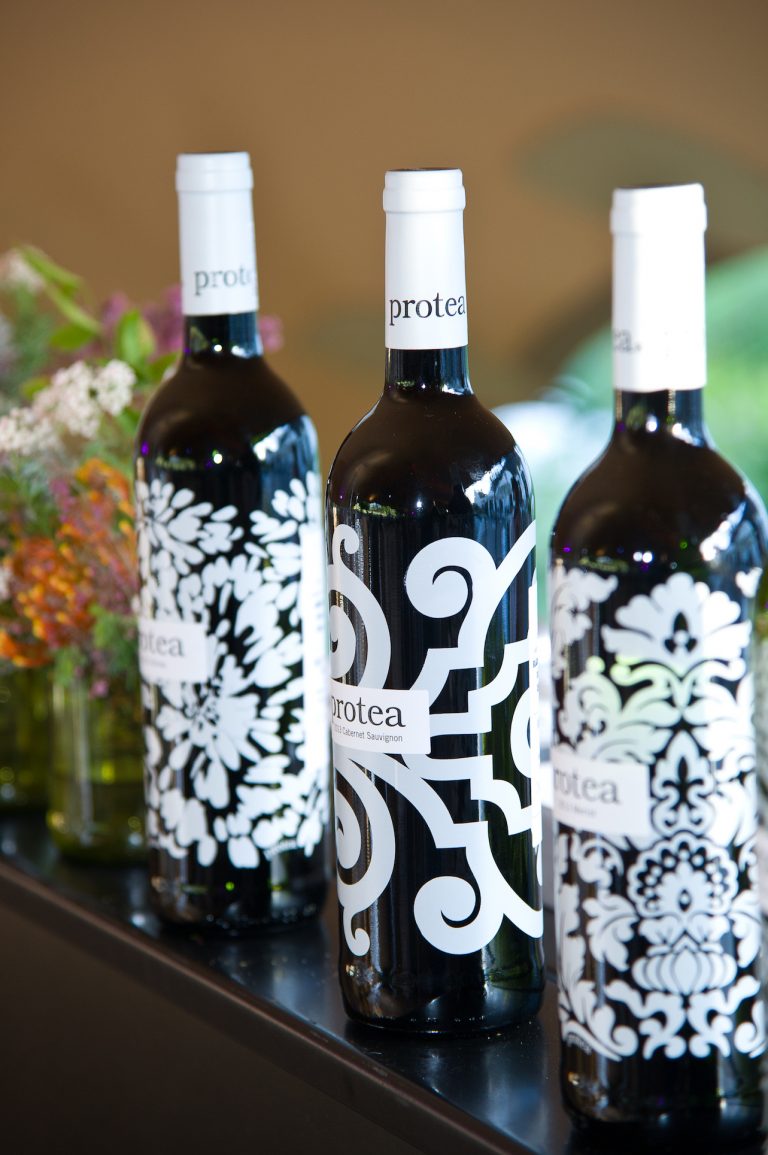
protea wines anthonij rupert wyne franchhoek sonia cabano blog eatdrinkcapetown
Protea wines from Anthonij Rupert Wines, Franschhoek

Franschhoek flies the flag for local food and wine, so it fits that the 2016 Uncorked Festival falls on Heritage Day.  This coming Saturday and Sunday 24 – 25 September, celebrate heritage in your own way over a glass or two or three of top Franschhoek wine, paired with delicious food. And yes, Franschhoek also joins Braai4Heritage this weekend so there will be a chop or two! And plenty more besides.

Read the full festival programme by clicking on this link: 2016 Franschhoek Uncorked Festival.

The notable participants Rickety Bridge, GlenWood, Anthonij Rupert Wyne, Grand Provence, Black Elephant Vintners, Boekenhoutskloof, La Bri, Noble Hill, Plaisir de Merle, Leopard’s Leap, Dieu Donné, Haute Cabriére, Maison Estate, Topiary Wines and La Chataigne, Lynx Wines, Boschendal and Allée Bleue.

Wine estates will be pushing out the boat with Braai4Heritage as the Food Theme, so expect everything and anything from tacos, Spanish churros and chocolate to the sound of  flamenco guitar, snoekbraais, boerewors, Black Angus beef burgers, smoked brisket sliders, braaibroodjies and roosterkoek, food trucks and just too much to mention!

Remember meals are not included in your entrance ticket price.

You can travel from farm to farm, sampling wines from the famous Franschhoek Vignerons. Visitors can also look forward to amazing festival offerings – a great chance to stock up on wine for the upcoming festive season! It’s just impossible to take in everything on a single day, so why not make a weekend of it?

Avoid the queues and prebook your Uncorked Weekend Pass online through www.webtickets.co.za. Tickets cost R 140 per person, allowing you access to all participating wine farms, a complimentary glass and free wine tastings.

For more info contact the Franschhoek Wine Valley offices on 021 876 2861 or visit www.franschhoekuncorked.co.za for further details and a list of participating farms.  For regular updates follow  on Twitter @Franschhoek_SA.

New FWV logo_small 400px

Franschhoek Uncorked
24 & 25 September 2016
11h00 to 17h00 (unless otherwise specified)
R 140 per person for a weekend pass!
Pre-book tickets online at www.webtickets.co.za or
contact Franschhoek Wine Valley at 021 876 2861 for more information

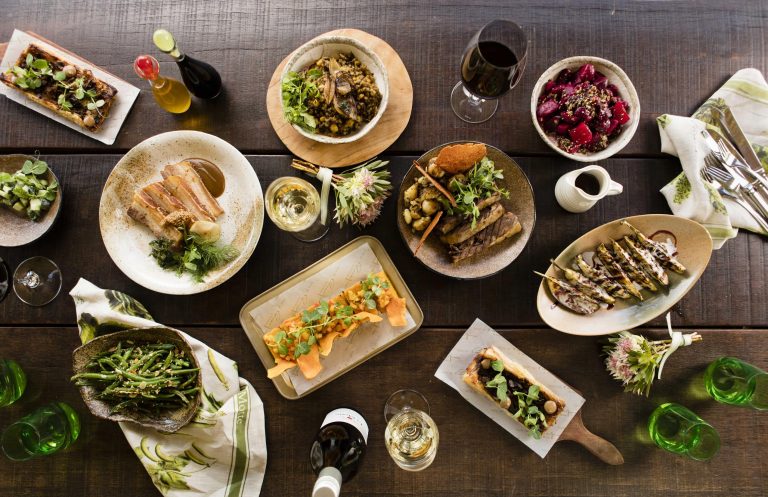
protea wines anthonij rupert wyne franchhoek uncorked festival sonia cabano blog eatdrinkcapetown
Protea wines at Anthonij Rupert Wyne, Franschhoek


Heritage Day Family Lunch at La Motte

0

La Motte celebrates Heritage Day with heritage cuisine offering in Pierneef à La Motte Restaurant

Food traditions differ among nations and in South Africa with its rainbow culture, the food culture is all but simple. One of the common customs however, is our love for cooking over an open fire – therefore also why Heritage Day in South Africa is fondly refer to as National Braai Day. We do however share another culinary tradition.

Eating together.

Eating together is about more than food. Whether it happens around a formally laid table, casually around a fire or intimately in the kitchen, eating together is about sharing. Like all traditions however, it is something to be treasured and protected. Continuing La Motte’s passion for both the conservation and sharing of, among others, the culinary heritage of the Cape Winelands, Pierneef à La Motte Restaurant this year celebrates Heritage Day by bringing people together around a table.

In tune with the old Cape tradition of family get-togethers over extended lunches and as a reflection of the estate’s owners’ appreciation for such traditional values, Heritage Day lunch will be served ‘family-style’ and guests can expect a selection of artisan breads, plated starters, a main course consisting of two meats of which one will be a roast, as well as a selection of side dishes, vegetables and salads served to share. A plated dessert will conclude the feast.

Eating together is not unique to South Africa. It is enjoyed all over the world. But in a country with many differences, we should not only treasure our uniqueness, we should also embrace our similarities and in eating together, we celebrate a true South African tradition.

The Heritage Day family lunch will be served on Saturday, 24 September 2016, 11:30 – 15:30

Cost: R325 per person, excluding wine. Children under 12 have the option to share in the menu at a special price of R125 or order from the Children Menu.

la motte culinary heritage cuisine special heriage day sonia cabano blog eatdrink cape town
La Motte Culinary Heritage Luncheon for Heritage Day


Constantia Glen Lights the Fire for Heritage Braai

0

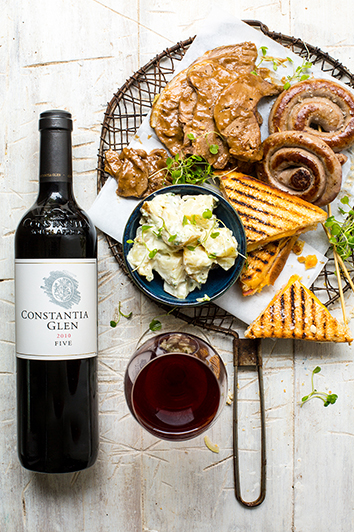
Constantia Glen is preparing the coals this Heritage Day for a sizzling braai platter for two – the perfect reason to head to this picturesque boutique wine estate on Saturday, 24 September.

Indulge in a generous braai platter of succulent spitbraai lamb, boerewors, homemade potato salad and braaibroodjies. Ideal for sharing, the platter is available from 12h00 until 15h00 at R290. While you may find the estate’s flagship reds, Constantia Glen THREE and FIVE a tad luxurious for your usual Sunday braai, they are perfect taste partners for this heritage platter for meat lovers. Both reds are elegant expressions of the Bordeaux varieties grown on the upper reaches of the Constantiaberg.

The more accessible Constantia Saddle range of wines, comprising a refreshing White, a fruity Rosé and a palate friendly Red, gives you plenty of choice for your braai platter.

The popular selection of delicious cheese and charcuterie platters, Mediterranean salad or their proudly South African biltong and droëwors – perfect pre-braai morsels – will also be available on Heritage Day in addition to the special braai platter. To avoid disappointment, please be sure to make a reservation to enjoy this Heritage Day celebration.

Known for exceptional cool climate Bordeaux-style red and white wines, Constantia Glen is open seven days a week from 10h00 till 17h00. Look out for the Constantia Glen signs towards the top of Constantia Main Road. Call 021-7955639, e-mail reservations@constantiaglen.com, visitwww.constantiaglen.com, www.facebook.com/ConstantiaGlen or follow @ConstantiaGlen on Twitter and Instagram. The GPS co-ordinates are S 34º 0’39.6” E 18º 24’30.6”.

constantia glen heritage day braai sonia cabano blog eatdrinkcapetown
Constantia Glen Heritage Day Braai

Spiced Pumpkin and Date Loaf with Orange Icing

0

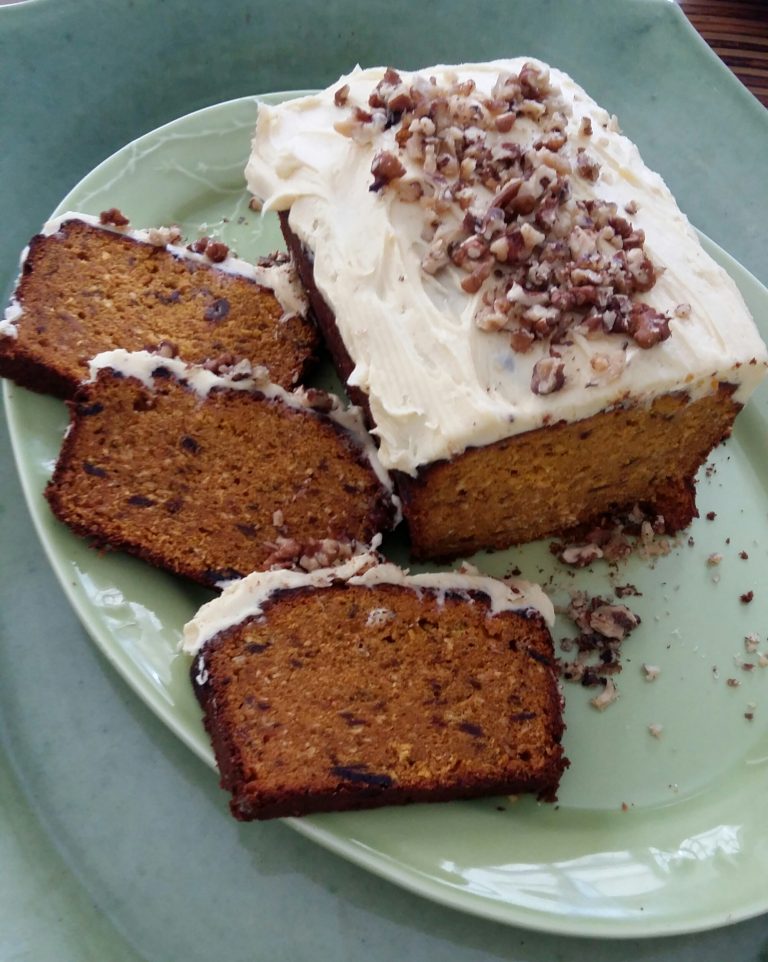
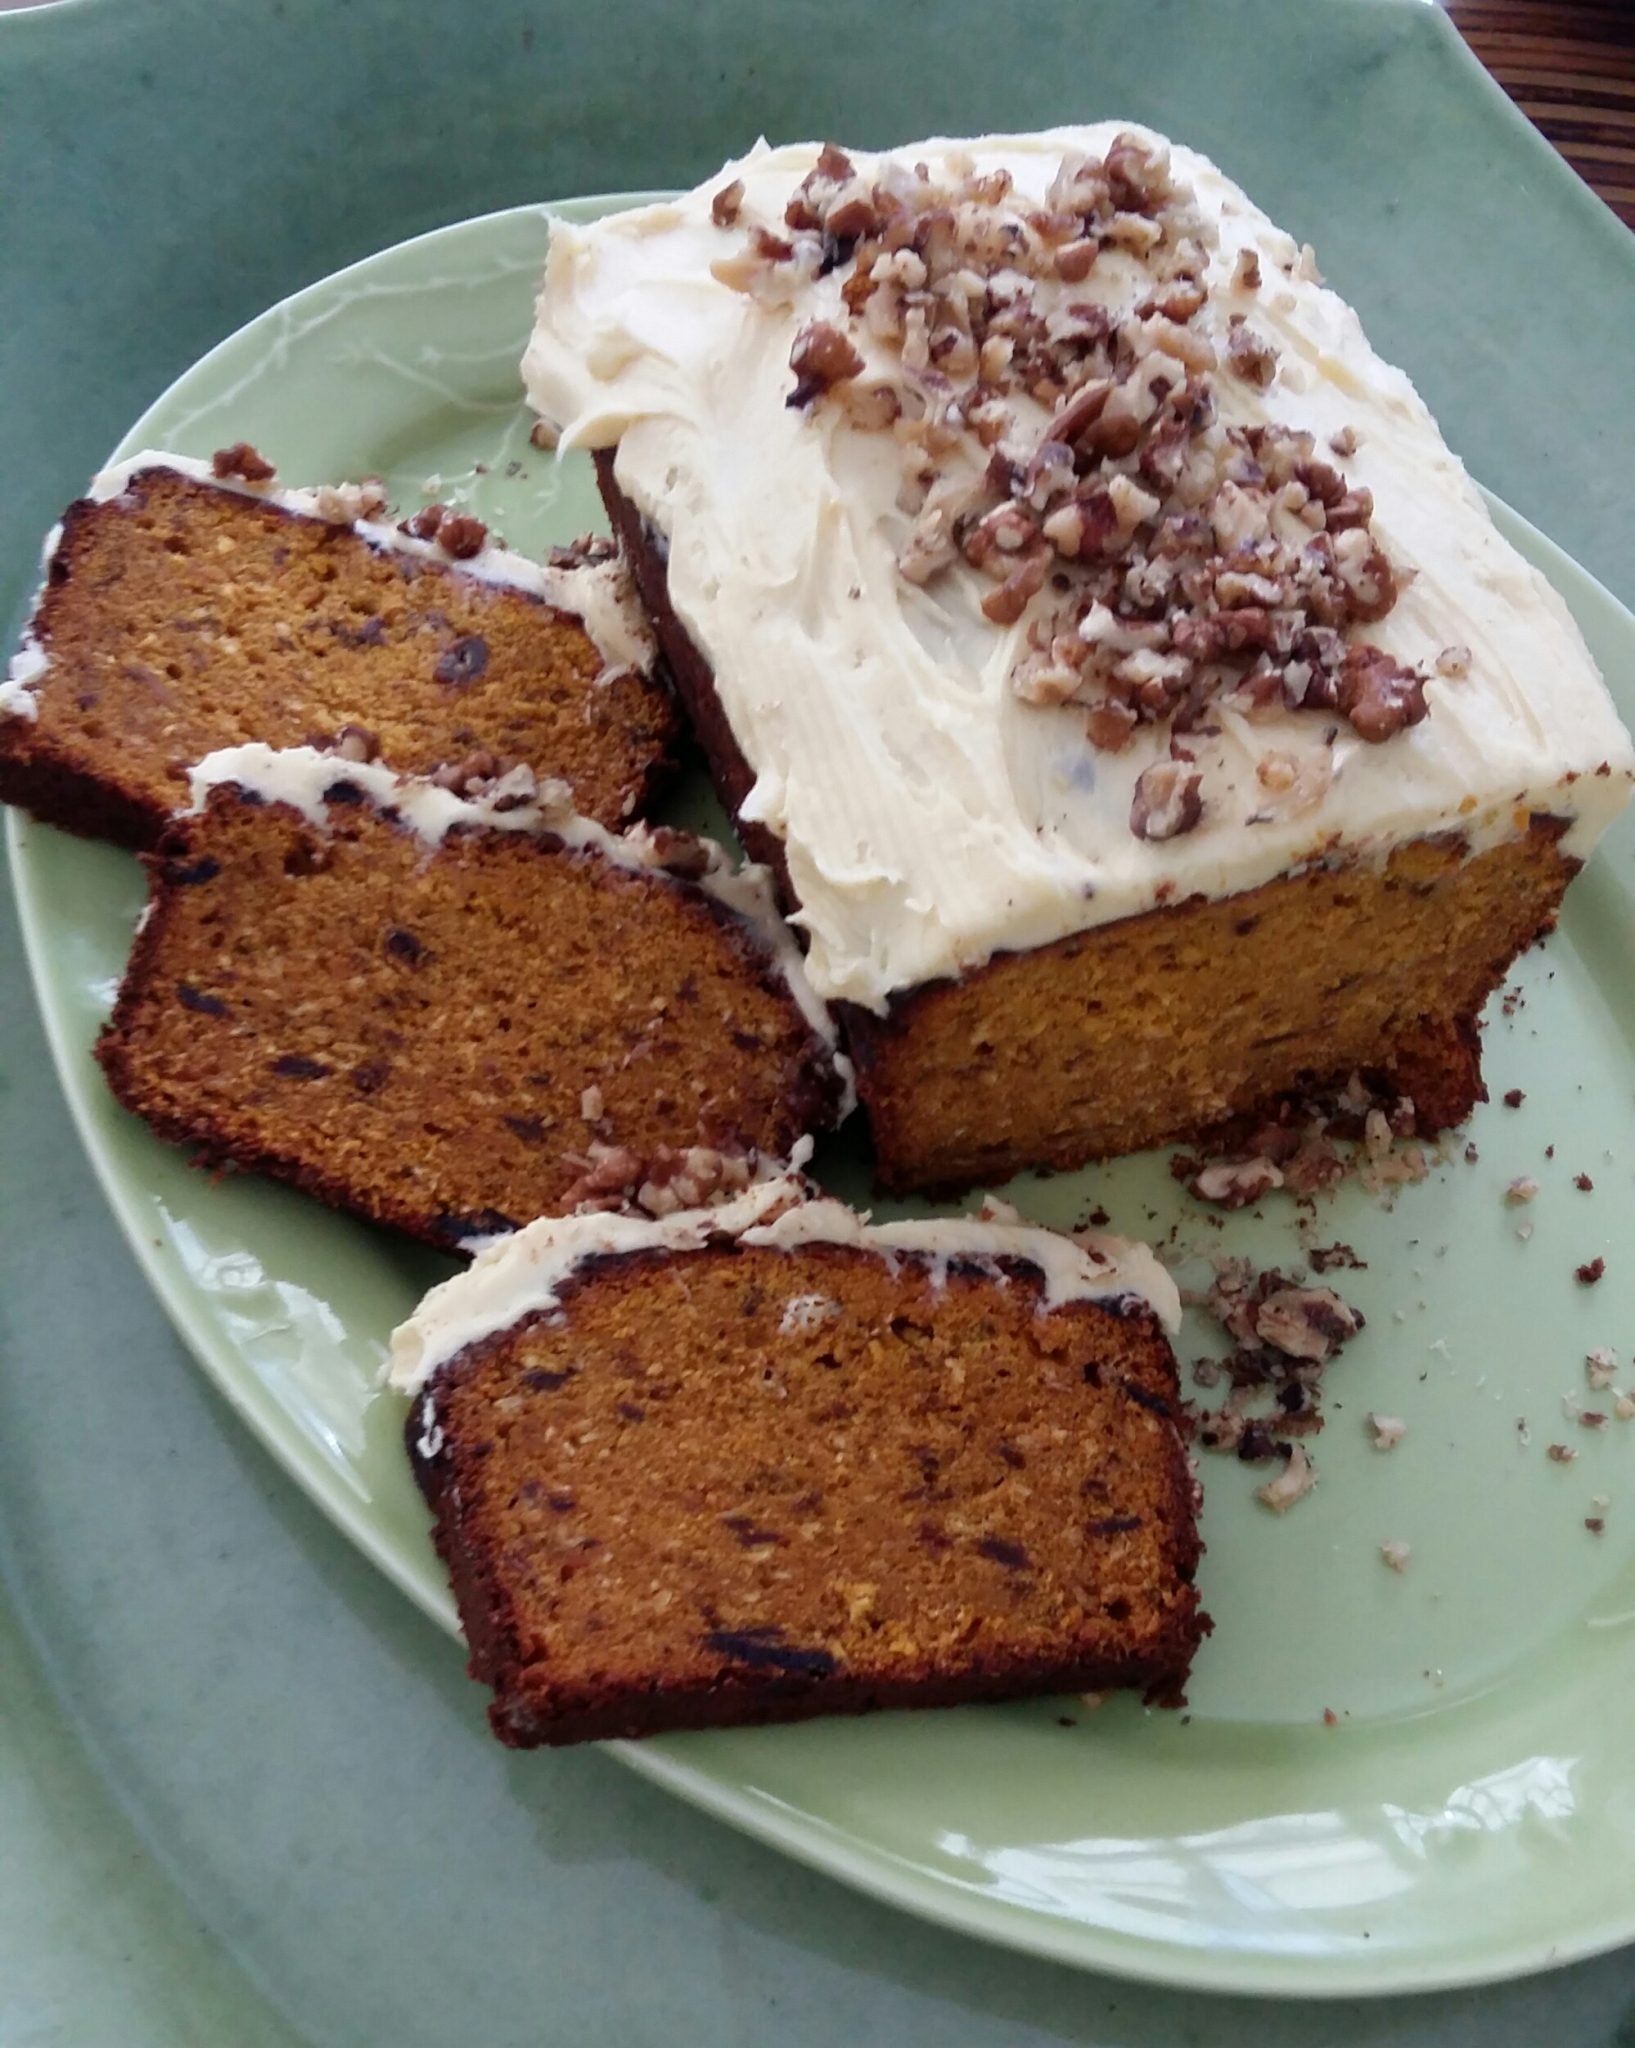
I’ve been experimenting with traditional pumpkin fritter/pampoenkoekie recipes lately, so I had quite a bit of roast pumpkin left over. Luckily I also had Serena Jacobson’s vegetarian cookbook Fields of Flavour handy, so I adapted this cake recipe into a rather yummy loaf using the surplus pumpkin.

I love the subtle warmth that powdered ginger and nutmeg gives to the cake/bread, and also like to stir some chopped walnuts or pecans into the batter right at the end. Also, scattering finely chopped walnuts over the creamy orange-scented butter icing only improves the whole scenario. You can leave the icing off, and serve the bread more like a date loaf, to be sliced and spread with sweet butter. Any way you choose to have it, it’s delicious!

Pumpkin varies hugely in water content, depending on the time of the season – early summer ones can be very watery, and late summer pumpkins are much sweeter and more concentrated in taste. This is why I always roast pumpkin in chunks before I use it in baking, since baking dehydrates the pumpkin and intensifies the flavour. Peel and chop into chunks, spread out on baking trays, and roast at 180 C for about 30 minutes until tender but not caramelised.

Warming pitted dates in the microwave for no more than 30 seconds will make chopping them in your food processor so much easier. If you warm the dates for longer, you’ll end up with a very sticky puree in your food processor. Chop the dates first, scrape out of the bowl and set aside, and then proceed to puree the roasted pumpkin chunks to a smooth puree in the same bowl.

Lightly dusting chopped nuts in a little flour and shaking excess off in a sieve prevents the nuts from sinking to the bottom of the cake while baking.

SPICED PUMPKIN AND DATE LOAF WITH ORANGE ICING

Ingredients:

3/4 cup (180 ml) castor sugar

1 cup (250 ml) butter, softened

1 t (15 ml) grated orange zest

2 large free-range eggs

1 cup (250 ml) pitted soft dates, finely chopped

3/4 cup (180 ml) finely mashed cooked pumpkin, preferably roasted so it’s quite dry

2 cups (500 ml) self-raising flour

1 t (5 ml) baking powder

1/2 cup (125 ml) milk

Method:

  1. Preheat the oven to 180 C and spray the inside of a 1 kg capacity loaf tin with Cook & Spray.
  2. Beat sugar and butter together in electric blender until pale and creamy. Add the orange zest and then add the eggs one at a time, making sure each egg is thoroughly amalgamated in the batter before adding the next ingredients.
  3. Add the dates and pumpkin, and beat at high speed for 3 minutes. Mix the baking powder with the flour and add 1/2 a cup (125 ml) at a time to the pumpkin with the blender’s motor running. Add the milk. Beat for another 3 minutes.
  4. Spoon the batter into the prepared loaf tin and smooth the top lightly with a spatula or back of a spoon. Back in the centre of the oven for 1 hour until a skewer inserted in the middle of the loaf comes out clean. Remove from oven and let stand for 15 minutes before removing from the tin and cooling an a metal rack.

ORANGE ICING

1 1/2 cups (375 ml) icing sugar, sieved

1/2 cup (125 ml) butter, softened

grated zest of 1 orange

freshly squeezed juice of 1/2 orange

1 cup (250 ml) walnuts, lightly toasted and chopped

Method:

  1. Beat icing sugar and butter together in electric blender or food processor with the orange zest and juice until smooth. Use a spatula to spread it over the top of the loaf. Cut into slices to serve.

    spiced pumpkin loaf dates orange icing sonia cabano blog eatdrinkcapetown
    Spiced pumpkin and date loaf with orange icing


Instant Chai Latte Mix

0
Spiced tea, or as we call it ‘chai’, has become a hugely popular drink. Sold in powdered, teabag or loose leaf form, it can be enjoyed hot or cold.

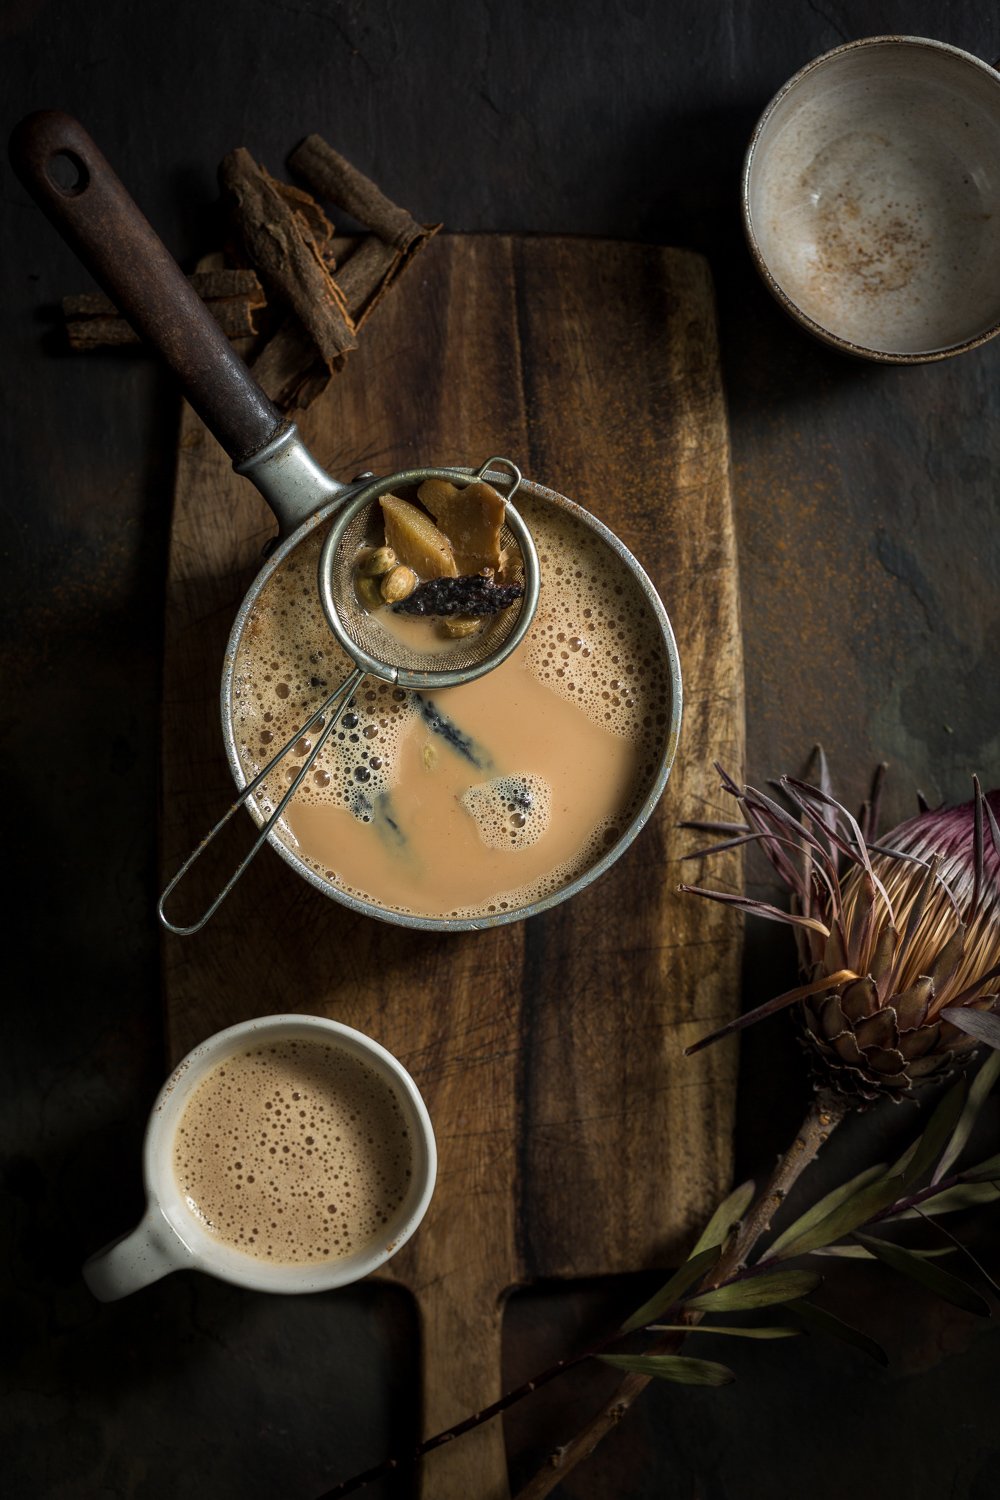
Actually, the word ‘chai’ simply means ‘tea’ in India, and what we’re really talking about is masala chai, or spiced tea. It’s dead simple and straightforward to make masala chai at home, by simply brewing up some tea with whole spices on your stovetop.

If, like my daughter, you prefer an instant chai mix, I have just the recipe for you. It’s based on one I found on the internet, and tweaked to my own taste.

One ingredient that stumped me though, was the ‘instant tea’ referred to in the original recipe, because to the best of my knowledge no such thing exists in South Africa.

Enter Carmien Tea instant rooibos powder! It dissolves and easily in hot liquid, and is the perfect addition to this great recipe. Order it direct from their website www.carmientea.co.za.

If you don’t have instant tea powder, just leave it out and stir your chai latte mix into a mug of ready-made tea. With the instant rooibos tea you can add the chai mix to hot milk, or even hot water. 2 T (30 ml) is enough for 350 ml liquid.

I’ve left out the sugar from the original recipe as I found it way too sweet for my taste, and I think in general most people prefer to sweeten their own tea anyway. Instant full cream or low-fat milk powder is sold in almost all supermarkets. If instant non-dairy creamer like Cremora is your thing, you can use that too, although I really don’t like the taste or texture.

I’ve included a traditional, non-instant masala chai recipe at the bottom of the post, for those who prefer it. And yes, of course you can make it at fresh at home, with simple, easy-to-find ingredients. (Note: when buying spices, do always make sure to buy small quantities from a merchant with a high turnover, which will assure the spices are still fresh. Stale spices lose their pungency and therefore their seductive aroma. )

Make it with Ceylon tea if you need a lift (the tannin is a stimulant), or use Rooibos (tannin-free) when you’re aiming to get some sleep.

I like my brew of masala chai so strong a teaspoon can stand up in it, and I like it hot enough to steam up my glasses! The fun part of making your own masala chai is adapting the spice mix to your own taste.

Some like the addition of spices like vanilla, fennel seeds and peppercorns, others don’t. Most agree cinnamon is a must, as are cardamom, ginger, star anise, cloves, milk and sweetener. One of my friends likes adding a fresh bay leaf to his brew, too!

It goes without saying that using rice, almond, soy or nut milks for your chai is A-OK.

I suppose if you really wanted to, you could leave out all sweetener, but unsweetened chai to me seems a bit like a kiss without a hug.

Now, let’s put the kettle on, shall we?

Instant chai latte mix sonia cabano blog eatdrinkcapetown

Instant Chai Latte Mix

INSTANT CHAI LATTE MIX

Makes about 5 1/2 cups mix. It will last up to 3 months stored in a cool, dry place in an airtight container.

Ingredients:

2 cups (500 ml) instant milk powder, full-cream or low-fat

1 cup (250 ml) powdered non-dairy creamer (if you don’t like this, simply use 3 cups milk powder)

1 1/2 cups (375 ml) castor sugar (optional)

1 cup (250ml) instant rooibos tea

2 T (30 ml) ground ginger

2 T (30 ml) ground cinnamon

1 T (15 ml) ground cloves

1 T (15 ml) ground nutmeg

1 T (15 ml) ground cardamom (use your electric spice grinder for this

2 t (10 ml) vanilla paste if you can get some

  1. In a large bowl, combine milk powder, non-dairy creamer if used, instant rooibos and spices. Stir well until thoroughly blended. Grind 1/2 cup at a time in your spice grinder to get the mixture to a fine powder. Store in a clean, dry jar with tight-fitting screw-on lid.
  2. To serve: Stir 2 heaping tablespoons chai latte mixture into a mug of hot water or hot milk. If you haven’t used instant rooibos, add 2 heaping tablespoons of chai latte mix to a mug of made tea.

Fresh Masala Chai – Indian spiced tea

Warming, calming to the nervous system and utterly delicious.

Makes 8 cups/ 2 litres

4 teabags –Ceylon or Rooibos

5 cups (1 250 ml) water

1 t (5 ml) powdered ginger or 2 t (10 ml) grated fresh

2 x 5 cm sticks cinnamon

6 cardamom seedpods, whole

1 star anise

1 vanilla pod

8 whole cloves

To Serve:

50 ml – 80ml raw organic honey to taste

3 cups (750 ml) low-fat organic cow’s or soy milk

Method:

  1. Bring the water to a boil with all the ingredients except the honey and milk. Turn the heat down, put the lid on and simmer gently for about half an hour.
  2. Pour through a strainer into a clean saucepan, discard the solids and add the milk and honey to the spiced tea. Warm gently and serve hot or cold.
sonia cabano recipes blog eatdrinkcapetown instant spiced chai mix
Instant chai latte mix

Pork Belly with Citrus, Fennel and Ginger

0

Pork belly is one of the most accommodating cuts of meat, and a doddle to cook. Slow and low, basically, is the only tip you need – low temperature and a long cooking time. Braising – oven-roasted in a liquid bath of stock, beer, wine or ginger ale – is one of the most popular ways to prepare pork belly, especially in the Far East. I usually go the ginger ale route, but for this particular recipe I tried Carmien Tea’s ginger and lemongrass infused rooibos tea. Results: delicious!

Butcher Salvin Hirschfield stocks and delivers excellent quality pork belly in Cape Town, which I usually order rindless, in 1.2 – 1.4 kg pieces. Before roasting, rub your chosen spices and seasonings well into the meat, and let stand at room temperature for an hour or two. Prepare a deep roasting tin – preferably with a lid – by placing a layer of roughly chopped celery, carrot and onion and put the pork on top of that. Pour in enough liquid to come halfway up the side of the meat, cover with lid or foil, and roast in the oven for approximately 3 and 1/2 hours. It’s advisable to check the roast from time to time, so that it doesn’t cook dry. Add a cup or more liquid if this is the case. Slow and low roasting allows most of the fat to be rendered out, and turns the meat deliciously tender while remaining succulent. Once the meat is tender enough, I lift it out of the cooking juices and place it on a wire rack inside the roasting dish, to roast uncovered for about 30 – 40 minutes on each side to crisp up.  Turn the oven temperature up to 180 C for this final blast of heat.

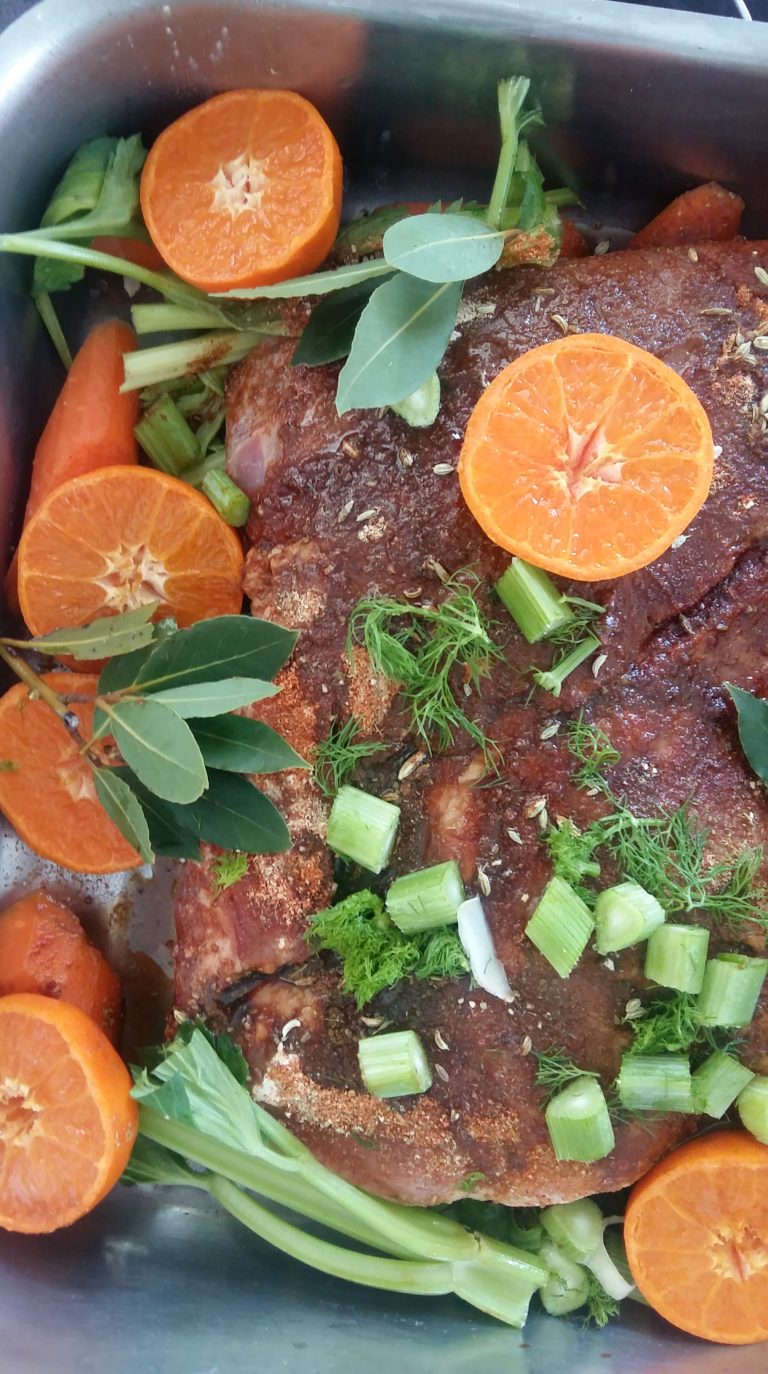
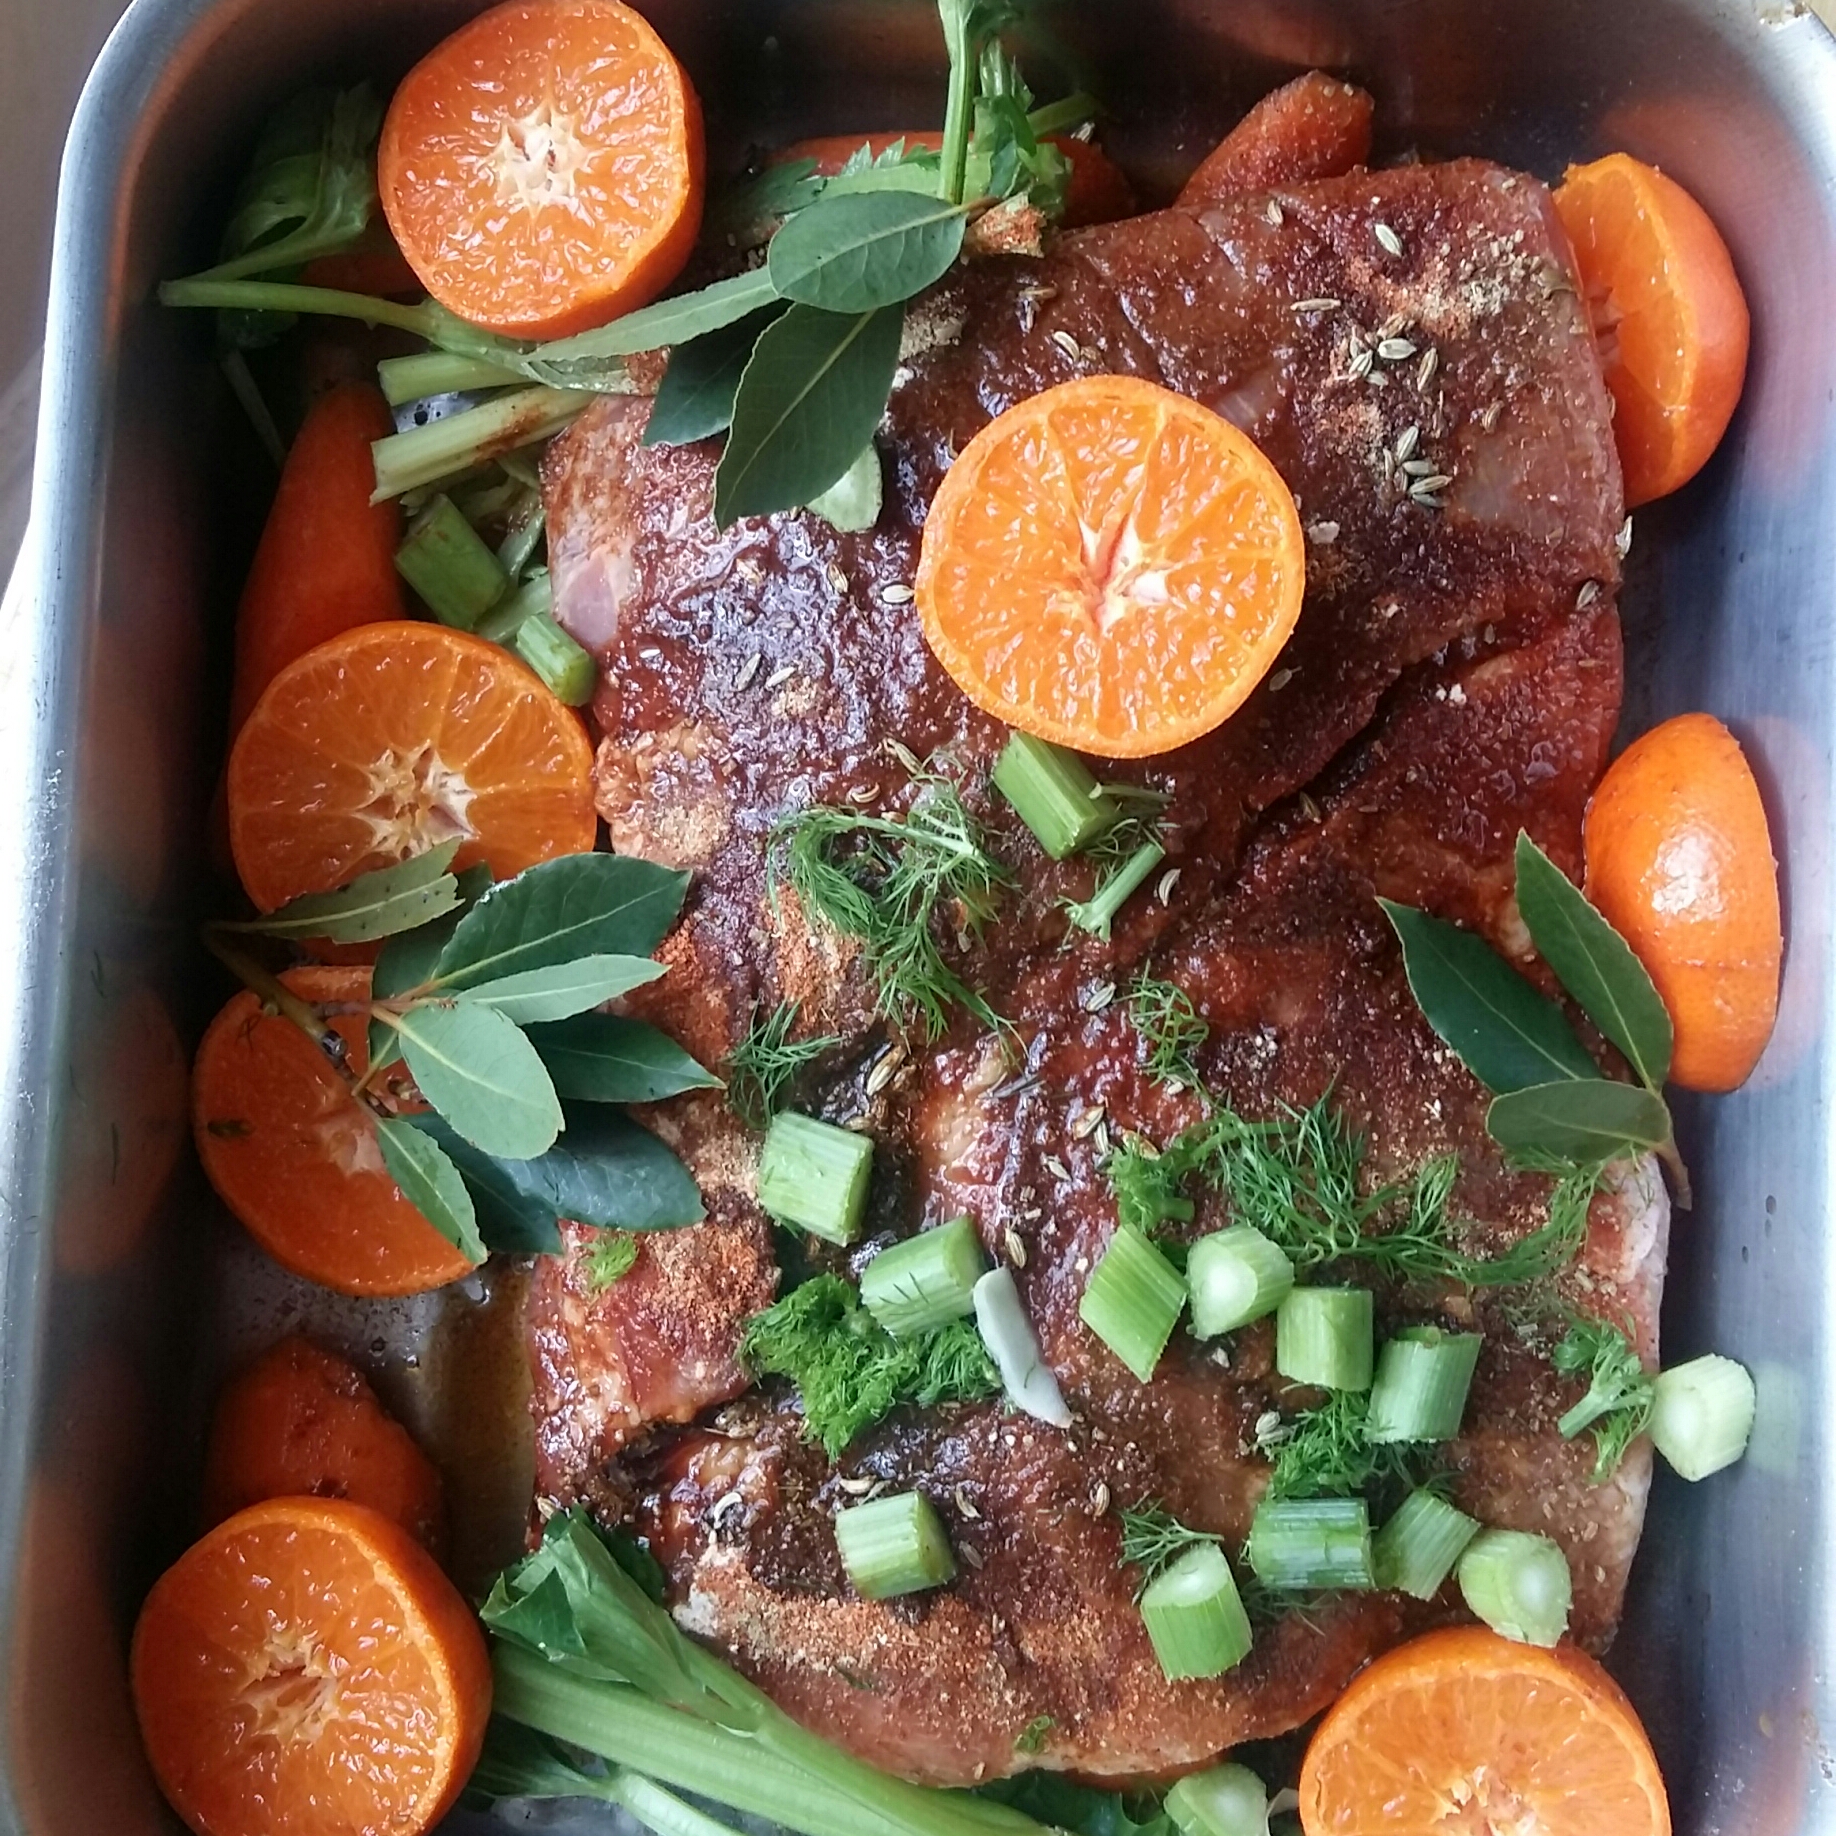
Citrus, fennel and ginger make perfect flavour mates for pork. The ginger ale is quite sweet, so if you’re not keen on that, simply use beer, wine or stock. In this recipe, I used strongly brewed Carmien Tea ginger & lemongrass infused rooibos – about 3 teabags per 500 ml boiling water. Let cool before adding to roasting tin. Just remember that stock is salty and will become even more so as it reduces, so season with a light hand if you’re using it. The lovely fragrant tangerines impart a fantastic flavour to the pork and sauce – you can also use oranges if you want. Chinese black vinegar has a pungent, almost smoky taste that lends intriguing depth to the sauce. If you can’t get any, you may substitute with a mixture of Worcester sauce and brown vinegar, although it won’t be quite the same, of course.

The recipe couldn’t be simpler and is really little more than a description:

PORK BELLY WITH CITRUS, FENNEL AND GINGER

Serves 4 – 6

Ingredients:

1.2 – 1.4 kg pork belly, rind removed by your butcher

2 T (30 ml) dry ginger

2 T (30 ml) whole fennel seeds

1 T (15 ml) ground fennel

2 T (30 ml) BBQ spice mix

1 large peeled onion, 1 large carrot, 1 stick celery, all roughly chopped up

1 small fennel bulb (or half a large one) and stems, roughly chopped up

4 – 6 tangerines, cut in half

1/4 cup (60 ml) soy sauce

1/4 cup (60 ml) Chinese black vinegar (Chinkiang brand, sold at any Oriental grocery store)

6 – 8 Bay leaves

– if you can’t get Chinese black vinegar, mix 1/4 cup Worcestersauce with 1 T (15 ml) brown grape vinegar

Salt and ground black pepper

Approx. 500 ml ginger ale or strong Carmien Tea ginger & lemongrass infused rooibos (3 bags per 500 ml)

Method:

  1. Mix the ginger, fennel seeds and ground fennel, BBQ spice and rub all over your pork belly. Cover with a clean dishtowel and let it stand for 1 – 2 hours at room temperature.
  2. Preheat the oven to 200 C. Place the chopped onion, carrot and celery on the base of a large roasting tin, preferably one with a lid. Put the pork belly on top of the vegetables and arrange the fennel and tangerine halves around the meat. Season and scatter bay leaves over and drizzle with the soy sauce and black vinegar.
  3. Pour the ginger ale or other liquid carefully around the meat, cover tin with heavy-duty tin foil or a lid, and place in the oven. Cook at 200 C for 30 minutes, then turn the temperature down to 160 C. Cook for another 3 hours, checking from time to time that the liquid hasn’t all evaporated. Add another cup or two of liquid if this is the case.
  4. Once the pork belly is tender enough to your liking, remove the roasting dish from the oven and take the foil or lid off. Lift the meat our out of the roasting juices, place on a wire rack, and return to the roasting dish. Turn the oven temperature to 180 C and roast the pork belly for 30 – 40 minutes, then turn it over and roast another 30 – 40 minutes to crisp up the exterior. Remove from oven and let stand for 20 minutes before carving, or pulling the meat apart using two forks. Strain the cooking juices and reduce over high heat in a saucepan until slightly thickened. Adjust seasoning to taste. Pour over the meat and serve.

Butcher Salvin Hirschfield contact details salvin@meatzone.co.za

recipes sonia cabano blog eatdrinkcapetown pork belly citrus fennel ginger
Pork belly roast with citrus, fennel and ginger

Crusty Bread Baked in a Pot

0
crusty bread no-knead recipe sonia cabano blog eatdrinkcapetown
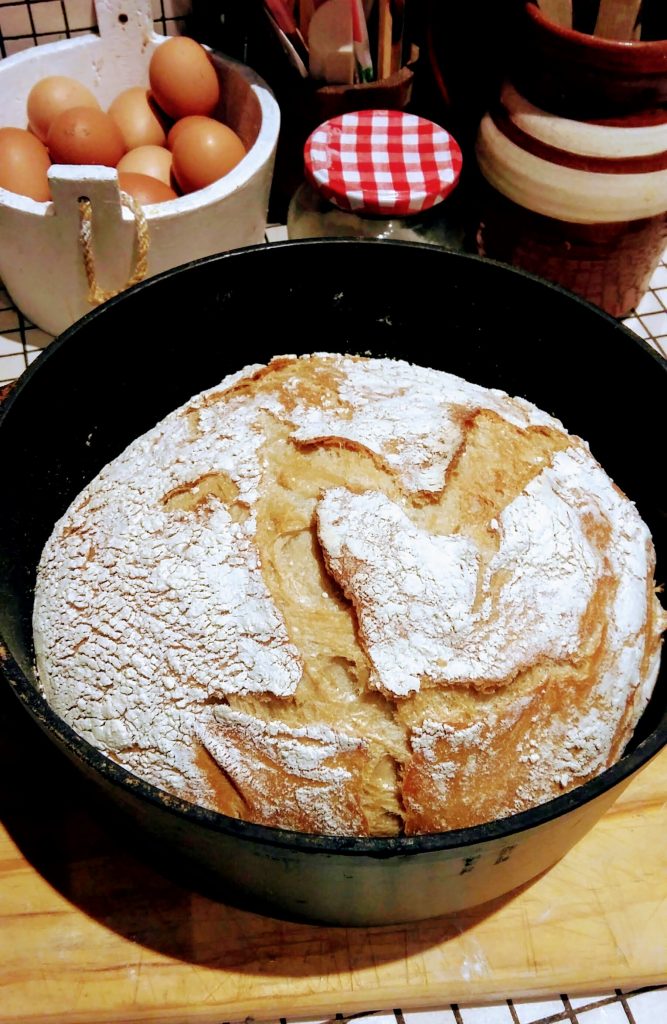
Crusty no-knead bread baked in a cast iron pot

Afraid of baking bread? Believe me, you can bake bread. In fact, stop reading this right now,  go stand in front of a mirror and look yourself straight in the eye. Take a deep breath, then say out loud, ‘I can bake bread!

Then come back and read this blog, so I can tell you how.

Not only are you going to bake the easiest, no-knead bread in the world, my friend,  it might just turn out to be the finest bread you’ve ever had.

All sorts of mystique surrounds baking bread: understandably so, because yeast is a live and therefore fickle thing. Flour quality can vary considerably too – from region to region, season to season and even among different brand names. Add to that the effort involved in kneading and proving, and all that can go awry there, and it’s quite easy to see why many people get the jitters about baking something so simple and delicious.

crusty no-knead bread recipe sonia cabano blog eatdrinkcapetown
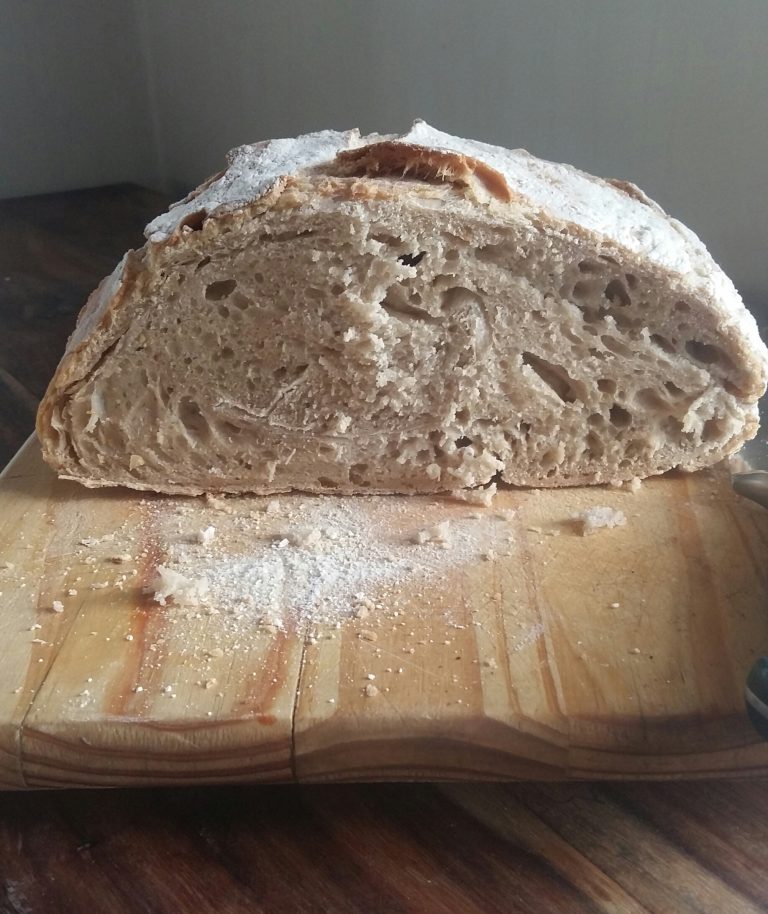
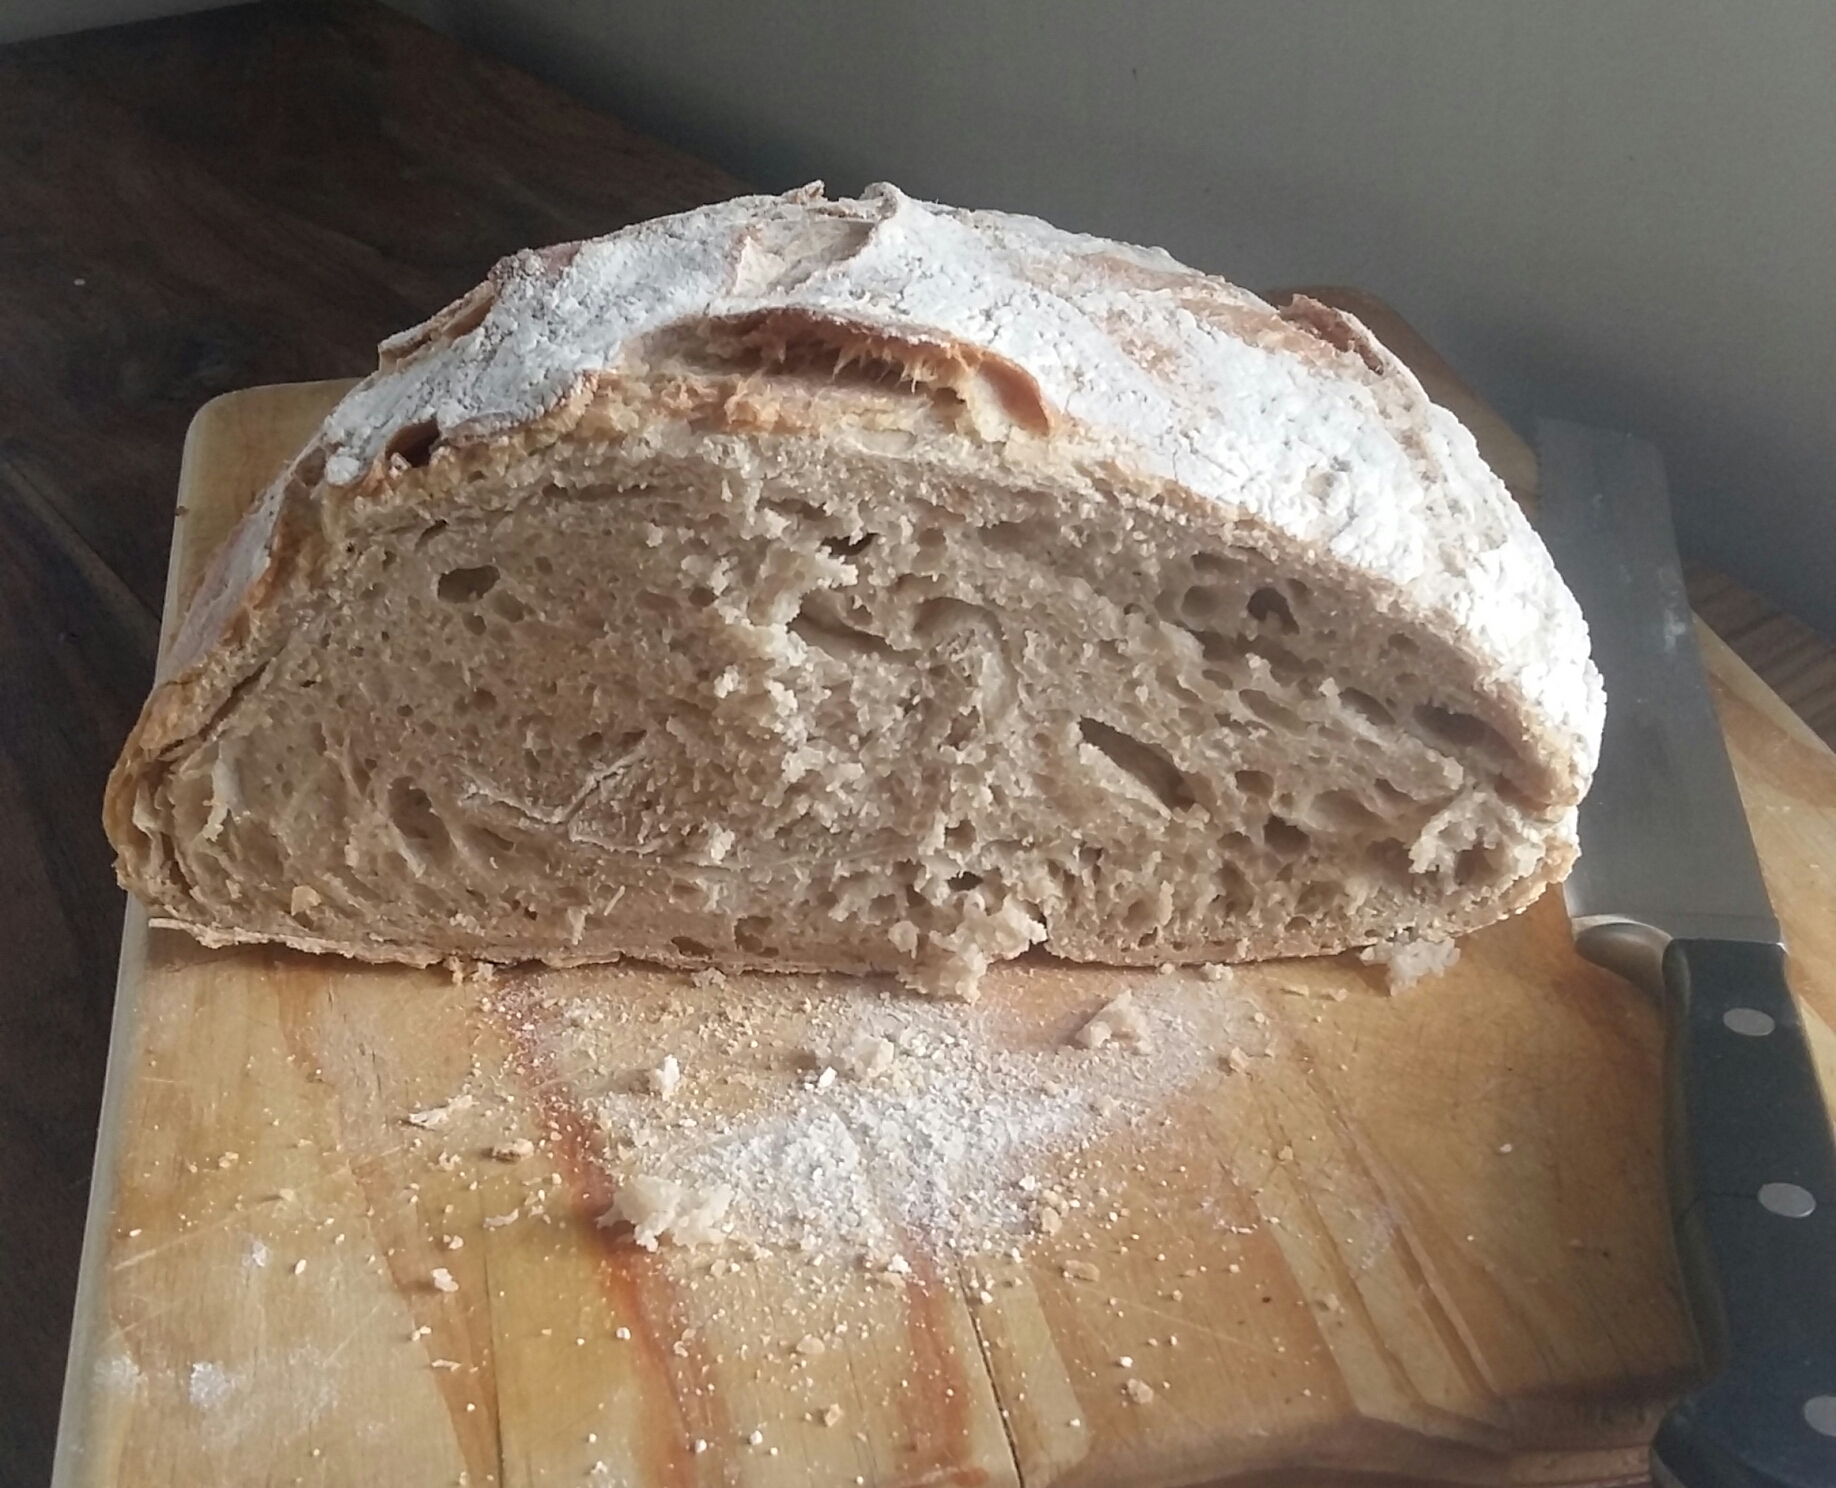
Crunchy crust, firm texture and fine crumb, this is the bread of your dreams!

Enter New York baker Jim Lahey’s famous no-knead crusty bread, baked in a cast iron pot. This legendary loaf has become world famous on the internet and in home kitchens everywhere, but I first read about it in our local Platteland magazine.

It’s almost imposible to mess up (if you follow the simple instructions) and there is no kneading, no guesswork and no trickiness involved. You stir together your ingredients, leave it for 12 hours, slap the dough around a bit, leave for another hour or two, bake, and VOILA! Amazing bread. So simple, anyone can make it. Yes, even you.

Cook’s Note: Someone on Facebook asked if it’s not prohibitively expensive to have your oven on high for almost two hours just to bake a bread.  I calculated the cost using Kestrel’s and Eskom’s websites, and at current cost, electriticity for this bread will be between R8.00 and R14.00 Considering the loaf is almost 2 and a half times the size of your usual artisan loaf, retailing between R25 and R65, I can safely tell you: Bake this bread 🙂 

Intrigued, I immediately set about stirring together the dough as instructed, setting it aside in our scullery for the requisite 12 hours, and promptly forgot about it for the next 18 hours. But because I’m a daredevil in the kitchen (yeah, right), I took a gung-ho attitude about my memory lapse and simply decided to carry on with the recipe regardless, as if those extra 6 hours had never happened. Because no-one was watching, OK?

Much to my surprise, the loaf was a cracker and turned out perfect. It was so delicious that my family demolished it in about 4 hours flat, and it’s a pretty big loaf, I tell ya. The long, looong fermenting time develops a wonderful flavour in the dough, yielding a loaf so tasty and satisfying you just cannot stop yourself from having yet another slice. And another. This is the bread of your dreams.

The crust is wonderfully crisp and crunchy to chew and the texture like that of a real sourdough. Great when first out of the oven, it matures overnight to deliver an even tastier slice the next day. Equally good with sweet or savoury toppings,whether slathered in butter or drizzled with olive oil, this bread also makes divine toast and for French toast there’s nothing better. It freezes like a champ for up to a month, although I doubt you’ll have much left over for that. And if you do make more than you need, why not hew off a hunk and give it as a foodie gift to a friend or loved one? (Nicely wrapped, of course.)

No special equipment is needed to get started, provided you have a cast iron pot with a lid. (Or borrow one, with the promise of freshly baked bread.) Yes, your black flat-bottomed braai pot will do perfectly, or even your Le Creuset if you happen to have one lying around haha. (I use the local, much more affordable version of Le Creuset, the Eetrite brand – every bit as gorgeous and servicable. And after 14 years of heavy use, my three beloved blue Eetrite cast-iron enamelled pots are still going strong, thank you very much.)  Other than that, you need white bread flour (preferably organic and stoneground), salt, instant or fresh yeast, and water. Oh yes, and an oven too, but you knew that already, didn’t you?

Precious little labour is required from you other than stirring together some flour, yeast, salt and a bit of water in a large bowl, and letting nature take its course for the next 12 to 18 hours. Yep, you read that right: you stir together the ingredients in a bowl, cover it and leave it completely alone for the next 12-18 hours. You have a life that needs you, don’t you? Go live it.

I use a large round metal mixing bowl and cover it with clingfilm and a clean bath towel after mixing the dough. It’s not a great idea to leave your dough in a drafty area nor one with big shifts in temperature – like near your tumble dryer or oven. Yeast is temperature sensitive, and sudden drops or surges in humidity and temperature will kill it. Stone dead. Boo hoo.

NB: if using fresh compressed baker’s yeast, make sure it is at room temperature before adding it to the 100ml warm water.

NO-KNEAD CRUSTY BREAD BAKED IN A CAST IRON POT

Ingredients:

3 cups stone-ground white bread flour (Eureka is a great brand)

1 – 2  teaspoons (5 – 10 ml) fine sea salt (I use 2 teaspoons)

30-40 grams fresh yeast, crumbled into 100 ml tepid water (not too hot, not too cool) in which you’ve dissolved 1 teaspoon sugar (5ml) or honey/OR 10 g instant yeast, added directly to the flour and salt before adding water. If using dried instant yeast, dissolve the tsp sugar/honey in the tap water before adding to the flour, salt and dried yeast powder. (I get fresh yeast from my local 7-11. Who’d have thunk?)

450 ml – 700 ml cool tap water, depending how much is needed to stir the flour, salt and yeast into a stiff but not dry or crumbly dough.

Method:

  1. Use a wire whisk to mix the salt with the flour in the bowl. If using instant yeast, add it directly to the flour and blend in with the whisk. If using the fresh yeast (which I prefer), crumble it into the tepid water and let stand for about 15 minutes to sponge – when it starts forming tiny bubbles or foam on the surface. Add this directly to the flour before adding the water.
  2. Now add the water slowly to the flour. I have used anything between 450 ml and up to 1 litre of water at different times of the year, with different kinds of flour. You DON’T want to end up with sticky wet dough though, so rather work slowly and cautiously with adding the water. Your dough is moist enough when no crumbly bits of flour are left in the bowl, and if the dough rolls itself into a ball as you stir it with a wooden spoon. You will notice at this stage that it seems as if the dough contains a live energy, and your are entirely correct, especially if you have used live yeast.
  3. Place the dough in a large bowl – remember the dough will quadruple in volume during the next 12 hours, so choose your bowl wisely! Cover tightly with clingfilm and then drape a clean, dry bath towel over the bowl. Leave in a cool spot to stand for 12 hours (I have let it go on for 18 hours to no harm.)
  4. 12 hours after mixing, your dough will resemble something out of a science fiction film: a pale grey, sticky, gelatinous sludge that bubbles slightly on the surface. It’s alive baby, it’s alive! You’ll be able to smell a pleasantly yeasty aroma if you hold your face close to the dough and breathe in. Lightly strew a scant handful of flour on a clean, dry worktop, and tip the contents of the bowl onto it. You’ll have to rake the sticky dough out with your fingers – a somewhat messy but not entirely unpleasant enterprise; kinda like being back in kindergarten. Using both palms straightened out, briskly pat your lump of quivering dough into a rectangular shape without working it too much – this should take you no more than 20-30 seconds – and to a thickness of about 3 cm. Fold first the right flap then the left flap centrewards, overlapping each other. Turn the dough 90 degrees in any direction and repeat the folding. Pat the dough into a ball shape.
  5. Now lightly flour a wide, long strip of baking paper – long enough to fold generously around the ball of dough – and lightly dust it with more flour. Place the ball of dough, seam side down, on one part of the paper, dust lightly with more flour, then fold the rest of the paper over the top of the dough. Cover with a clean, dry tea towel so no bits of the dough are exposed, and let stand for another 1- 2 hours in a cool, draft-free spot.
  6. Meanwhile, turn your oven as high as it will go – 220, 230 C is good. When it has reached this temperature, place your clean, dry, cast iron pot with its lid on inside the oven for at least one hour.
  7. NOW YOU ARE GOING TO BAKE BREAD! Use your oven gloves to remove the heated cast iron pot from the oven – remember to shut the door again as fast as you can! Take the lid off, remove the tea towel from the dough and use the paper to lift and roll the dough into the pot. Immediately replace the lid and return the pot to the oven for 45 minutes, using oven gloves. That pot is still hot! Remove the lid after 45 minutes for the crust to brown.
  8. Once the bread is done, (usually after about an hour) it will sound hollow if you rap the base with your knuckles. Yes, you’ll have to shake the bread out of the pot to be able to do this. If it doesn’t sound hollow, it’s not done, no matter what it looks like on the outside. Simply replace the lid and return bread in the pot to the oven for another 15 minutes and test again.
  9. When done, remove pot from oven and replace the lid, letting the bread steam for 20 – 30 minutes to soften the crust. Take bread out and let cool completely on a wire rack.

Congratulations, you’re officially a genius. You have made brilliant bread.

crusty no-knead loaf baked in pot sonia cabano blog eatdrinkcapetown
Behold! Crusty no-knead loaf baked in a pot


Banana Cake with Coconut and Papaya

0
banana coconut papaya cake recipe sonia cabano blog eatdrinckapetown
Tropical banana coconut and papaya cake

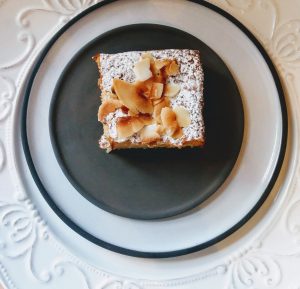
Everyone pretty much has a go-to banana bread recipe, but this one is unusual. It has an addition of ripe mashed papaya and desiccated coconut, the coconut giving a pleasing crunch to the moist cake.  I also love the topping of a generous handful of toasted coconut, and adding fragrant spices to the batter – but the cake is just as good without these. You could forgo the spices altogether and add the grated zest of one lime, too.

I found the original version in Fields of Flavour cookbook, published in 2002 by then Struik Publishers. The author, Serena Jacobson, was also the owner of Fields health shop in Cape Town’s Kloof Street – a magical place with strange and mysterious  ingredients on the shelves, and delicious if quirky food.

Serena’s recipe uses soy milk and her recipe advises to whisk the sugar with 180 ml oil. Since I have no problem with butter, I find that creaming the sugar and butter together gives a far more satisfying, lighter result. However, if you prefer to use oil, use that instead – a light oil like sunflower, canola or even peanut oil will do.

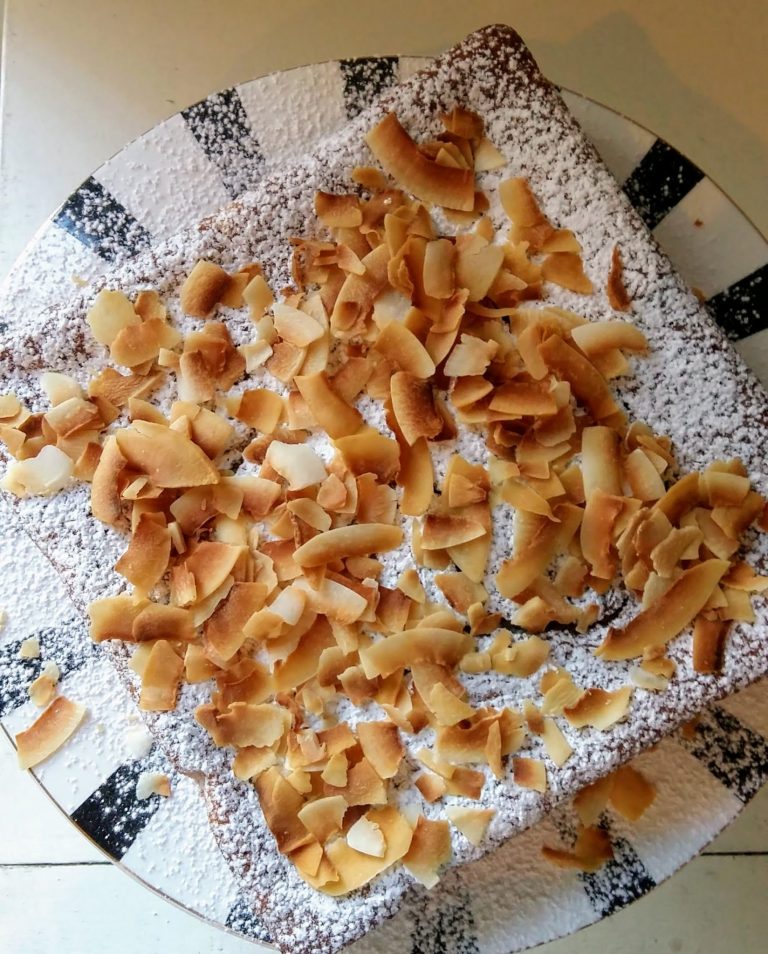
The cake can be dusted with icing sugar once cooled, or scatter a handful of nutty toasted coconut curls over for a wonderfully crunchy topping. Serve in squares with morning coffee or as dessert with a scoop of vanilla ice cream. Keeps for 4 days in an airtight container.

slice banana papaya cake recipe sonia cabano blog eatdrinkcapetown
Banana papaya cake with crunchy coconut topping. Delicious with morning coffee or a scoop of ice cream.

BANANA CAKE WITH COCONUT AND PAPAYA 

Ingredients:

3/4 cup (180 ml) softened butter or margarine (you can also use oil, but it won’t whip up as well)

3/4 cup (180 ml) castor sugar

2 large eggs

1/2 cup (125 ml) mashed overripe banana

1/2 cup (125 ml) mashed overripe papaya

1 1/2 cups (375 ml) self-raising flour

1/2 cup (125 ml) desiccated coconut

1/2 t (2.5 ml) baking powder

1/2 t each (2.5 ml) ground cinnamon, ginger and nutmeg (optional) OR grated zest of 1 lime

4 T (60 ml) soy, almond or cow’s milk

icing sugar for decoration, or 1 large handful of lightly toasted coconut curls

Method:

  1. Preheat oven to 180 C. Spray a square or rectangular cake tin with Cook & Spray, then line with baking paper. Lightly spray the paper too – leaving edges of about 3 cm sticking out above the edges of the cake tin makes it easier to lift the finished cake out of the tin to cool on a wire rack.
  2. Beat butter/margarine/oil and sugar together with electric beater until fluffy and pale. (This won’t happen quite as well if you use oil.)
  3. Add the eggs one by one with the motor running, making sure each egg is completely amalgamated before adding the next ingredients.
  4. Sift the flour, baking powder and spices together in a bowl and stir in the coconut. Add to the mixing bowl in half cup measures while the motor is still running. Then add the milk and continue to beat at medium speed for 3 minutes.
  5. Scrape the batter into the prepared baking tin and bake in the middle of the oven for about 1 hour. Test for doneness by sticking a toothpick into the middle of the cake – if it comes out clean, the cake is done. If some batter sticks to the toothpick, continue baking in 10 minute increments until completely done.
  6. Remove from oven and let cool for 5 minutes in the tin before removing and cooling on a wire rack. Decorate by lightly sifting icing sugar over, or scatter over a handful of toasted coconut curls.
top banana papaya coconut cake recipe sonia cabano blog eatdrinkcapetown
Spiced banana, papaya & coconut cake

Old-fashioned Curry Banana Meatballs aka Kerriefrikkadelle

0
Traditional South African recipe curry meatballs with banana sonia cabano blog eatdrinkcapetown
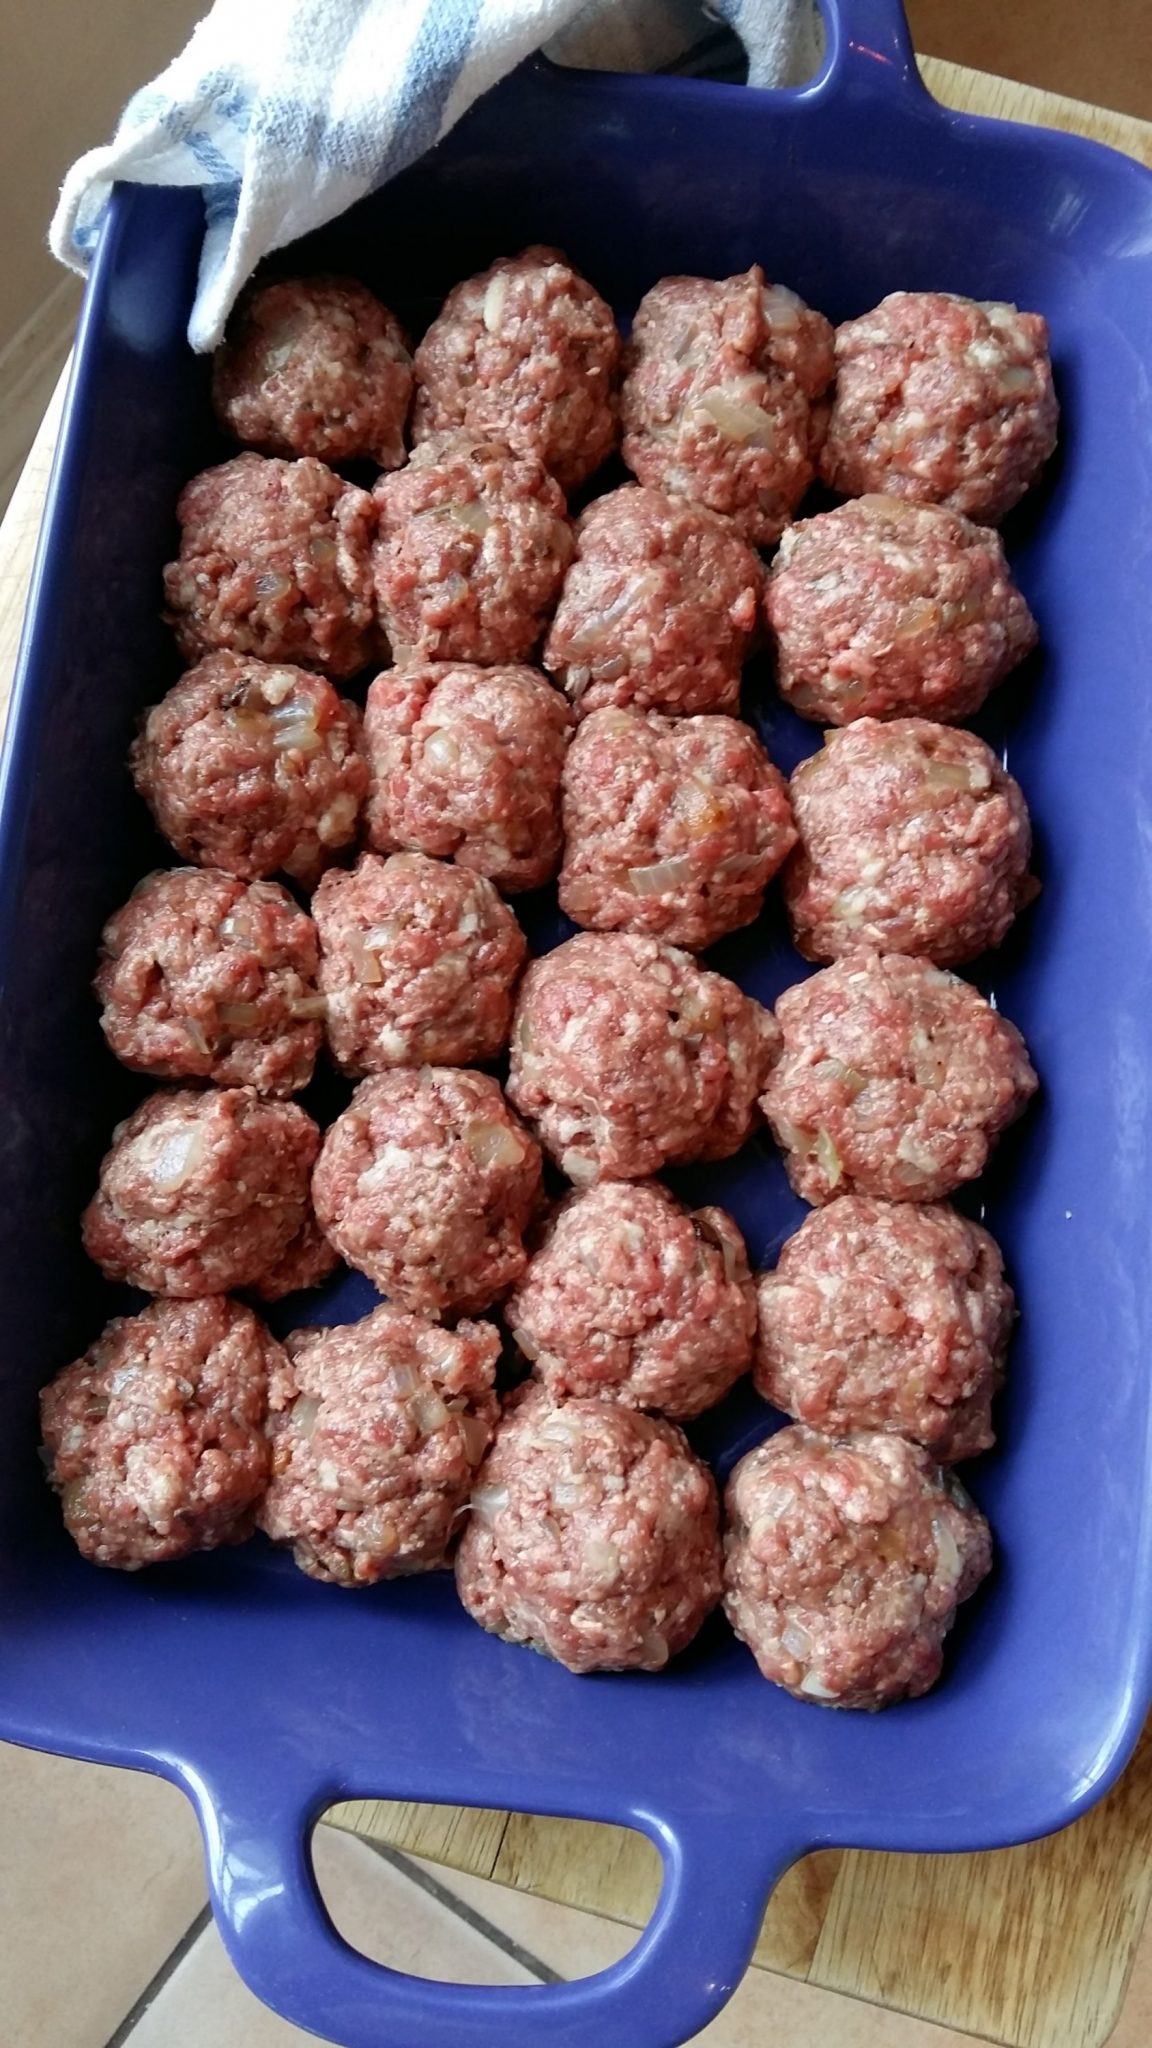
Kerriefrikkadelle ready for its sauce
Curry banana meatballs sauce traditional South African recipe kerriefrikkadelle sauce sonia cabano blog eatdrinkcapetown
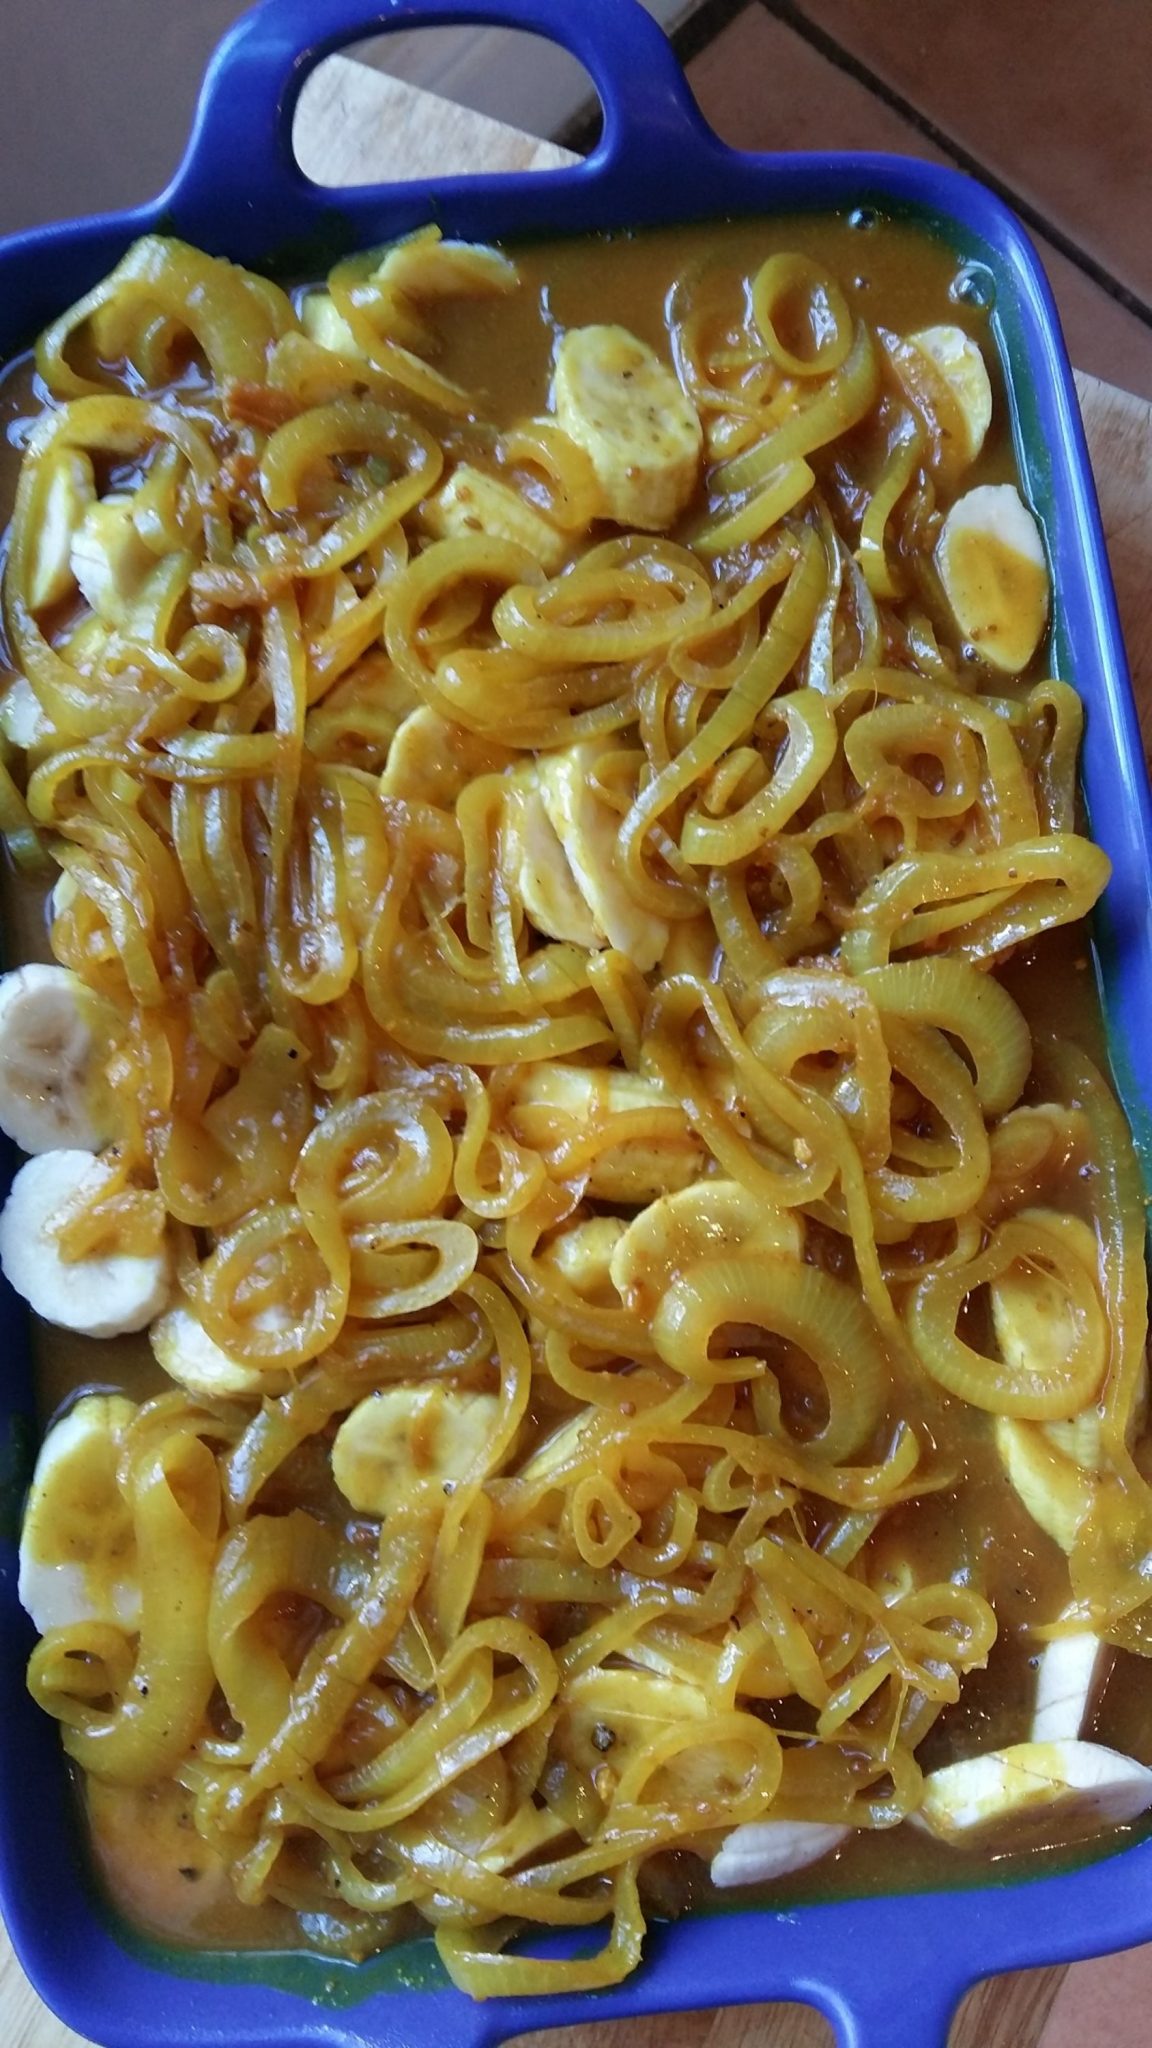
Curry banana meatballs ready to go in the oven

No-one really knows the origin of these rather exotically flavoured meatballs, but everybody loves them. That includes my fruit-loathing son, who’ll pack away an astonishing amount of kerriefrikkadelle given the opportunity.

I’ve fed them to foreigners too, expecting table rebellion, but plates were always polished and thirds asked for. Kerriefrikkadelle are delicious.

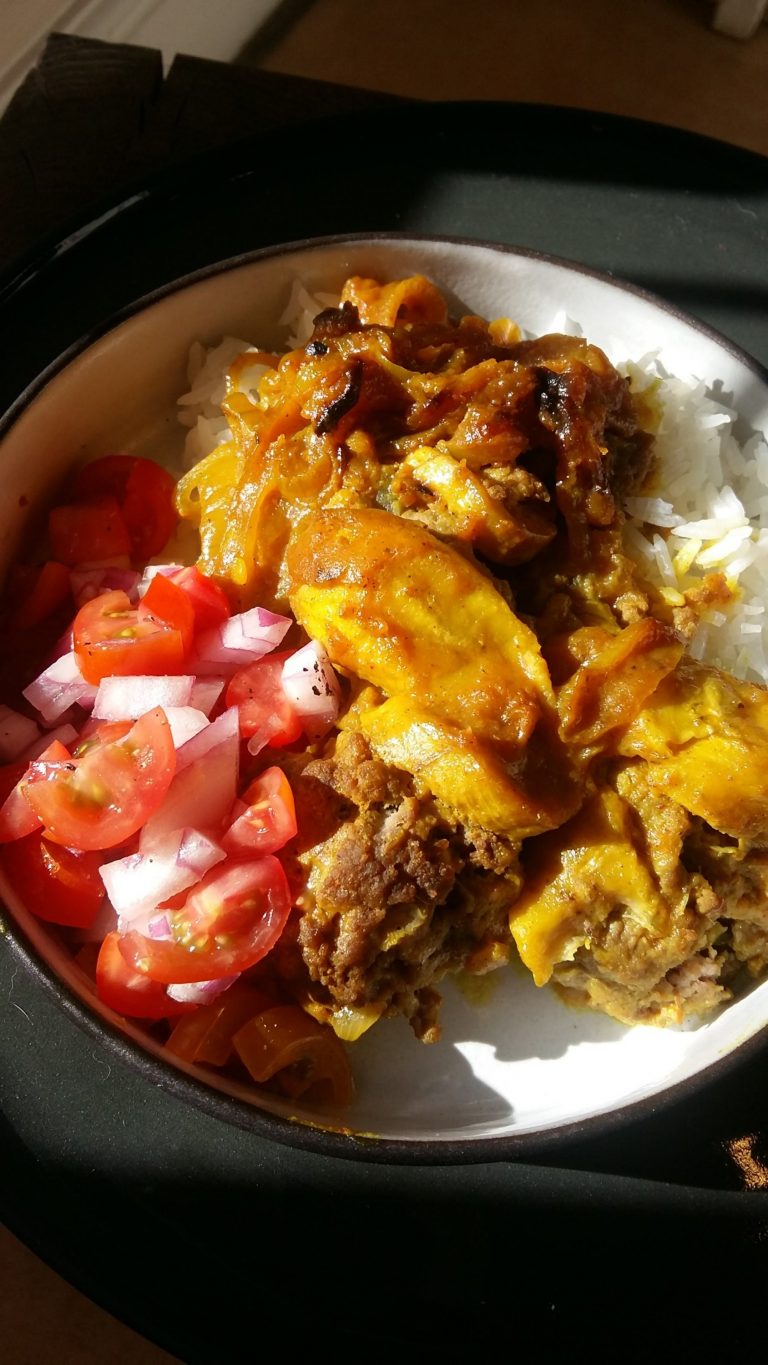
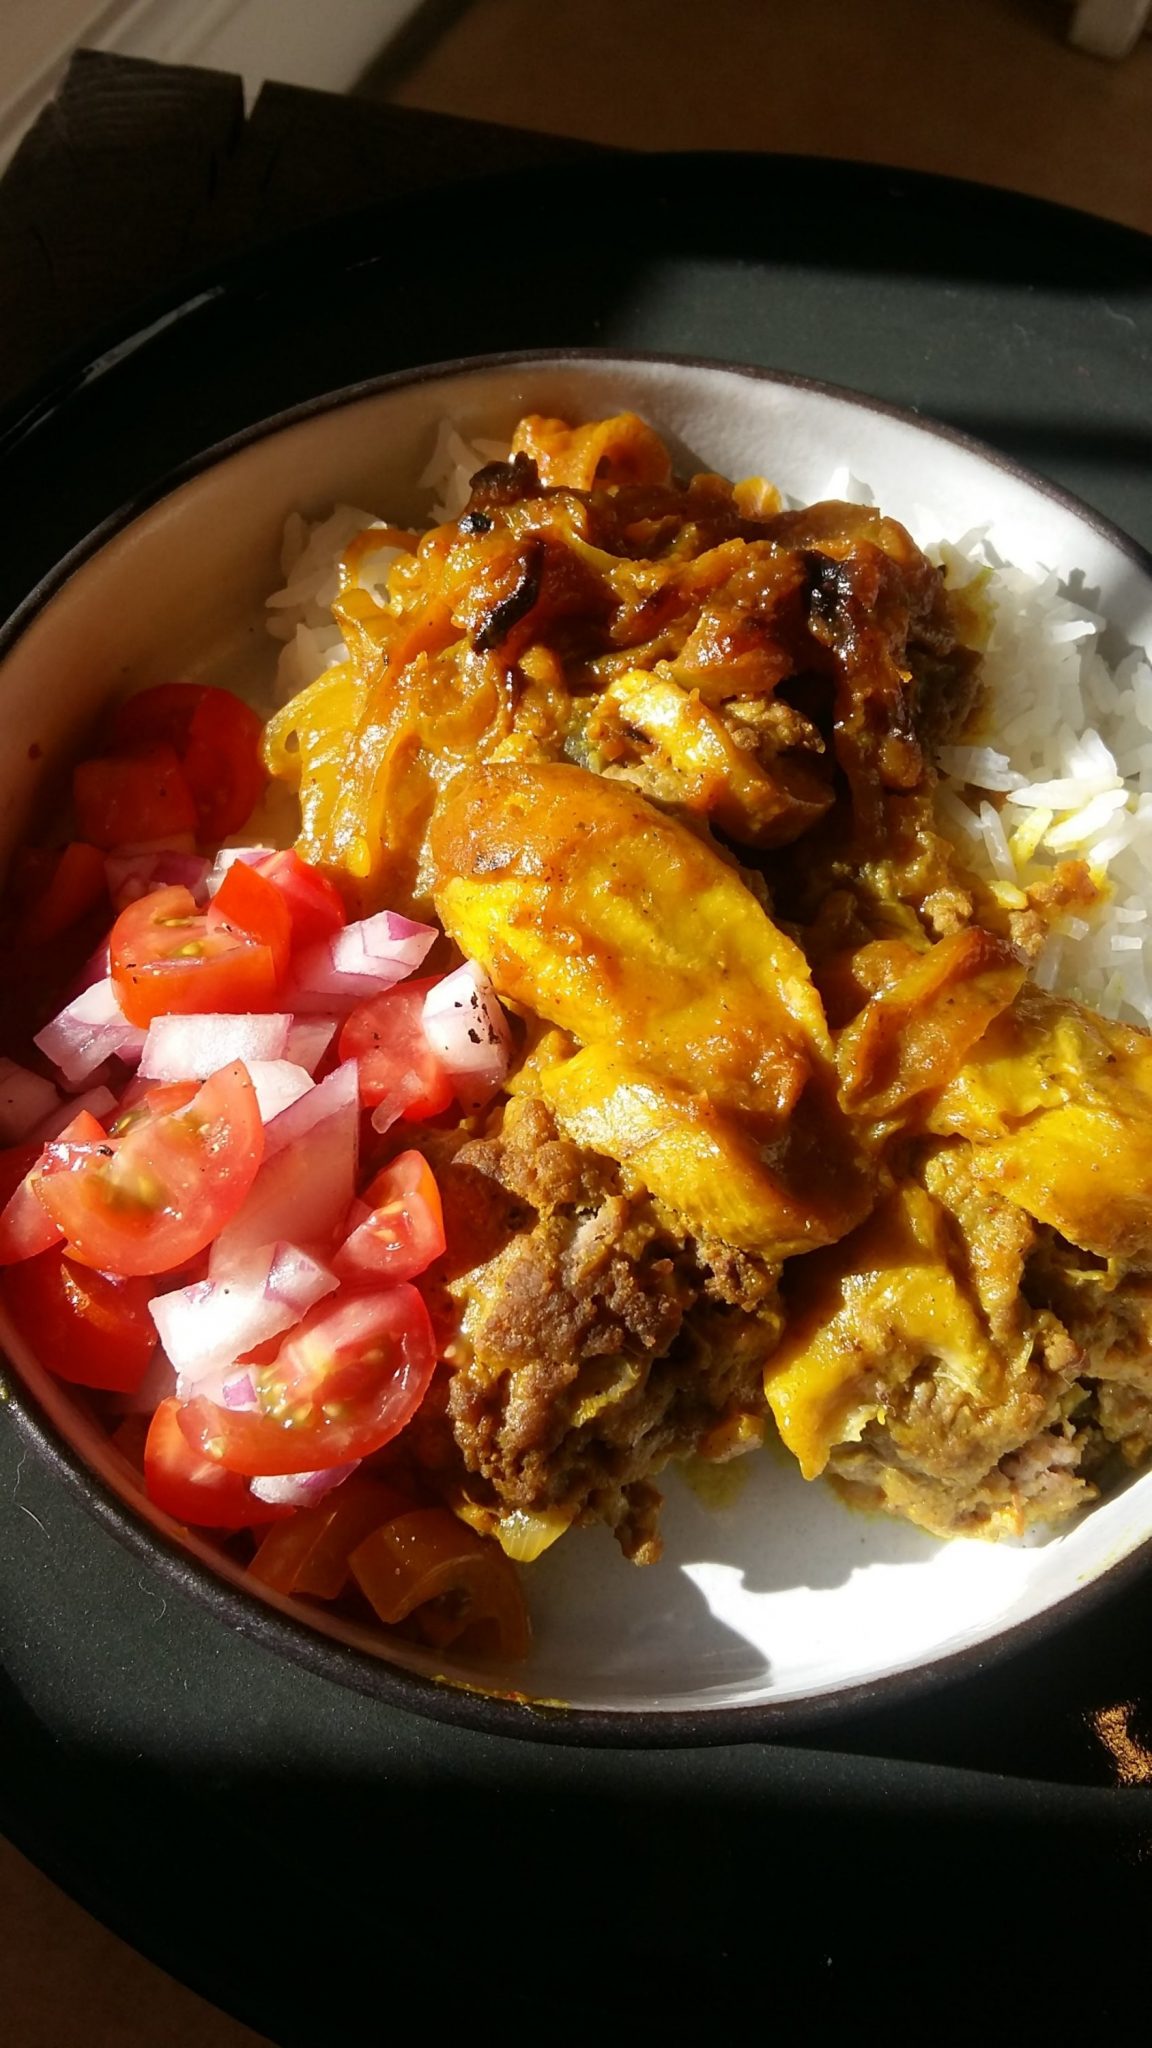
Truly and uniquely South African, curry banana meatballs combine the tangy sweet and sour, spicy, saucy curry elements we so love in our food. As sides I usually just serve plenty of hot white rice, a simple onion and tomato sambal and perhaps some good old Mrs Balls chutney. Cold kerriefrikkadelle make an awesome sandwich, too, layered between slices of thickly buttered white bread.

The word ‘meatball’ suggests something very mundane, which is why I love ‘frikkadelle’. Don’t they sound frisky and fun?

Frikkadelle – meatballs – are a staple on South African menus, especially when entertaining. A good frikkadel should give very resistance to the bite, crumbling easily apart in your mouth to reveal little morsels of tender, succulent and fragrantly spiced meat.

A bad frikkadel will make a lethal weapon as a bullet for a slingshot (who remembers ketties from our childhood?) and will put you off for life. Frikkadelle need tender loving care in the making: judicious spicing, a light forking to blend the meat and seasonings, and a gentle hand for rolling. No kneading and squeezing required or allowed at any time: that’ll get you hard and wizened little meat bullets.

On with the recipe. A kilo of mince feeds my family of four, but then that includes a big dude and a teenage dude for both eat for 3. I’d say you could feed 6 with this recipe if you added some vegetables and sides. Or bread and butter.

This recipe is adapted from South African culinary legend Peter Veldman’s iconic recipe book Kos vir die Eeu

Kerriefrikkadelle – Curry Banana Meatballs

Makes 24 frikkadelle roughly the size of ping-pong balls, or 12 large ones.

Be smart and start by mixing your sauce ingredients together, so you can just fling it into the pot with some water when needed.

Ingredients:

Frikkadelle/meatballs

1 large onion, minced very small or grated if your knife skills ain’t up to much

1 T (15 ml) sunflower oil

3 slices white bread, crusts removed, torn up and soaked in 1/4 cup (60 ml) milk for 20 minutes

1 egg, beaten

1 kg lean beef mince or a mix of ostrich and beef

3 T (45 ml) Mrs Ball’s chutney

2 T (30 ml) grape vinegar

2 t (10 ml) salt

ground white pepper to taste

1 T (15 ml) spice for mince

1/4 t (1 ml) grated fresh nutmeg

1 T (15 ml) Worcester sauce

Method:

  1. Cook the finely chopped or grated onion in hot oil over medium heat until translucent and golden, but not brown, as this will make the onions bitter.
  2. Once the bread has soaked up all the milk and turns mushy, place it in a sieve over a bowl and squeeze out all the milk into the bowl using the back of a dessert spoon. Add the bread pulp to the meat in a bowl.
  3. Lightly fork the meat to break it up. Add all the ingredients and mix well using the fork. The seasonings and bread should be evenly dispersed through the meat. Don’t overwork the meat; this will turn your frikkadelle into meat bullets.
  4. Using the cups of both hands, roll scoops of meat about the size of ping-pong balls into neat, round frikkadelle. They should not fall apart, but not be kneaded or squeezed into hard, compact balls either. You’ll get the hang of it by practising – you can always break up a miserable meatball and start all over again! Place the frikkadelle neatly in an baking dish deep enough to accommodate the topping of a layer of onions, sliced banana and the sauce. About 5 cm deep should do it. Cover with a cloth and keep in a cool place while you make the sauce. You can turn the oven on to 180 C at this stage.

Sauce:

The number of ingredients seem daunting, but rest assured the sauce is totally straighforward and easy-peasy to fling together. Basically you soften the onions in some hot oil, add the spices and seasonings, stir around the pot for 5 or 6 minutes, add the liquid and BAM! your sauce is 15 minutes away from done.

Ingredients:

1 T (15 ml) sunflower oil

1 T (15 ml) butter

2 large onions, peeled and sliced into thin rings

1 T (15 ml) crushed fresh garlic

1 T (15 ml) grated fresh ginger

1 t (5 ml) salt

1 heaping tablespoon mild curry powder (25 ml)

2 t (10 ml) turmeric powder

1/2 t (2.5 ml) ground cinnamon

1/4 t (1 ml) cayenne pepper (to taste)

6 T (75 ml) grape vinegar

4 T (60 ml) fine apricot jam

3 T (45 ml) chutney

2 T (30 ml) soft brown sugar

ground white pepper to taste

1 1/2 cup (375 ml) water

6 very ripe bananas, sliced thinly

Method:

  1. Cook the onion rings in the hot oil over medium heat until translucent and golden. Do not let them brown, as this turns them bitter and you’ll have to start again.
  2. Add the remaining ingredients up to but not including the vinegar. Stir briskly to blend and cook while stirring for another 5 or 6 minutes. Do not scorch the spices, rather turn the heat lower.
  3. Add the vinegar, jam, sugar and water and stir well. Turn the heat up and cook at a brisk boil for 15 – 20 minutes until the onions are soft and the sauce has thickened slightly. I usually add 1 t (5 ml) Maizena (cornflour) stirred into a paste with 2 t (10 ml) water to the sauce, to help it thicken.
  4. While the sauce is cooking, arrange the sliced bananas in an even layer over the meatballs. Pour over the sauce and bake in the oven at 180 C for 40 minutes, or until the top is nice and brown. Serve with plenty of hot white rice, onion and tomato sambal and some chutney on the side.

Traditional South African curry banana meatballs with white rice and tomato sambal sonia cabano blog eatdrinkcapetown
Traditional South African curry banana meatballs with white rice and tomato sambal